Discovering REW, the miniDSP, and the UMIK-1 has been a truly profound change to home theater calibration for me. REW and the UMIK-1 allow for learning how a system is interacting with the room and what Audyssey's predictive curves are actually doing. The MiniDSP allows me to react to what the measurements say. Many times I used to find myself wondering what the response was from seat to seat, and now that guesswork is gone. Certainly there have been ways to inexpensively do so in the past, even down to playing known sweeps and charting a decibel meter, but the ability to gather many measurements accurately and quickly - and very inexpensively - is an invaluable tool.
One of the benefits has been the ability to equalize the Low Frequency Effects channel by placing a miniDSP inline. Audyssey does a fine job in some rooms, but the addition of a MiniDSP adds a few advantages:
The process isn't too difficult once you get the hang of it, but it is a bit intricate if you are only doing it occasionally - as most home theater owners likely would. For this reason, I began to take detailed notes of my steps so that when I needed to re-calibrate, after a furniture or equipment change, it would be easy to get back up to speed. I eventually realized it may help others if I fleshed it out more.
There are a number of detailed guides for using REW to apply equalization to the LFE channel and I've found myself using multiple guides at different stages of learning. This goal of this document is to distill this information and create a clear checklist to remember the steps by. It also aims to include links to the important tutorials that do the best job for specific topics should a reader want more detail. This is an active document and I may detail it out more with time.
If you aren't sure what a miniDSP is, or how to position subwoofers, this guide might not be for you. It is for someone who has basic knowledge and wants to dig in with EQing their LFE channel after doing their best to position their subwoofers. I may elaborate on the basics of room setup later, but not in this tutorial.
Setup required will vary depending on your operating system and microphone. For an OSX specific tutorial, visit the Guide to Configuring & Using REW.
This tutorial will require the following:
This tutorial will require the following software:
After you're all setup, we're now ready to generate EQ profiles using REW and import them into the MiniDSP.
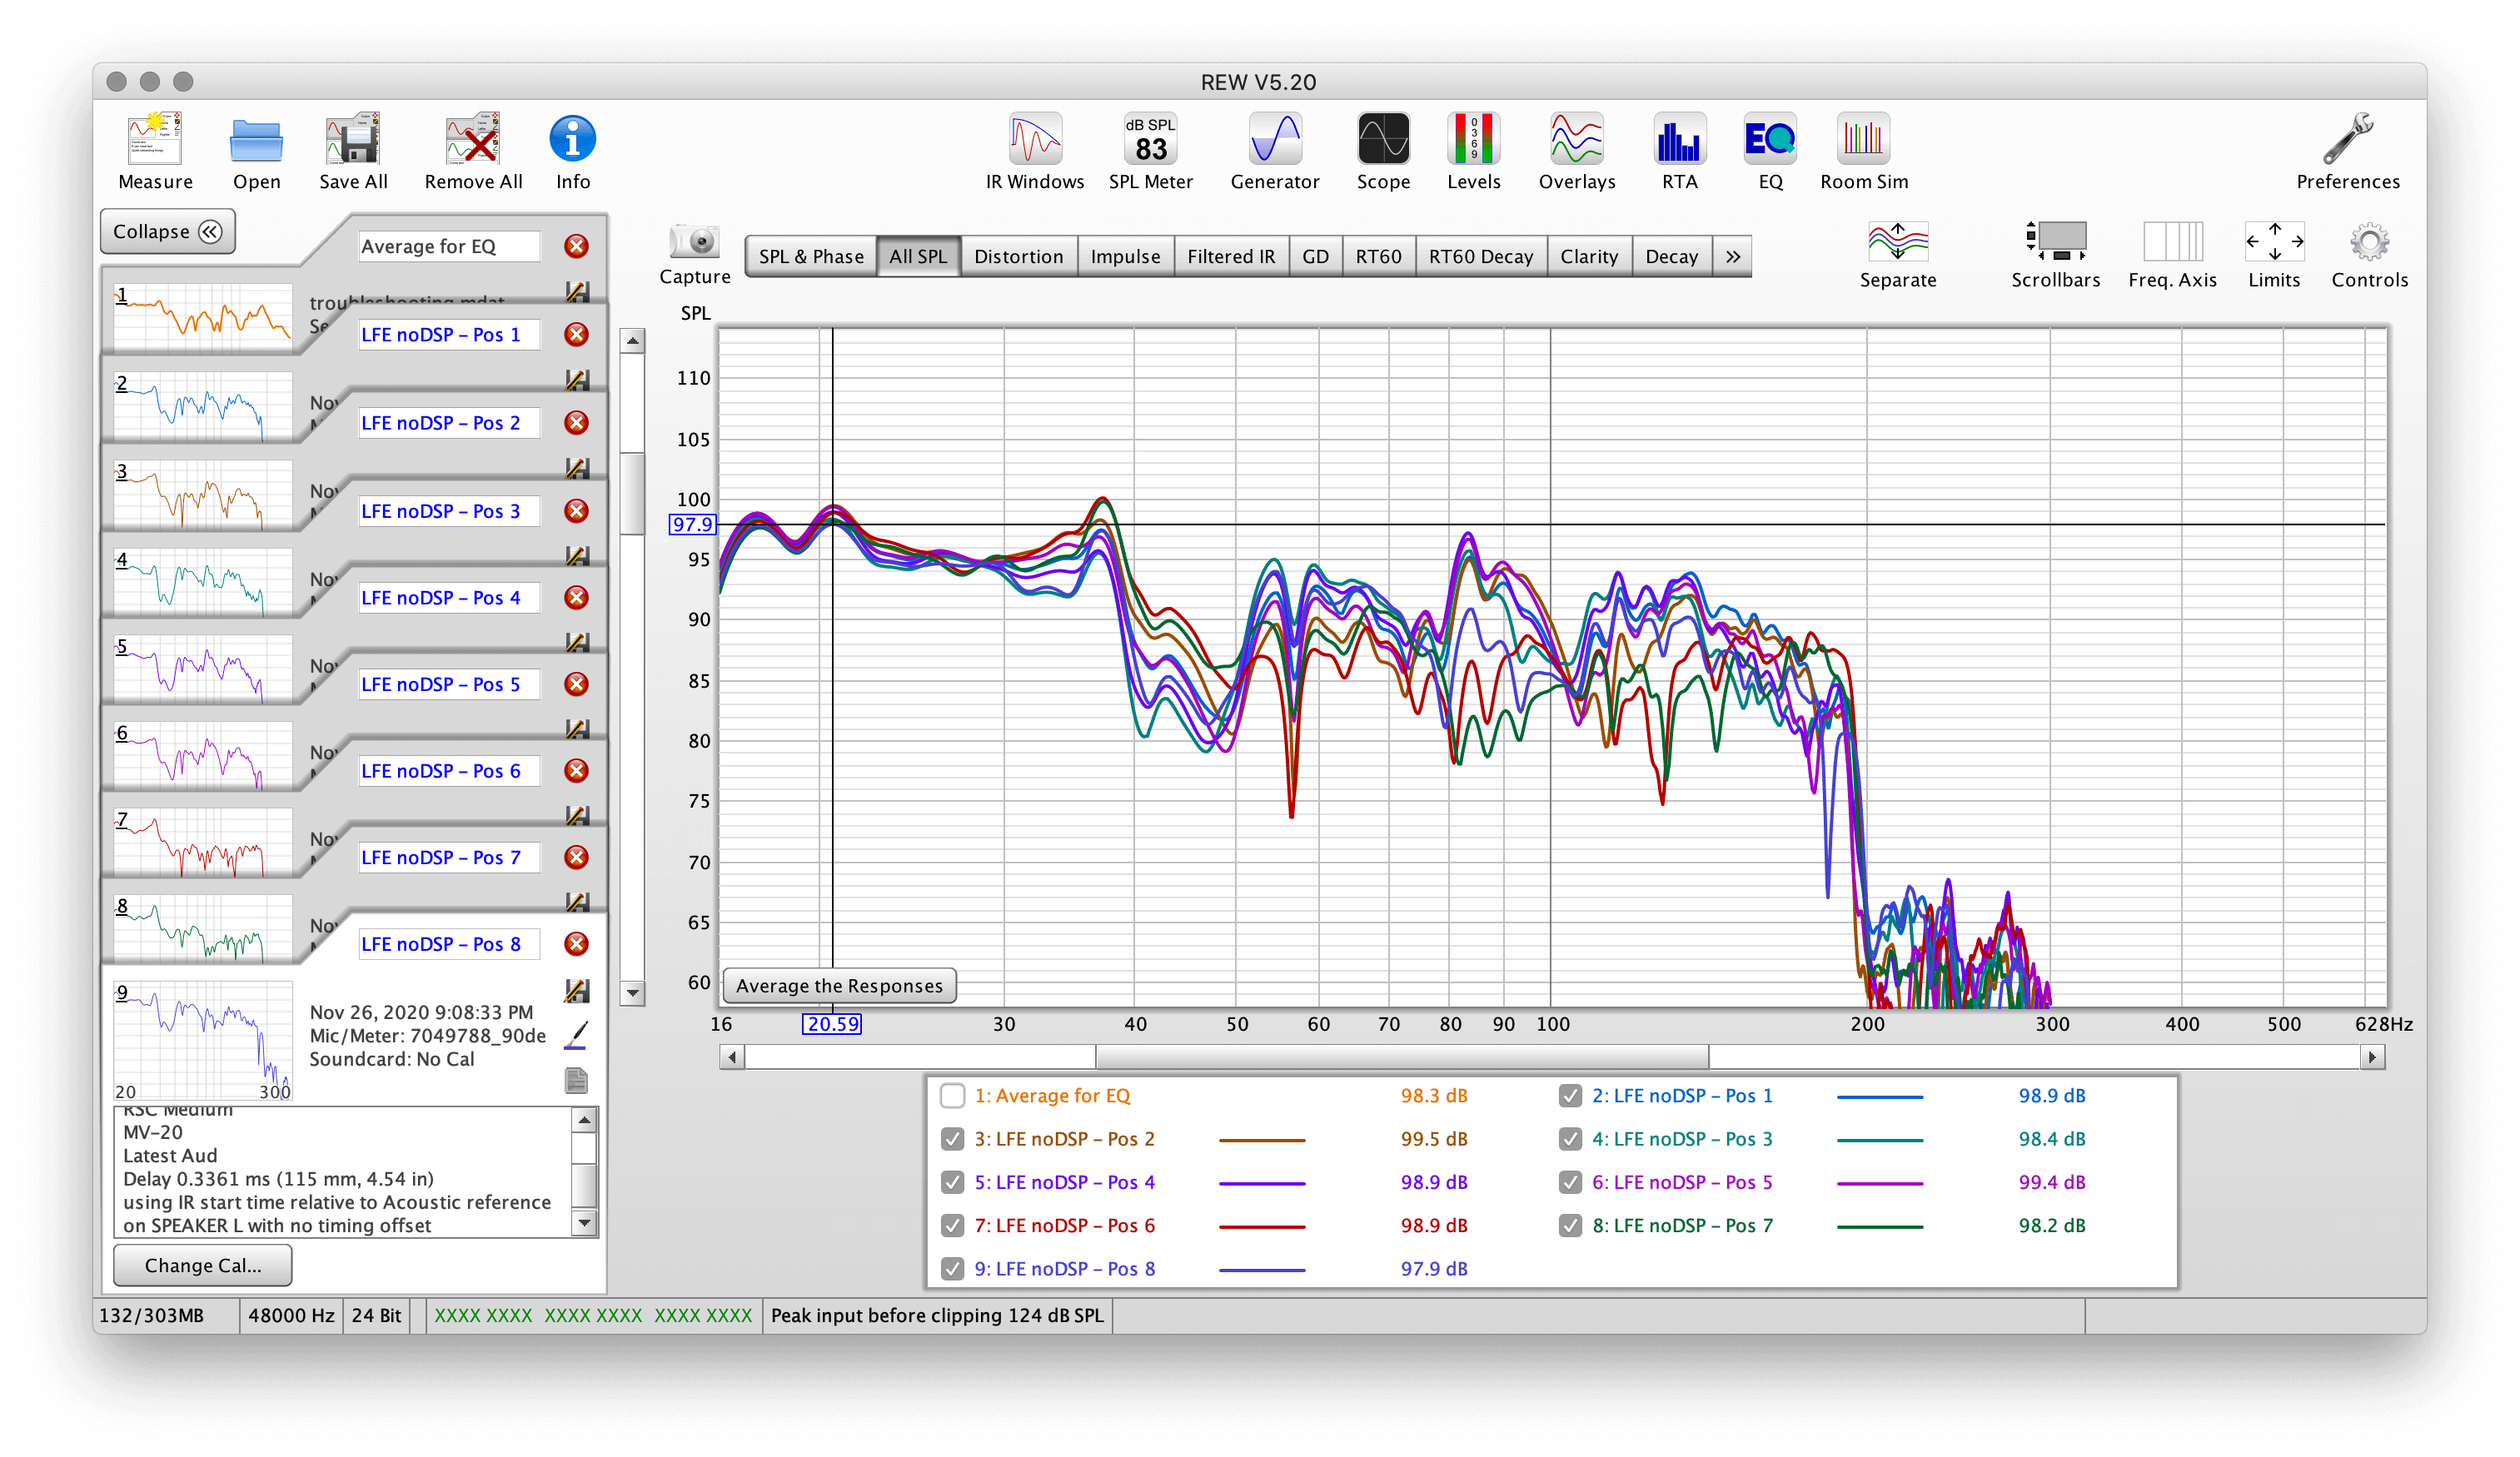
First, we'll take a cloud of LFE specific (15Hz to 300Hz) measurements using our grid of 8 measurement points again. Keep in mind that you can loosen or tighten this grid a bit. If you're really only interested in one seat, you might keep the measurements spaced only a foot apart. If maybe the main listening position is centered on a couch and you would like to also consider a nice average response for the left and right seats on that couch, then maybe extend the grid out about 2ft from the MLP. The more you spread your measurements, the less exact that main listening positions adjustments will be, but on the upside you'll be considering other seats more.
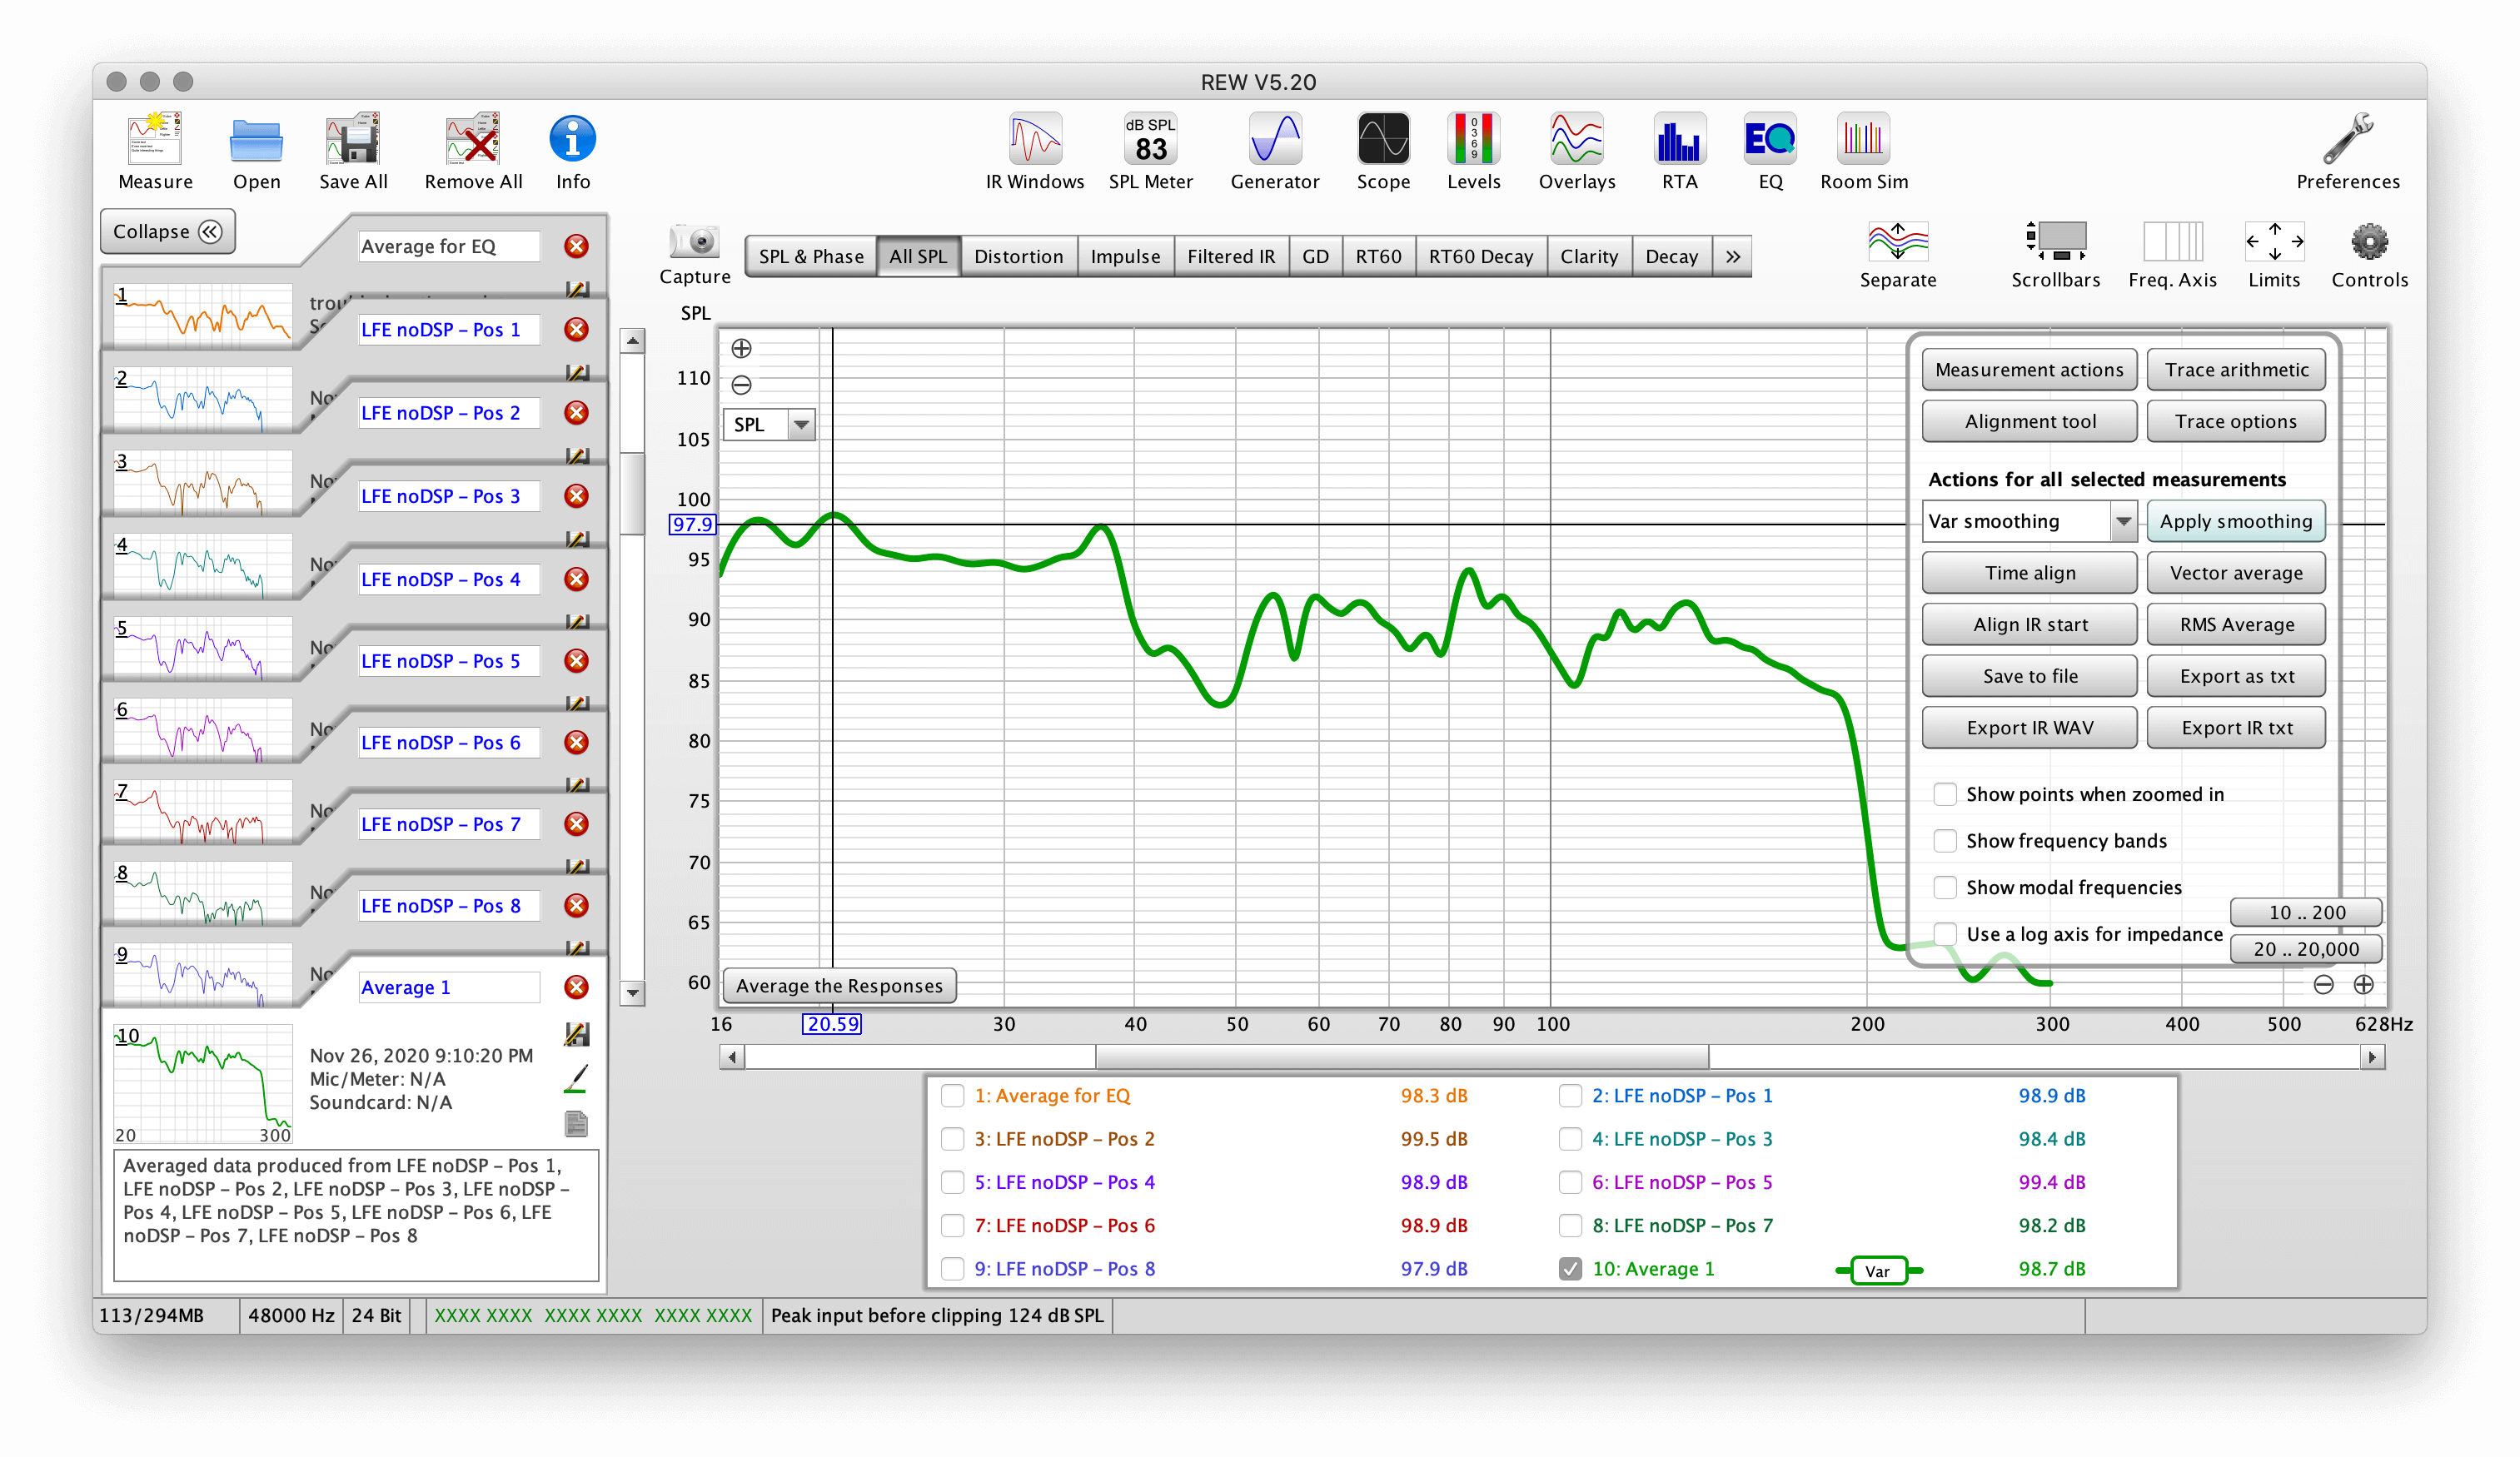
So here I took a cloud and averaged it:
We'll now smooth this average using VAR. This is ideal for EQ because it most closely resembles what we hear.
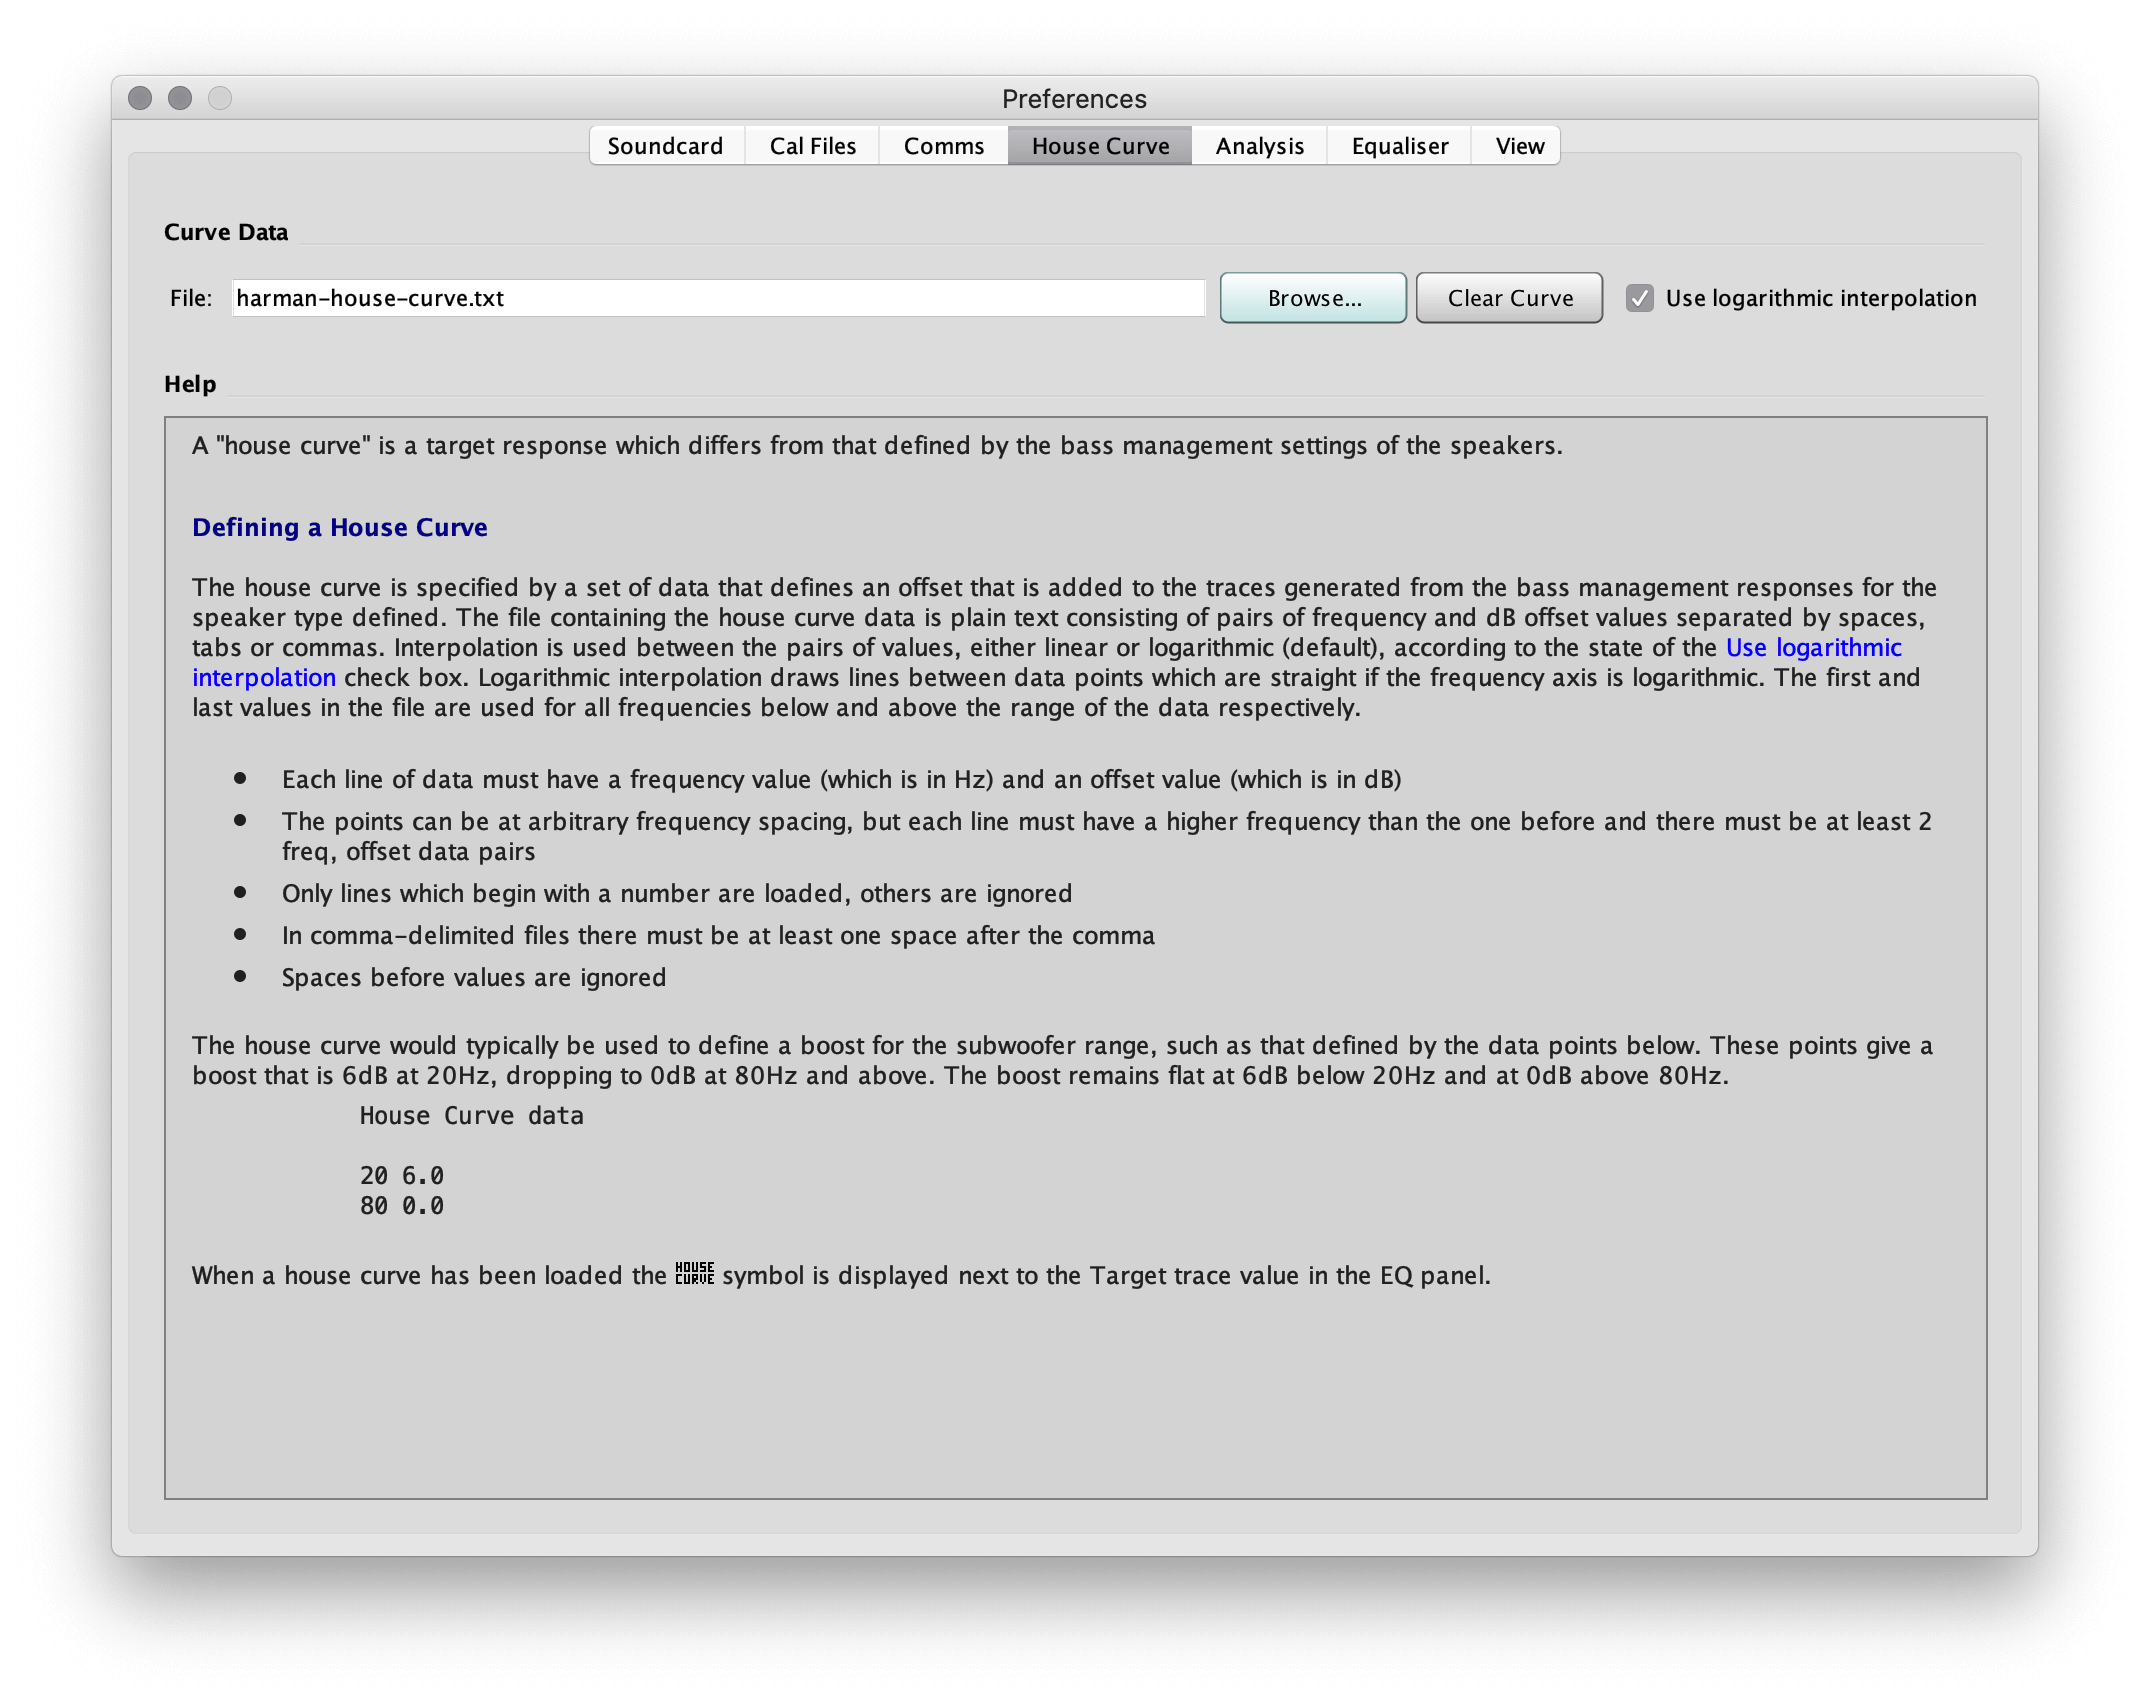
Most people prefer a house curve when EQing, and I'm no exception. I use the Harman house curve, which was developed using their research. YouTuber Julian Krause was nice enough to create the data points of it in the show notes of his REW video so I have added to a text file you can directly use here. (right/control click, save as).
If you would like to use that house curve, download it and go to Preferences > House Curve. Click Browse and select the text file.
With that set, press EQ in the menu and a new window will open.
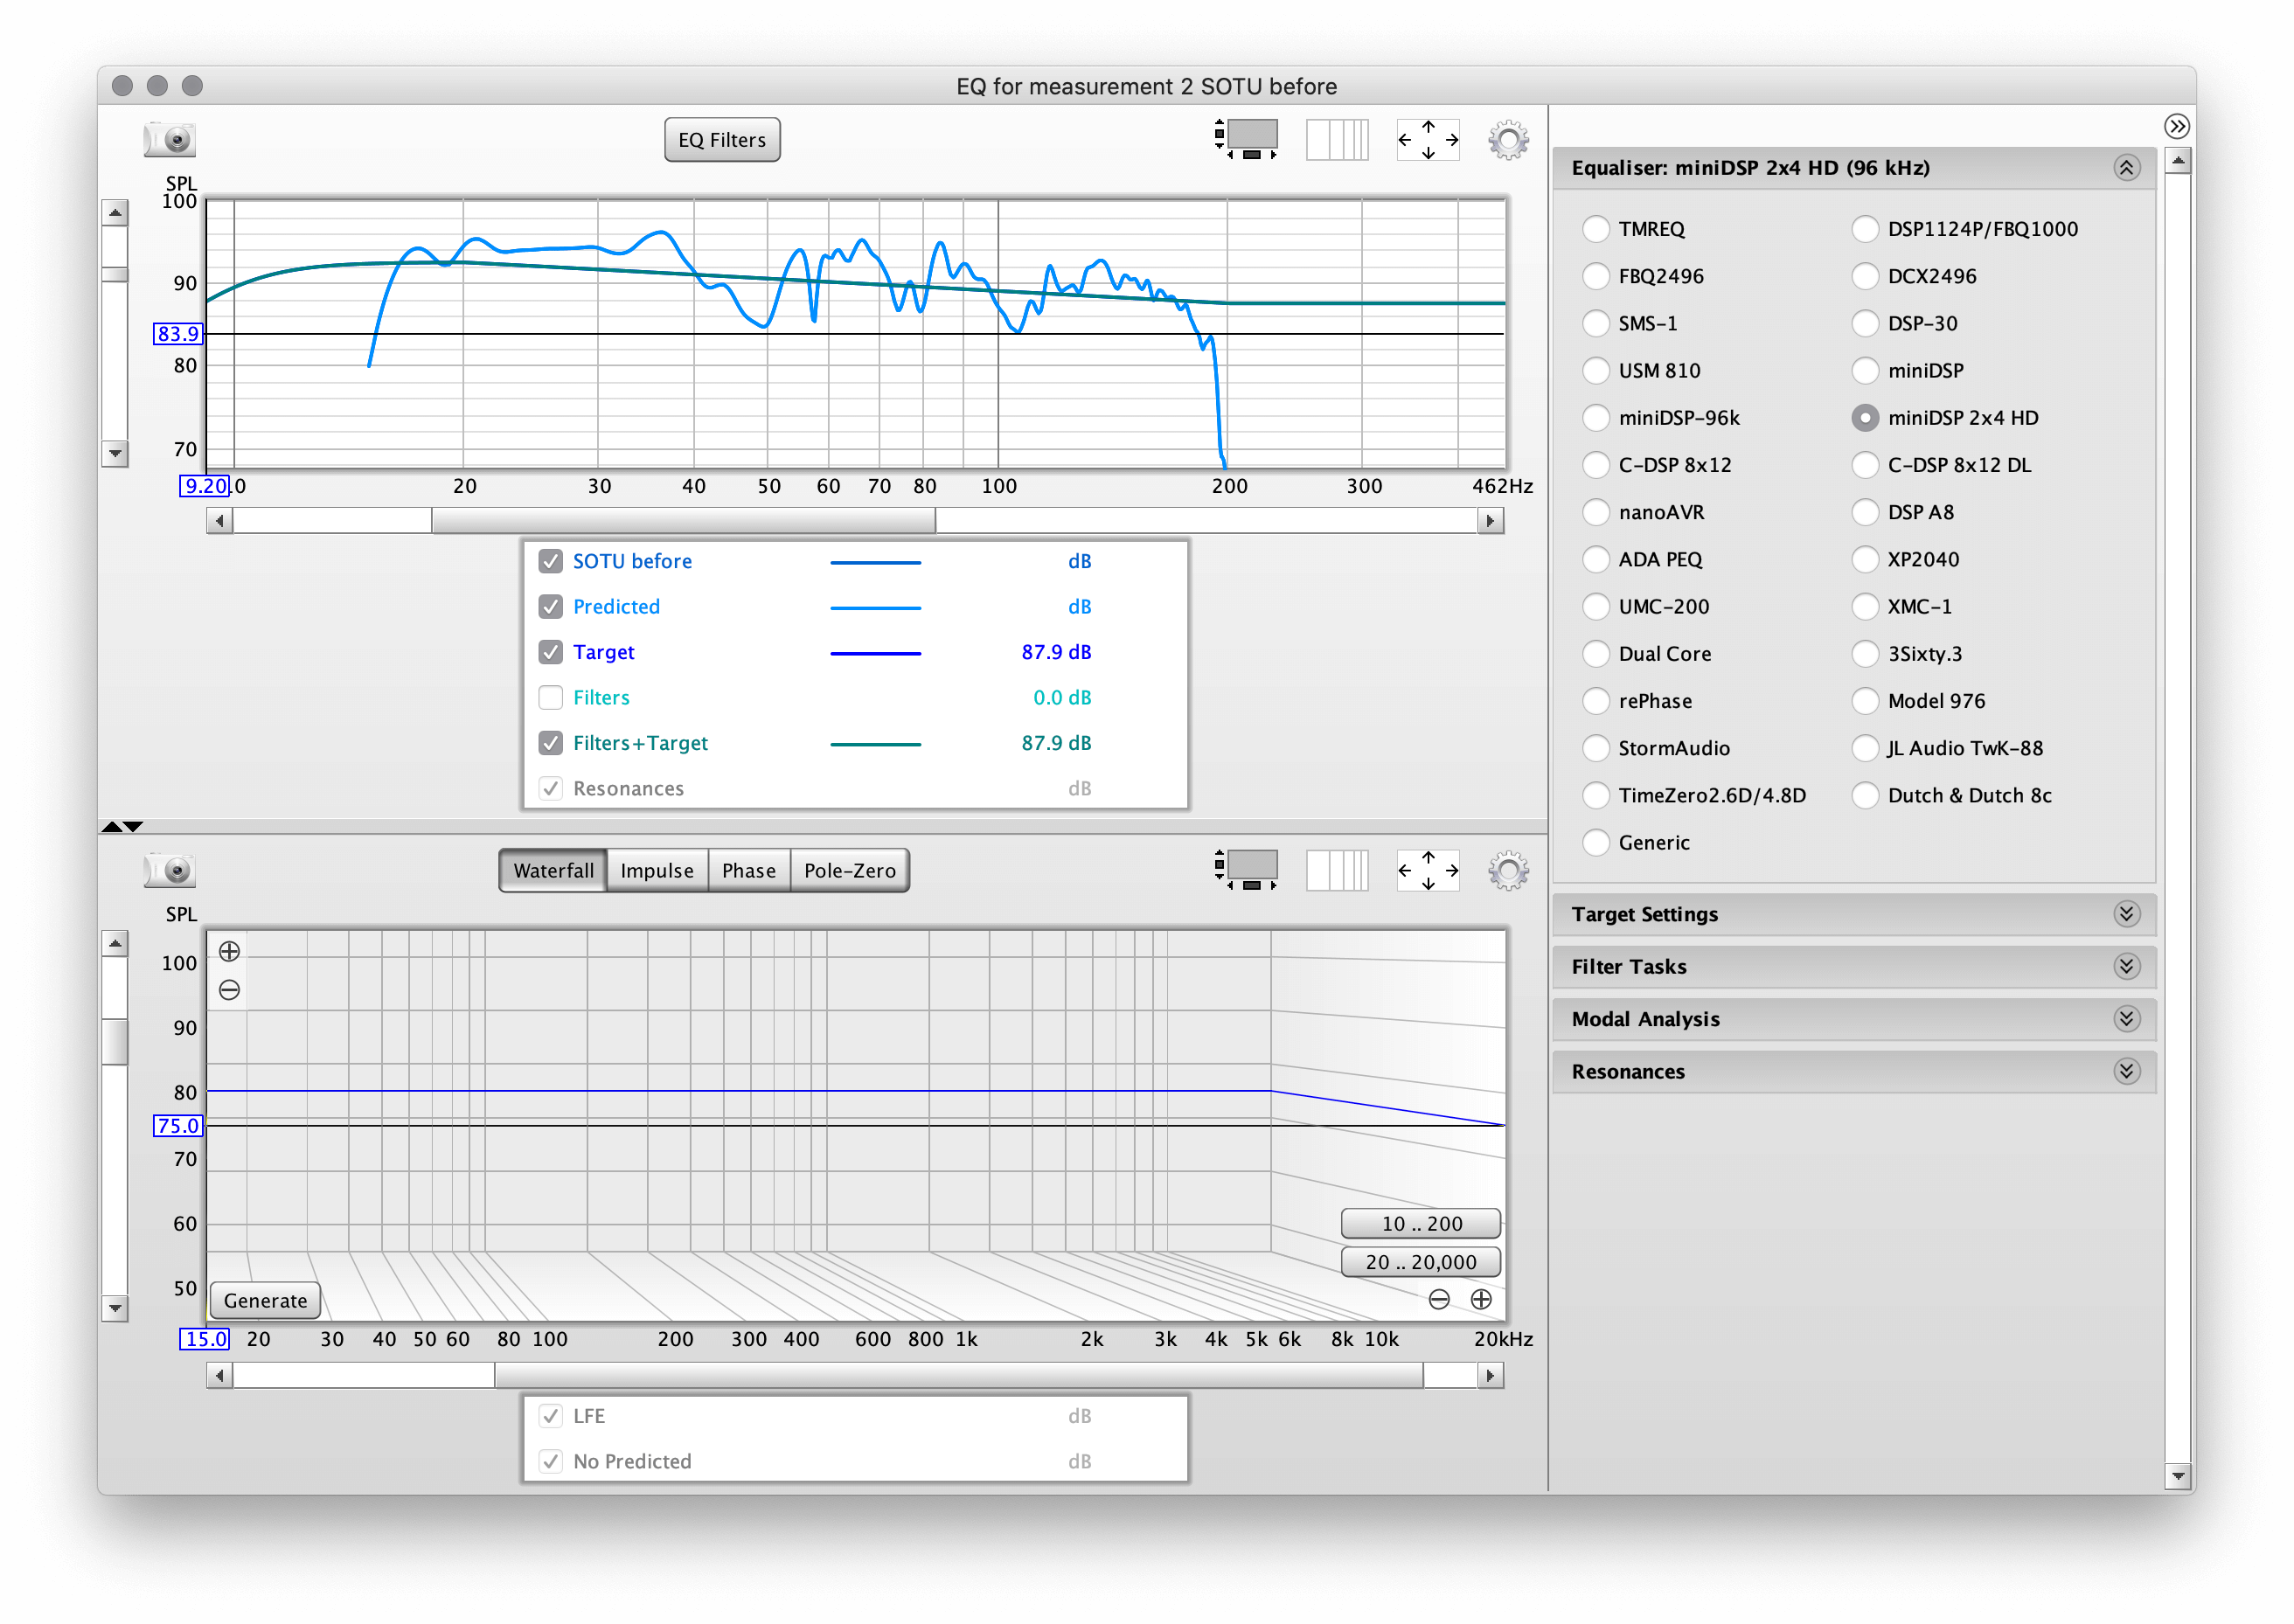
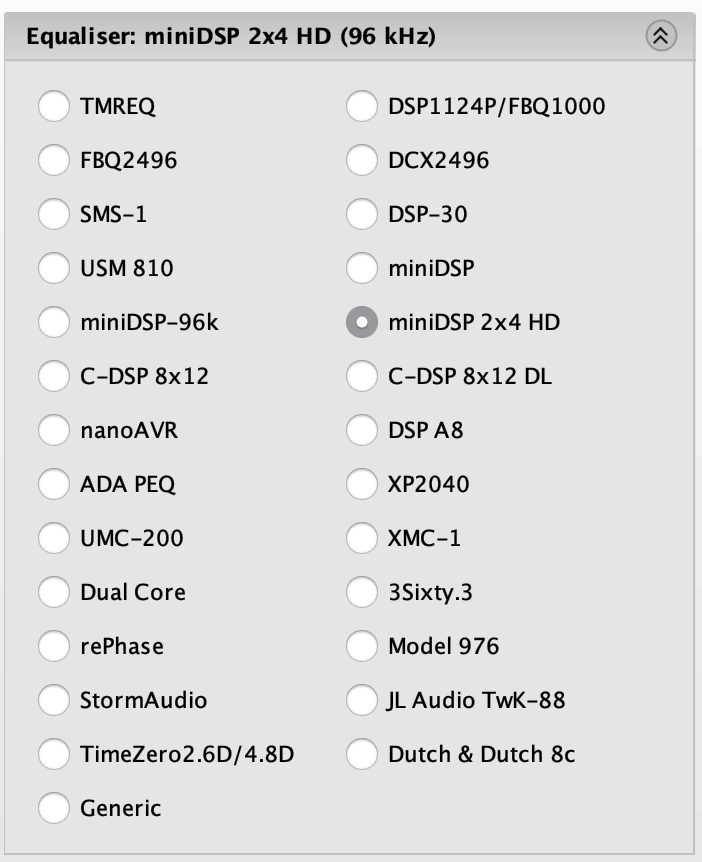
On the right hand side, click the "Equalizer" accordion and select your device. In my case, it's a miniDSP 2x4 HD.
Next we need to set our Target Settings, the next accordion down.
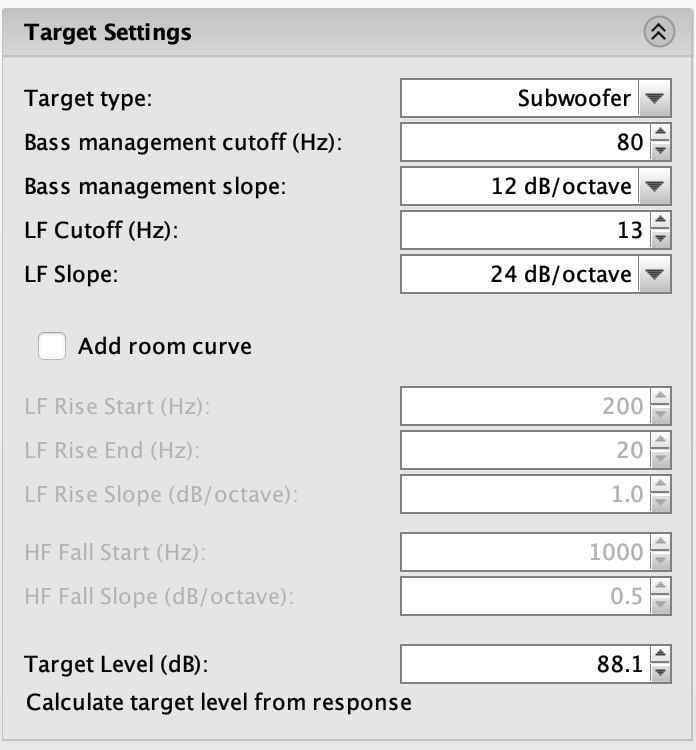
The selections here depend on a lot on your setup. For a vented subwoofer I often use either Full Range or Subwoofer and then tweak the roll off to provide a bit of deep bass protection if I'm worried about the subwoofers internal DSP not catching stray ultra deep bass. For a sealed I'd probably leave it set to none (provided I trust the designers DSP). This is very subwoofer and room specific though, so I'm just giving generalizations.
I'm going to set a LF cutoff at 15Hz and a slope of 24dB/octave. I'm not going to set a room curve, because we just added our room curve (house curve) a moment ago.
Now down at Target Level press Calculate target level from response. This should get you pretty close to a reasonable target level, but often a bit of tweaking is needed. Try to center the line based on how you're going to EQ. We can always come back to this, and you'll find you often do once the initial EQ points have been suggested. If your target level comes out completely funky, set Target Type to Subwoofer, re-calculate, and then set it back to whatever type you ultimately want to EQ to.
Now go to the Filter Tasks accordion.
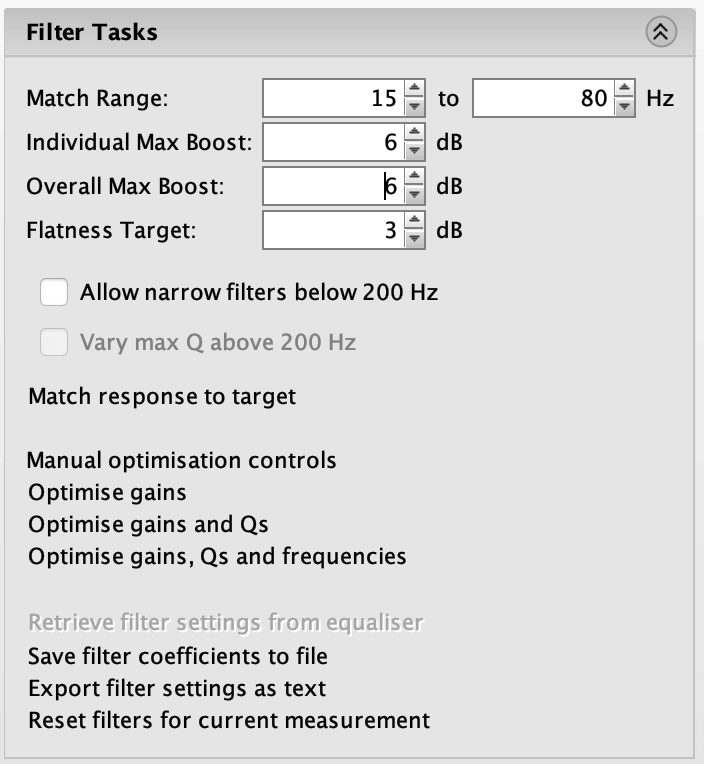
Here we can set the range we'd like to EQ to. I'm setting 15Hz to 80Hz because I'm using vented subwoofers, but if you have low tuned vented or sealed subwoofers digging deeper make sure to extend that to the full bandwidth you need.
For Individual Max Boost and Overall Max Boost, here we get into a discussion about boosting dips and headroom. If you have sharp spikes downward in response, those are likely nulls and not worth EQing (because no amount of EQ will fix them, it's room and subwoofer placement specific). So, you can either move subs (or chair) around if possible or ignore them. The good news is that a lot of times those nulls are so tight in bandwidth that they simply aren't audible anyways. The mistake people make of boosting those is that while fixing an inaudible null, they end up eating up a lot of their headroom and cause their subwoofer amplifier to clip sooner that expected: and that is audible!
Now wider troughs often can be successfully boosted, but you always need to pay attention the headroom available. The fact is, any EQ eats up headroom - yes, even cuts! Why? Because when you cut frequencies the overall volume gets lower, and often that means you'll end up raising it back up in the levels of the receiver. Your subwoofer level is typically set based on a room mode peak and cutting this peak will result in the volume being too low. So, you have to turn up the subwoofer(s), removing the headroom we thought saved by only cutting. No free lunch!
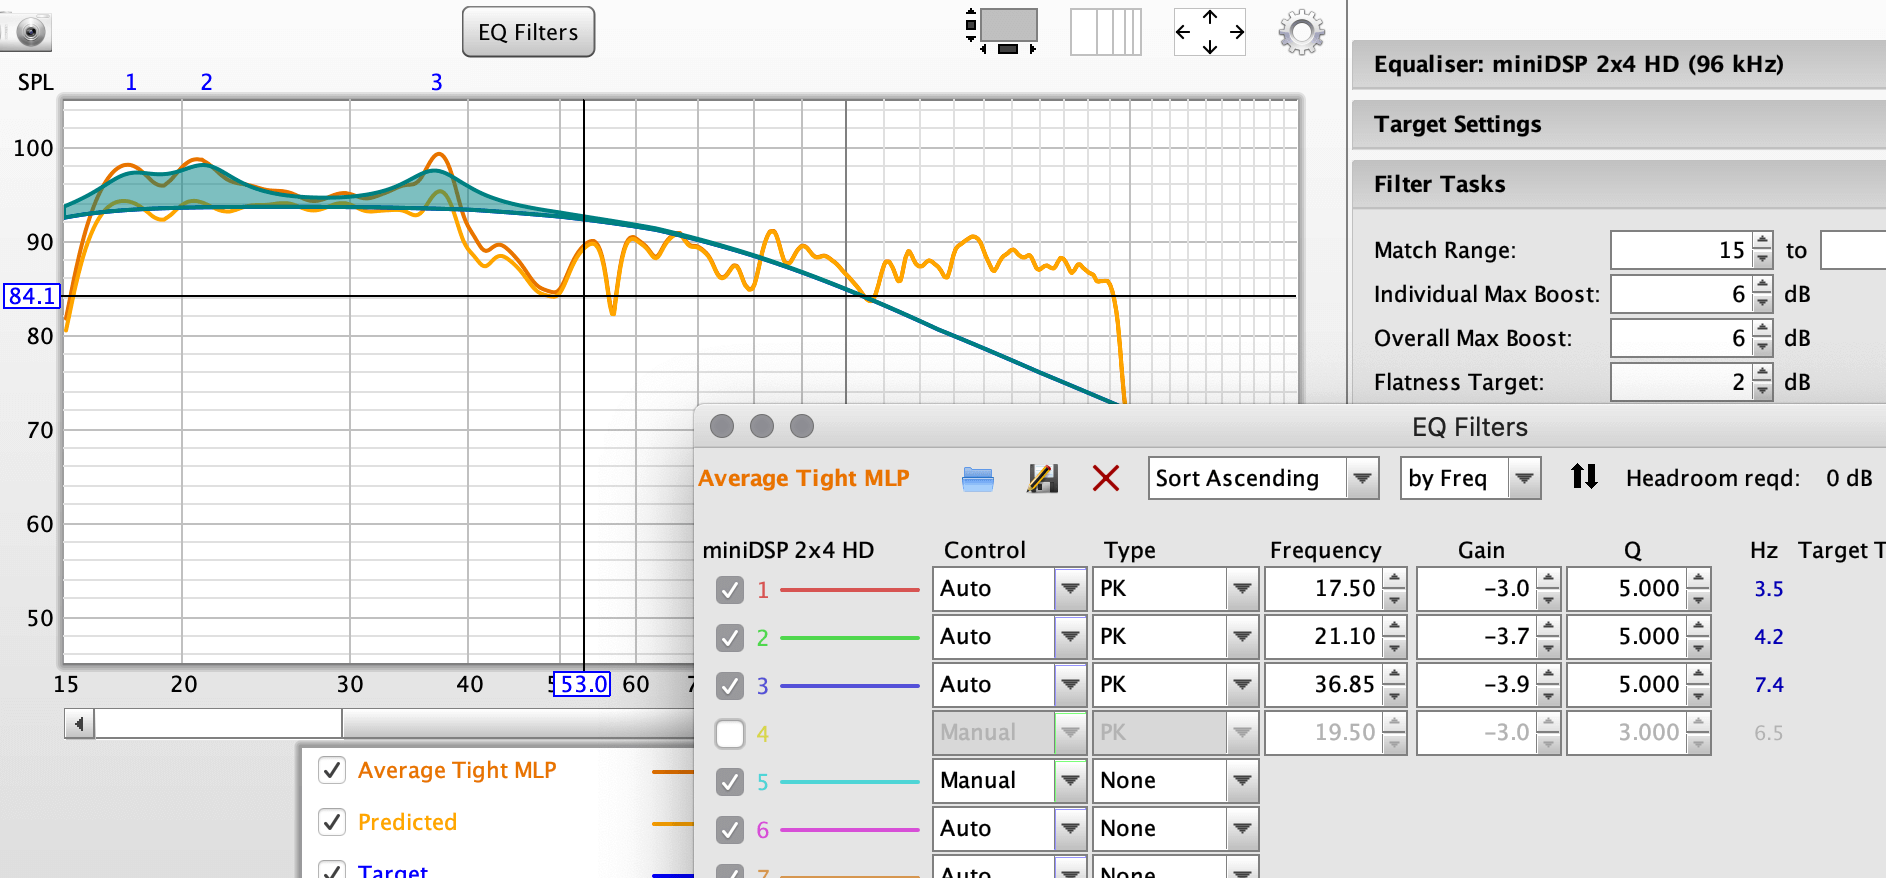
So first let's see what REW comes up with:
In my case, I have known available headroom and have a pretty good idea where my subwoofers start to reach their limits, so I know that I have a solid 6dB of headroom remaining. So I'll add boost manually where needed, keep that target curve about centered, and cut in that deeper bass.
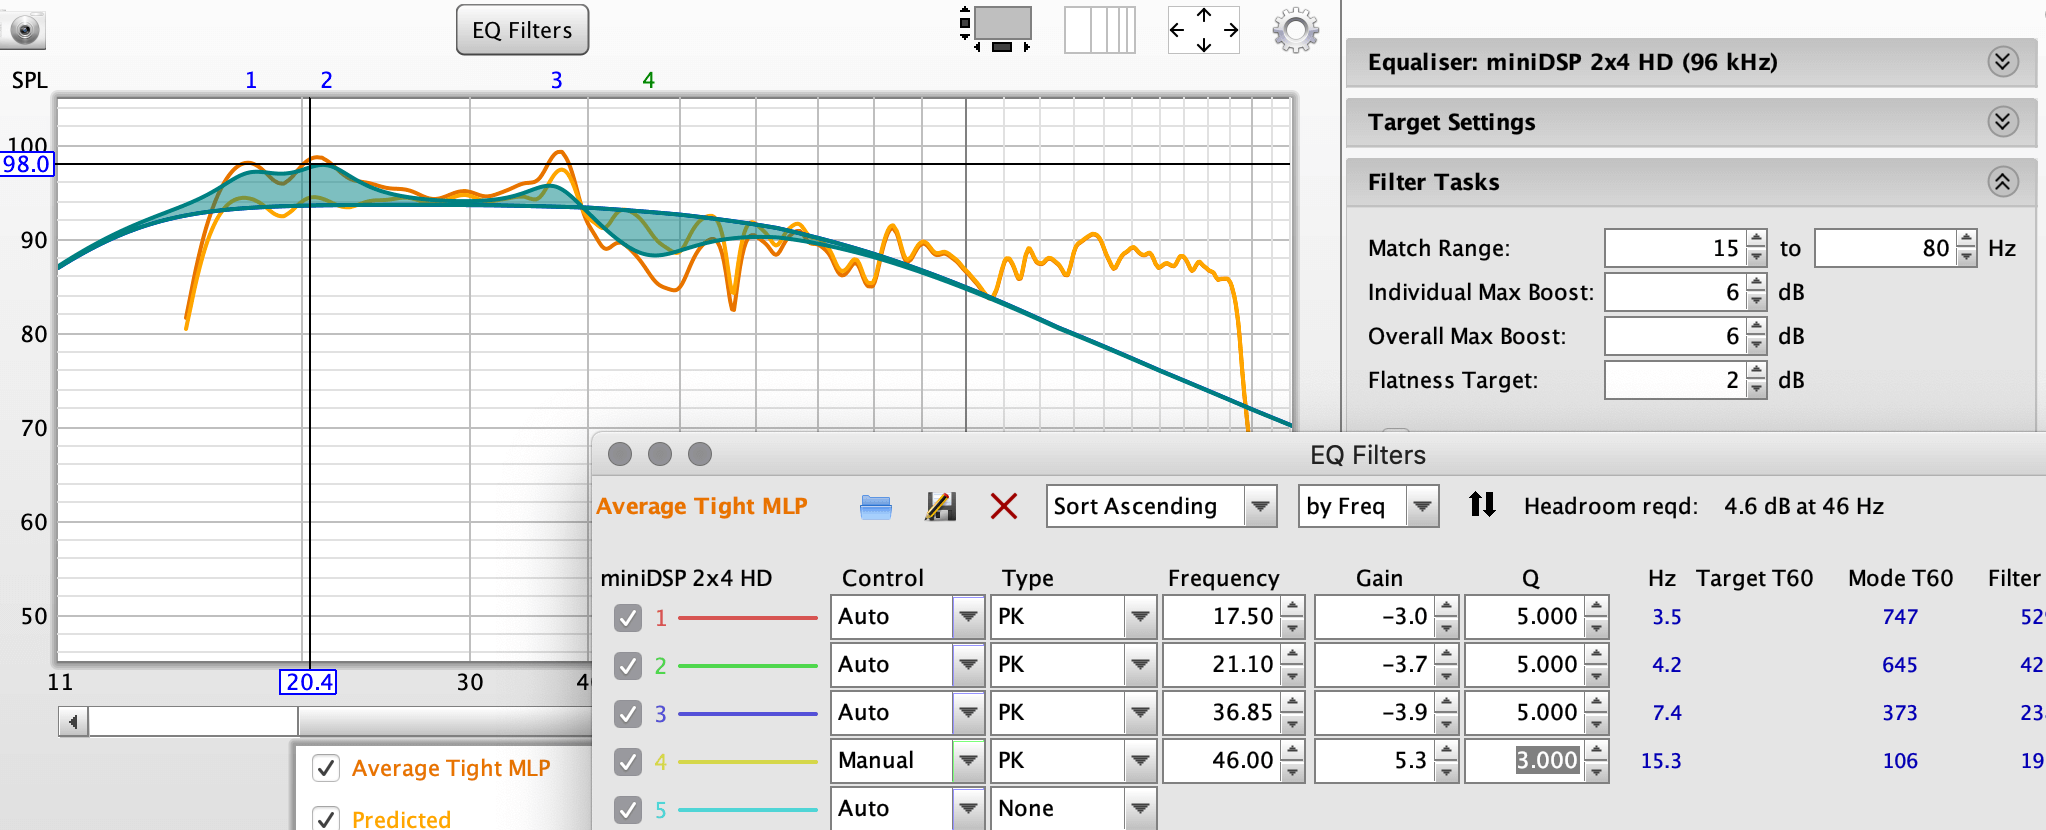
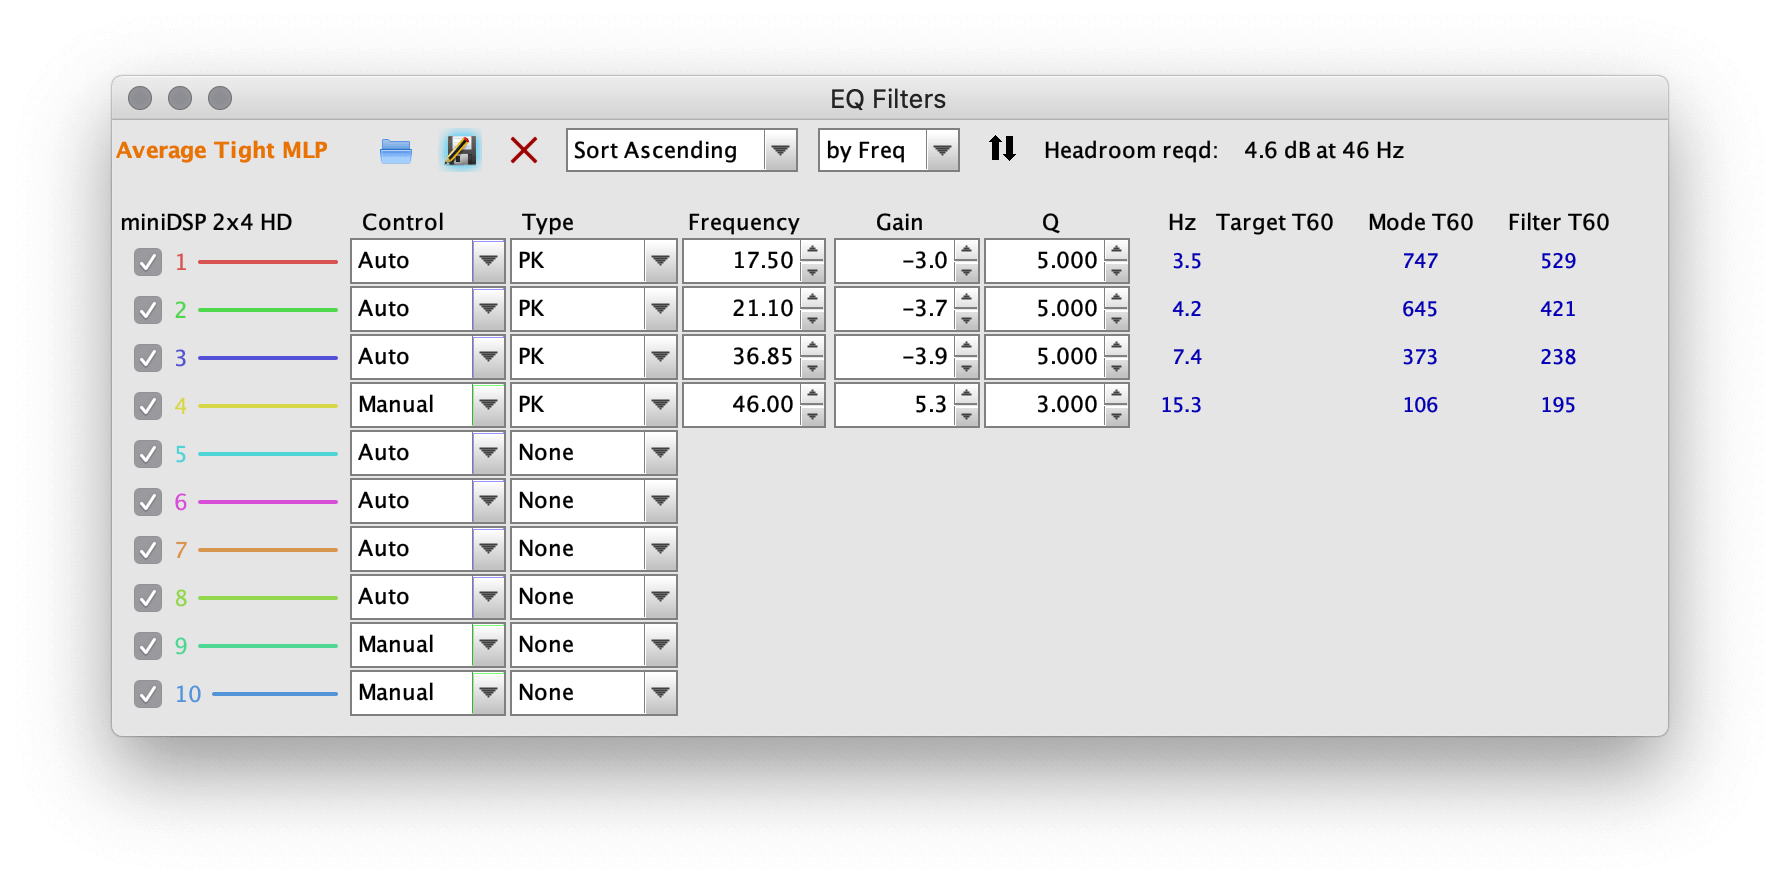
You can see REW tells us that 4.6dB of headroom is required at 46Hz.
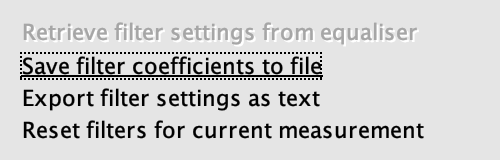
Let's see how this measures. To export to the miniDSP, select Save filter coefficients to file.
We're now ready to import our filter coefficients into miniDSP. So load up the MiniDSP software. I'm using the wifi adapter to make things faster. I highly recommend this addition. Confirm the computer and miniDSP are connected and synchronized.
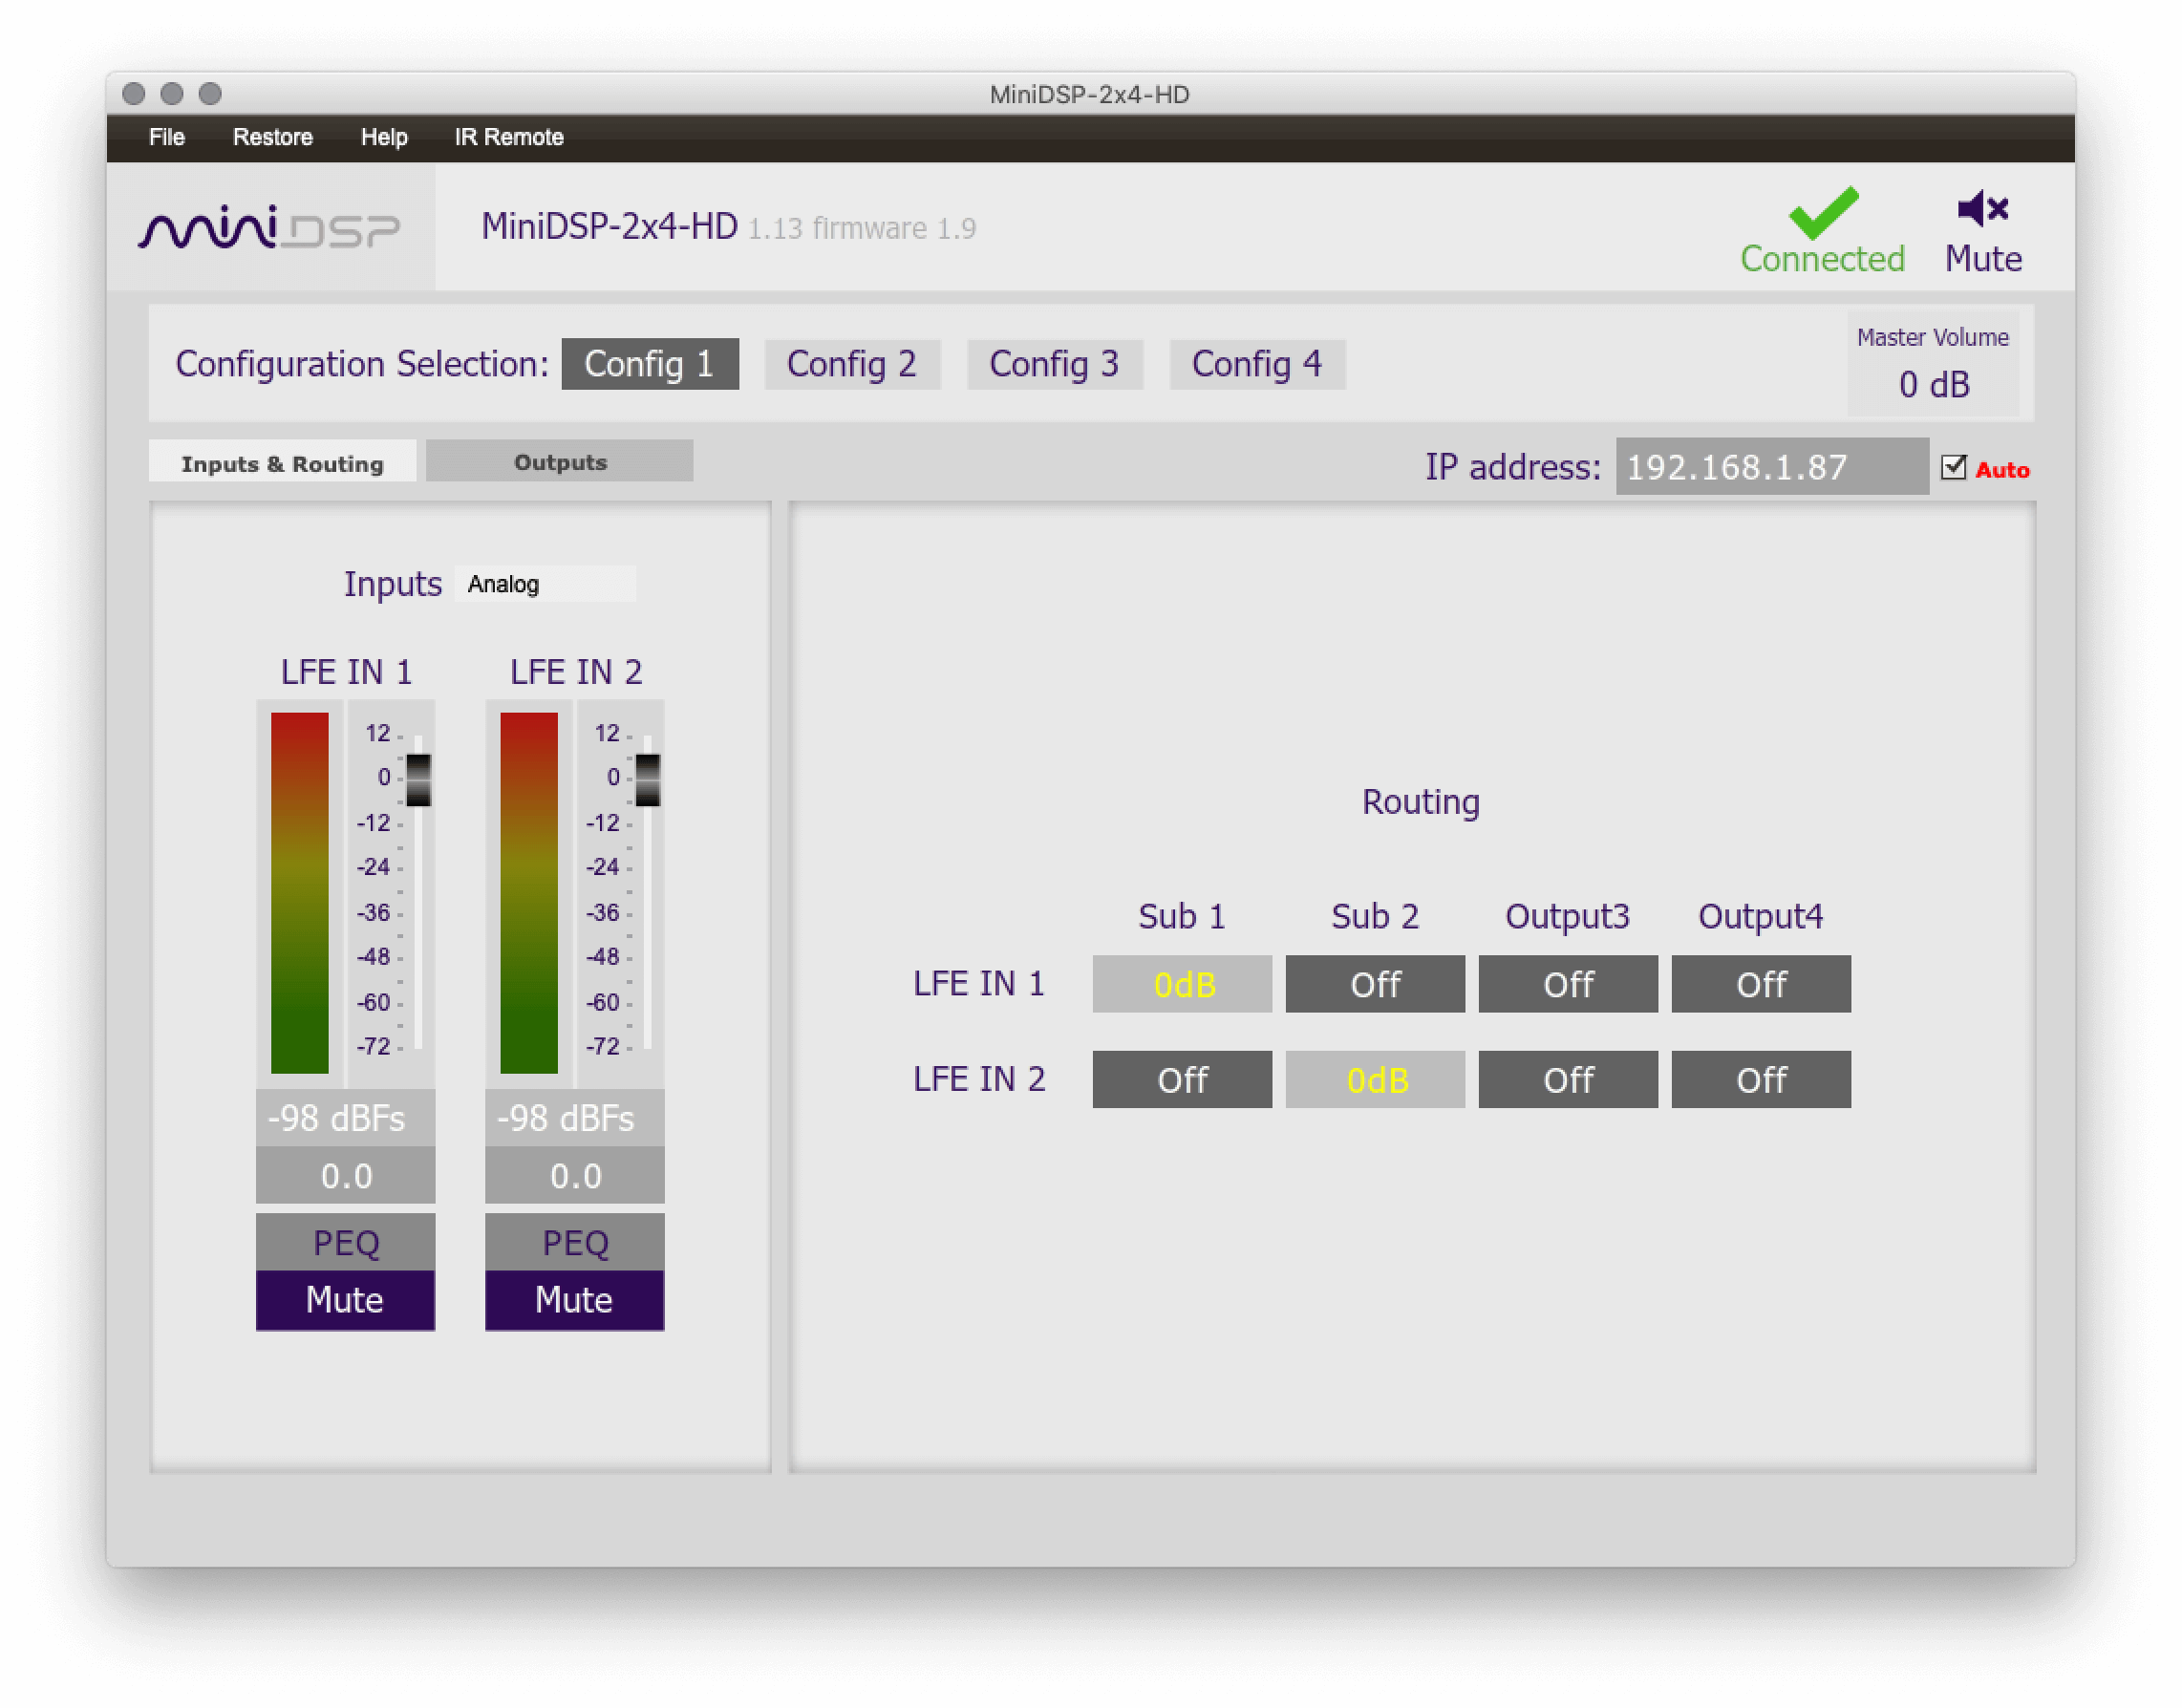
Select PEQ and choose Import.
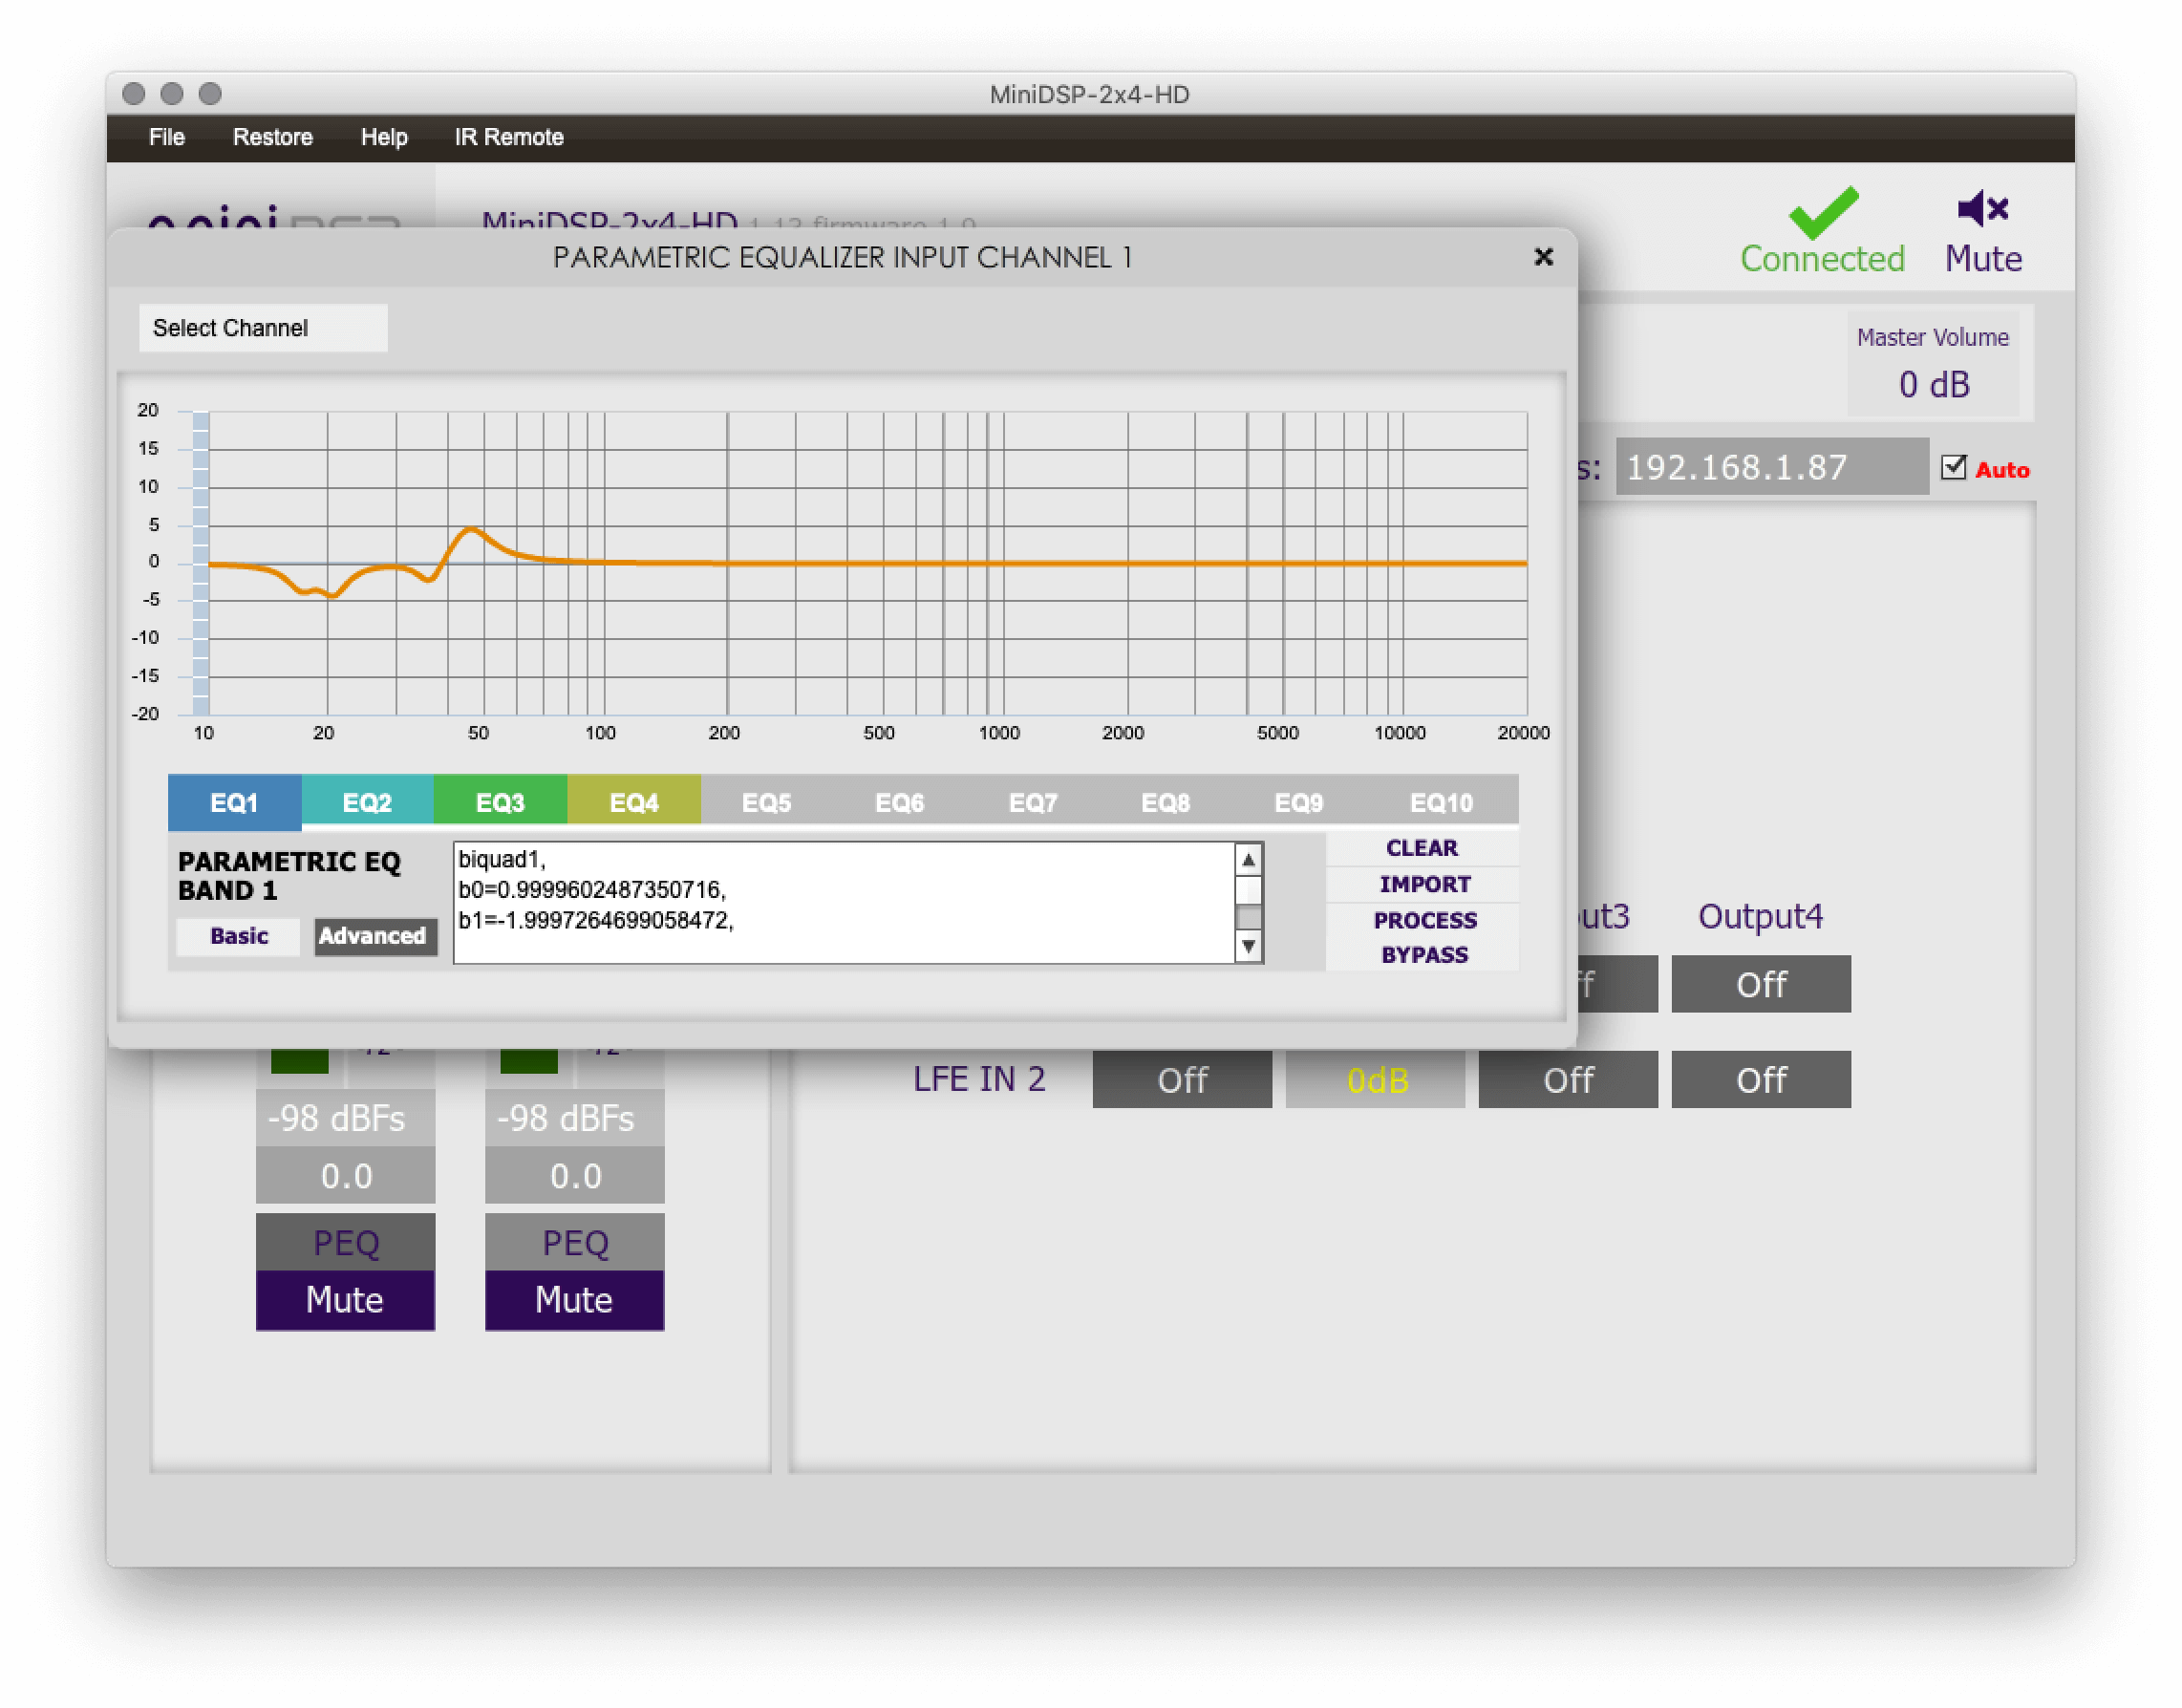
We can see our profile has been imported. If you are using two or more outputs, add the profile to those as well.
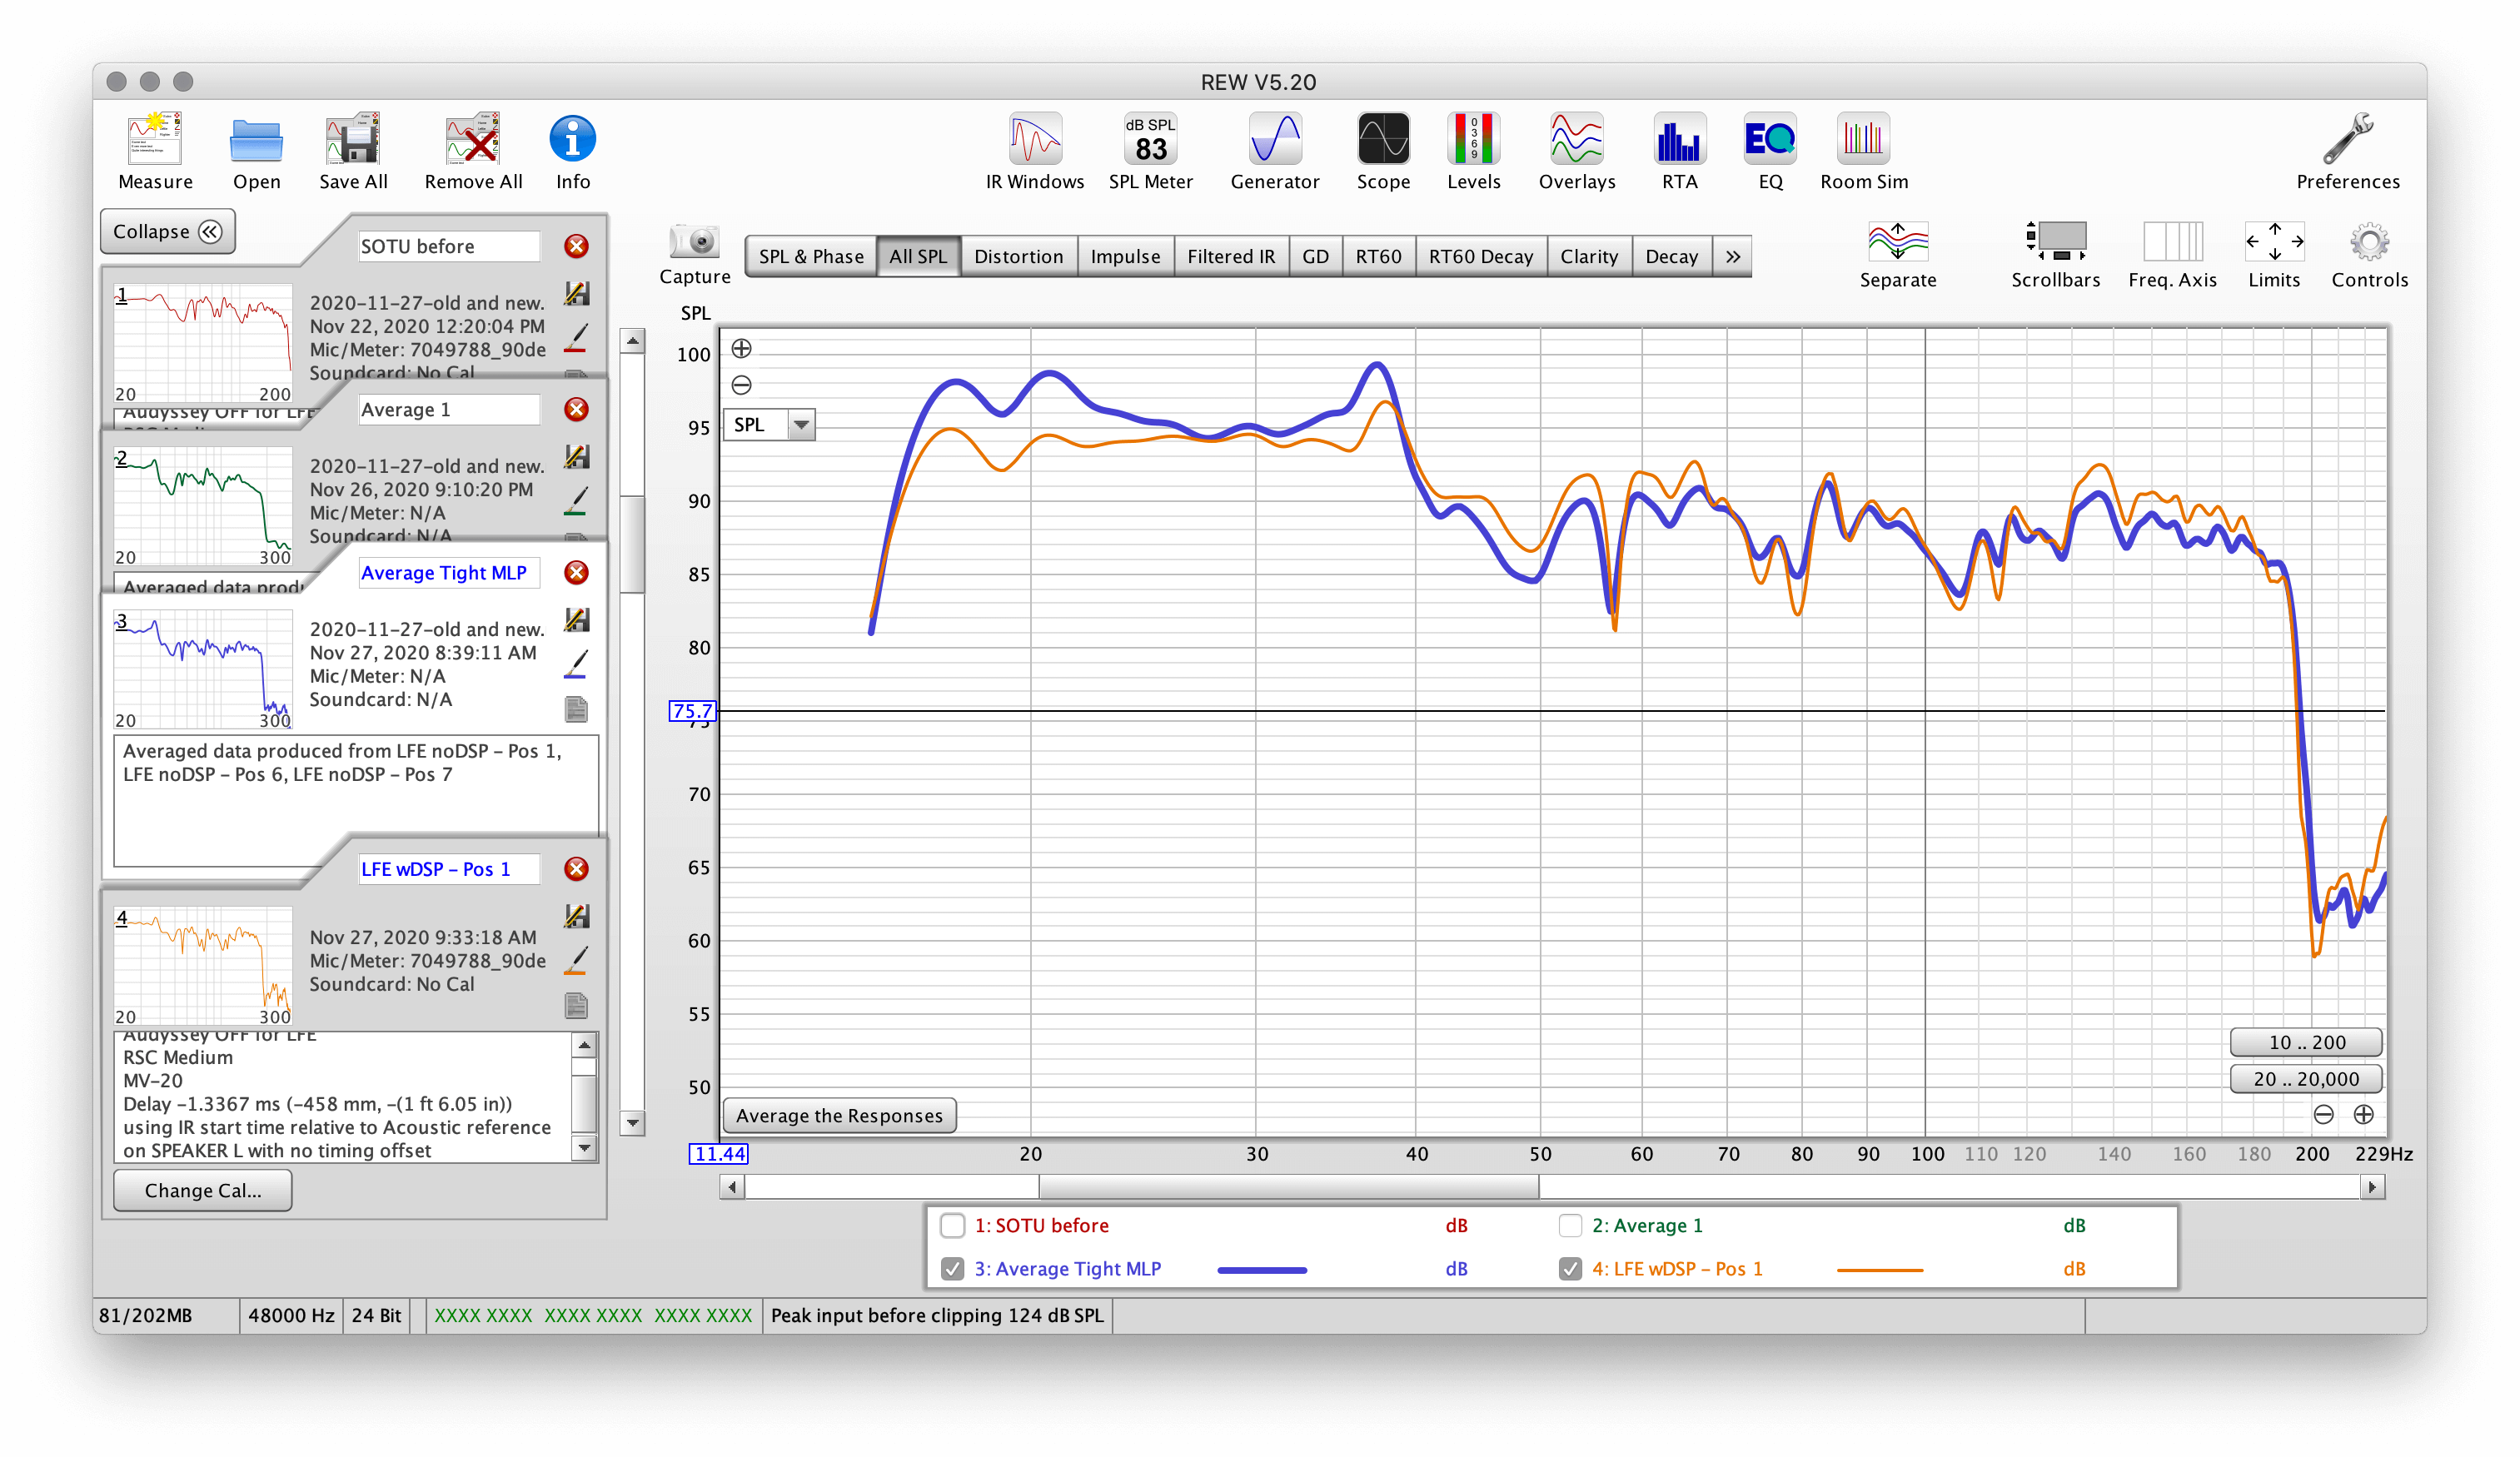
Now lets run REW and see how our response changed.
So blue is the average of my uncorrected response, and green is the average of the corrected. Not bad. There are a few more adjustments I'll make within REW though...
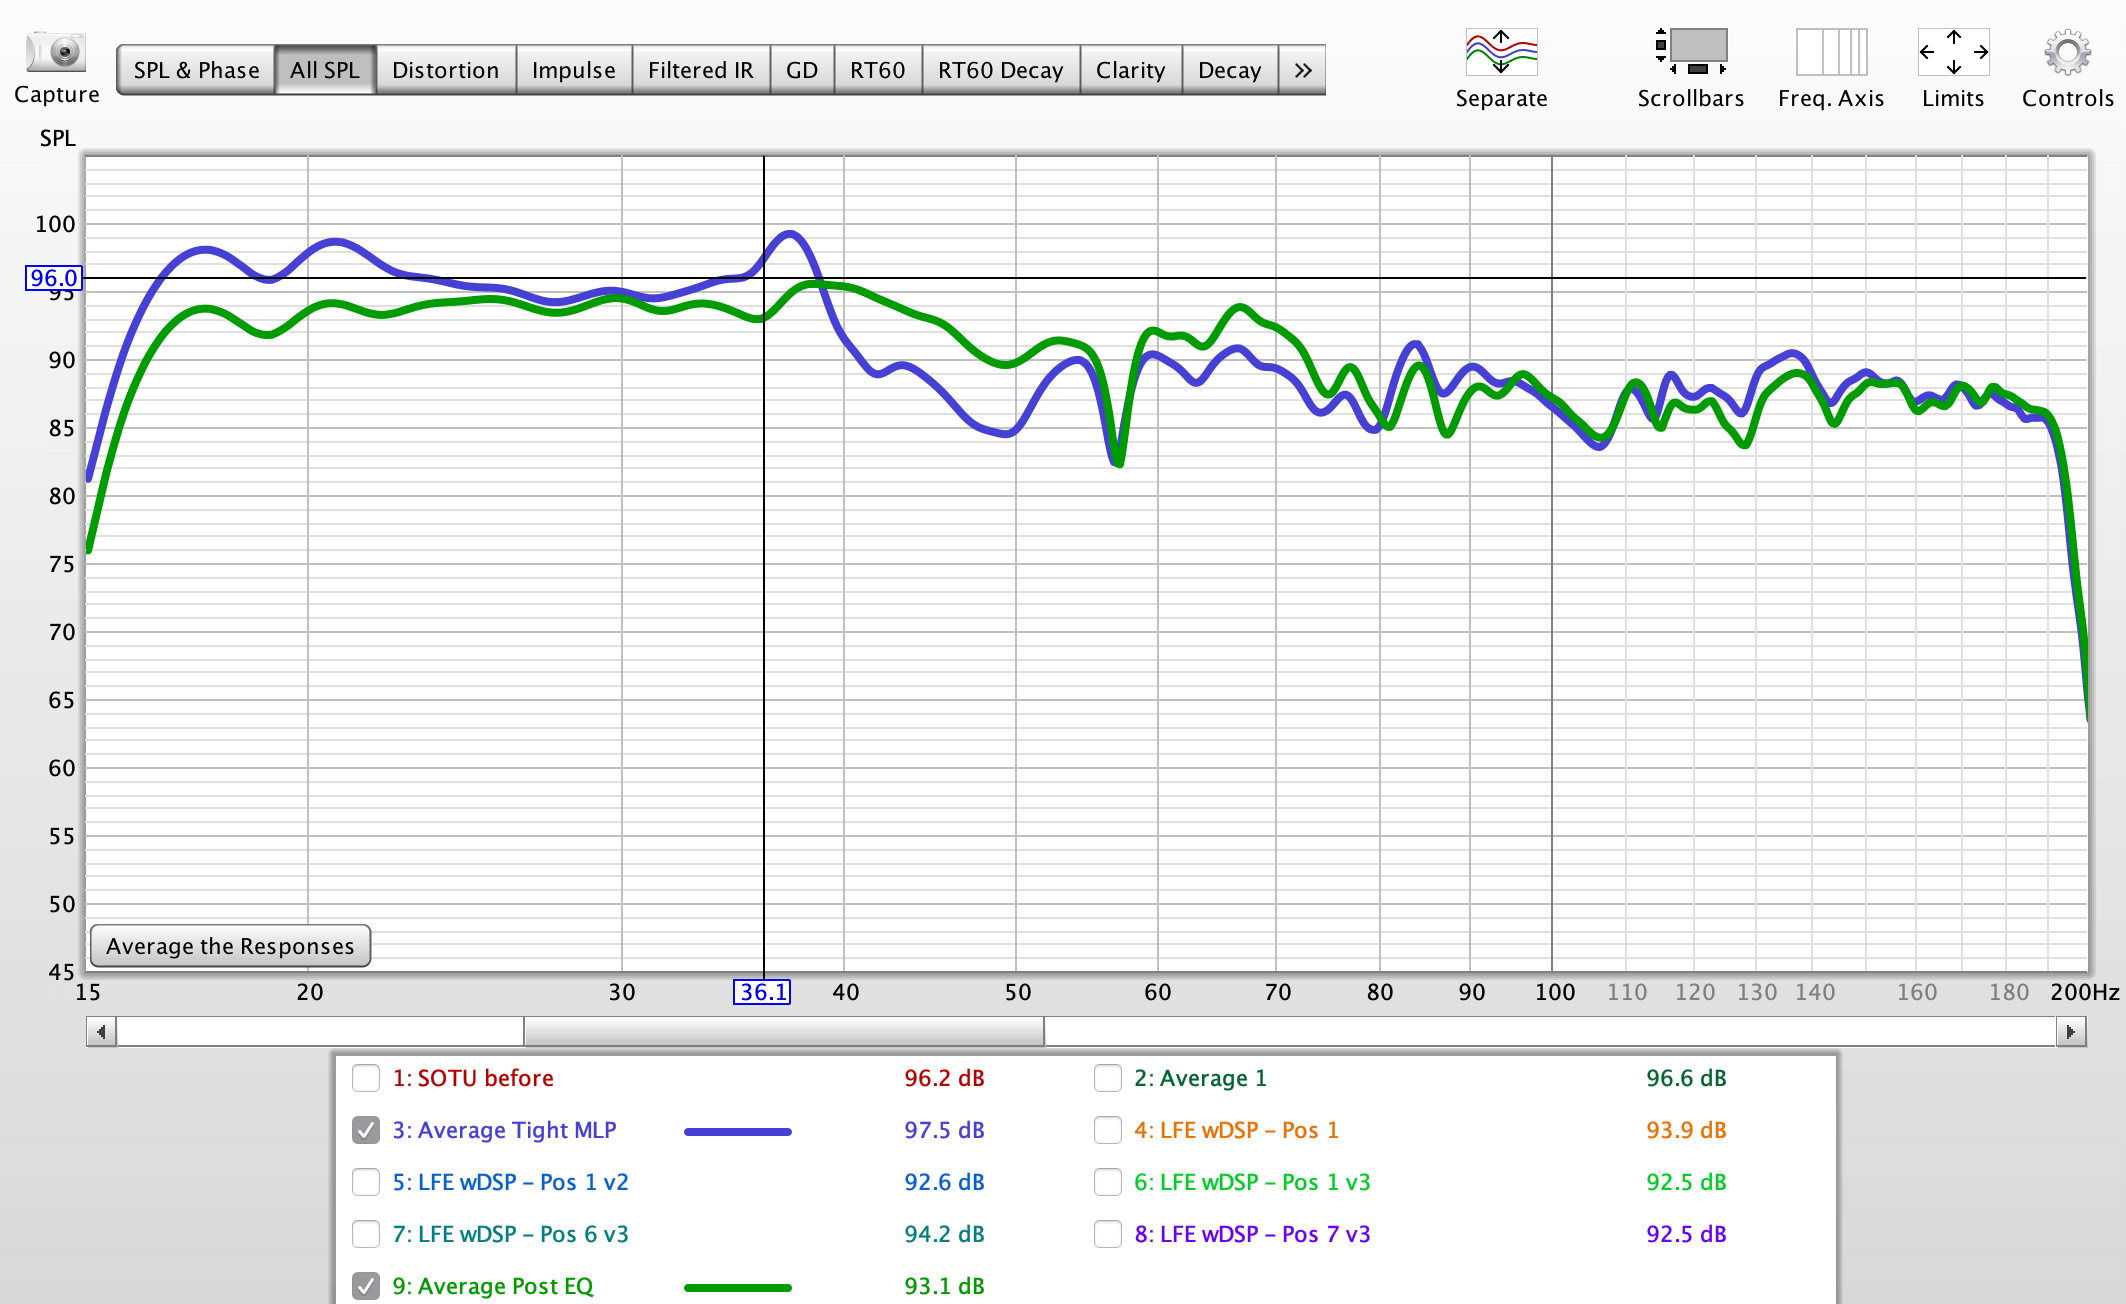
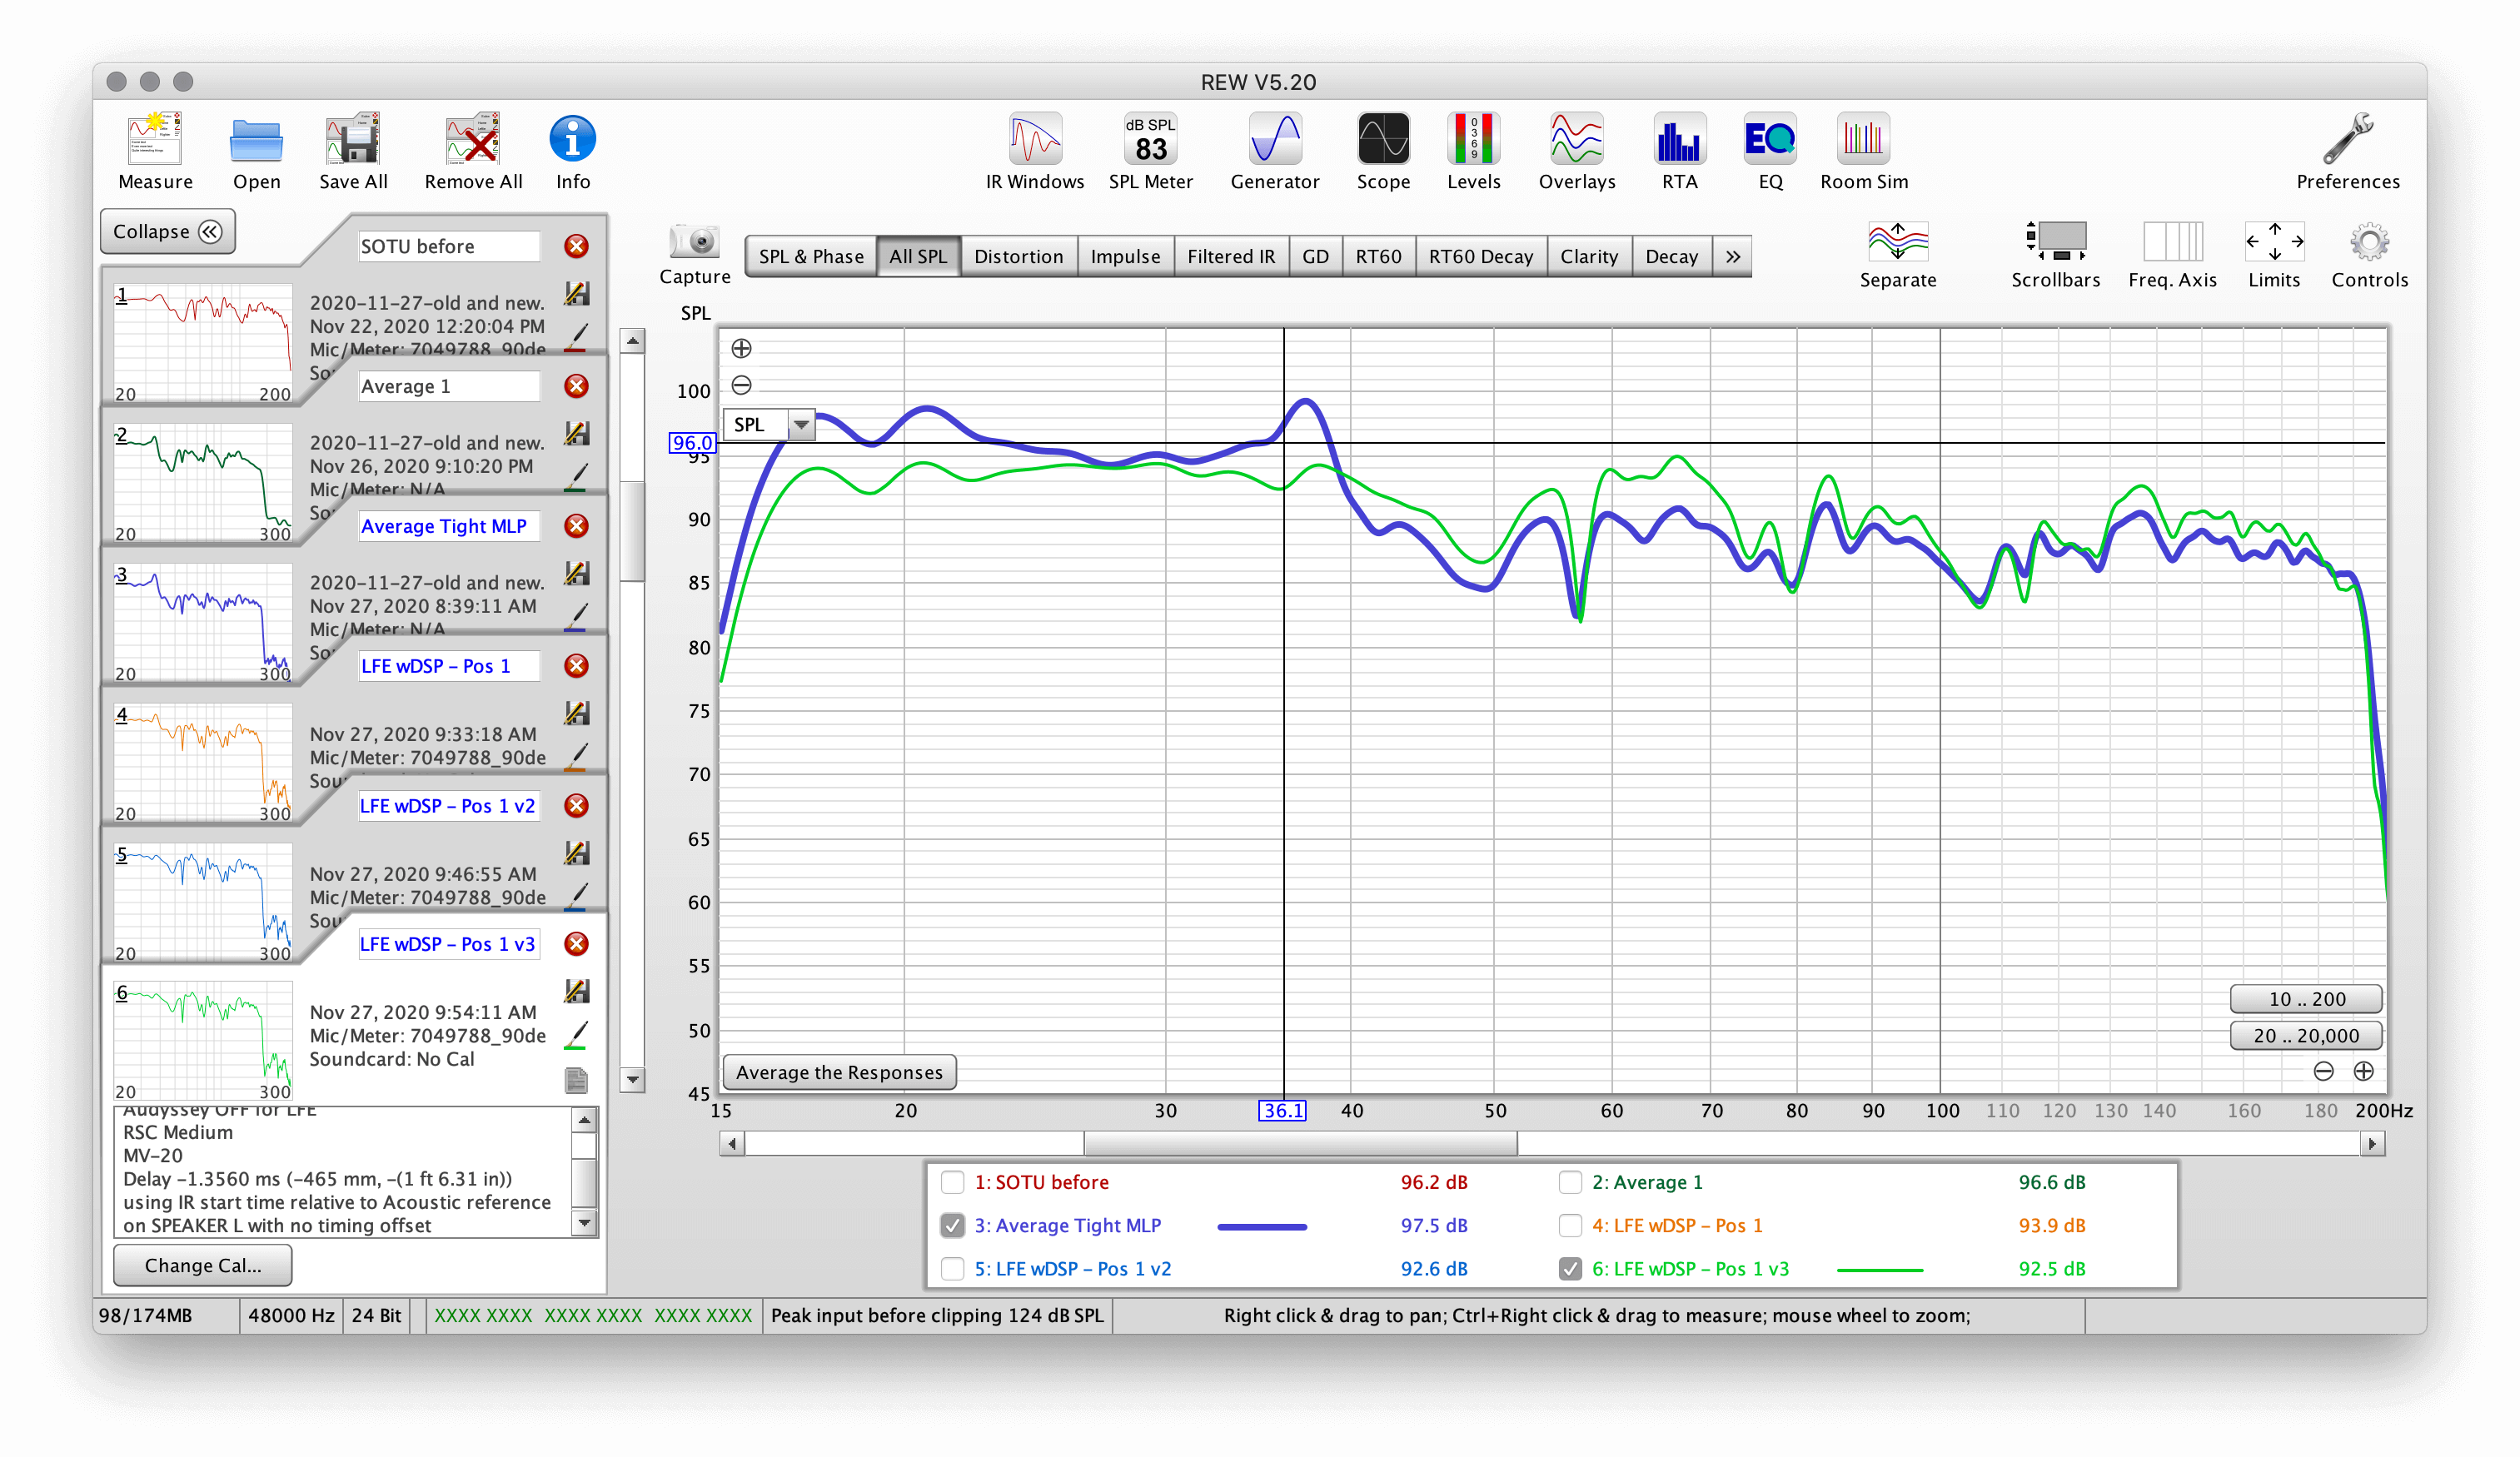
..and here is the final. Blue is the average of the uncorrected, and green is the average of the corrected. Doesn't look bad to me!
The temptation when satisfied with your work is to sit back and enjoy, but just one more - very important - thing! Remember that you'll likely not be doing this again for some time, so chances of you remembering and keeping track of everything is slim unless you document. So before you put everything away, do the following:
2020-11-27 Measurements After Amplifier SwapKeeping these items, and any other notes or measurements you took, handy is extremely helpful down the road. It will also give you a comparison point for when you make changes in the future.
I hope you've found this howto helpful!
Finally, I leave you with some of my favorite links relating to this topic.