This guide details how to configure a four subwoofer application in an oddly shaped room, using REW and a miniDSP. For determining placement options, see the article Subwoofer Placement Technique in an Oddly Shaped Room. Using that technique, I was able to determine the following locations as being ideal for subwoofer placements in my space:
We're now going to detail out how to configure this four subwoofer application. While you may already have the measurements from using the Subwoofer Placement Technique in an Oddly Shaped Room method, once the actual subwoofers are placed in their locations I do recommend re-measuring, so that's what we'll do.
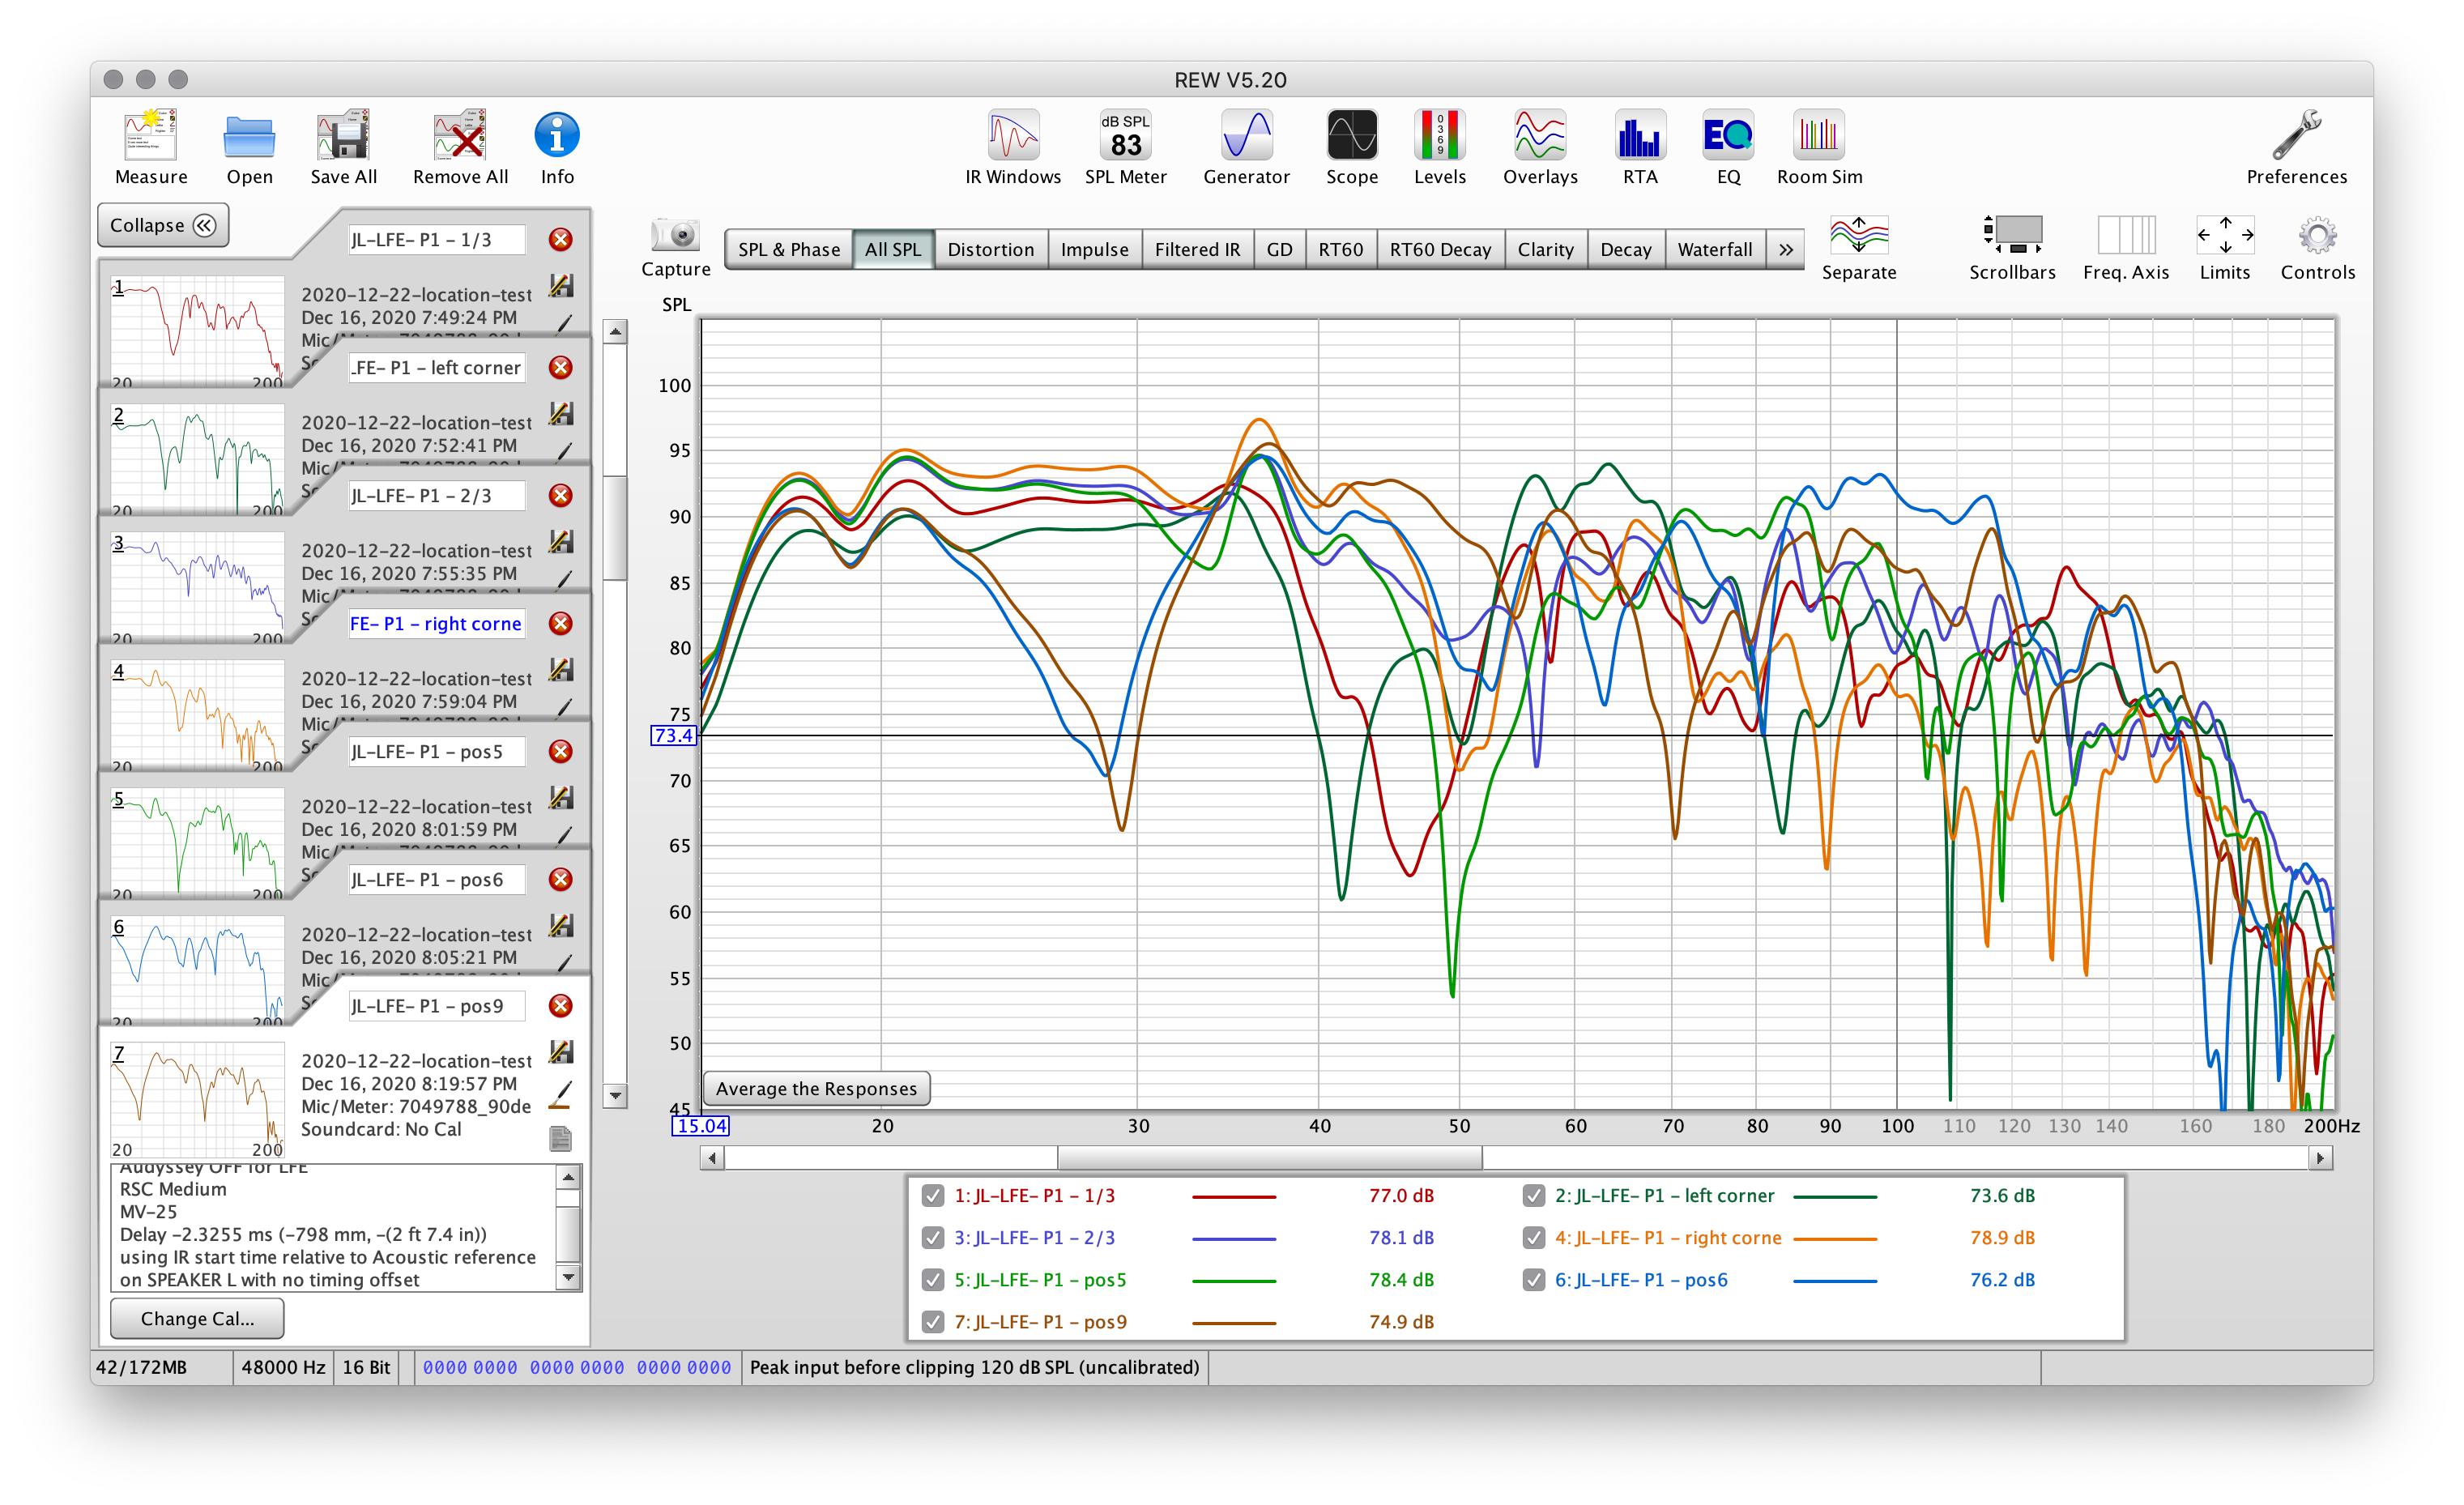
You certainly can use a point cloud, but for this article we're going to just measure the MLP.
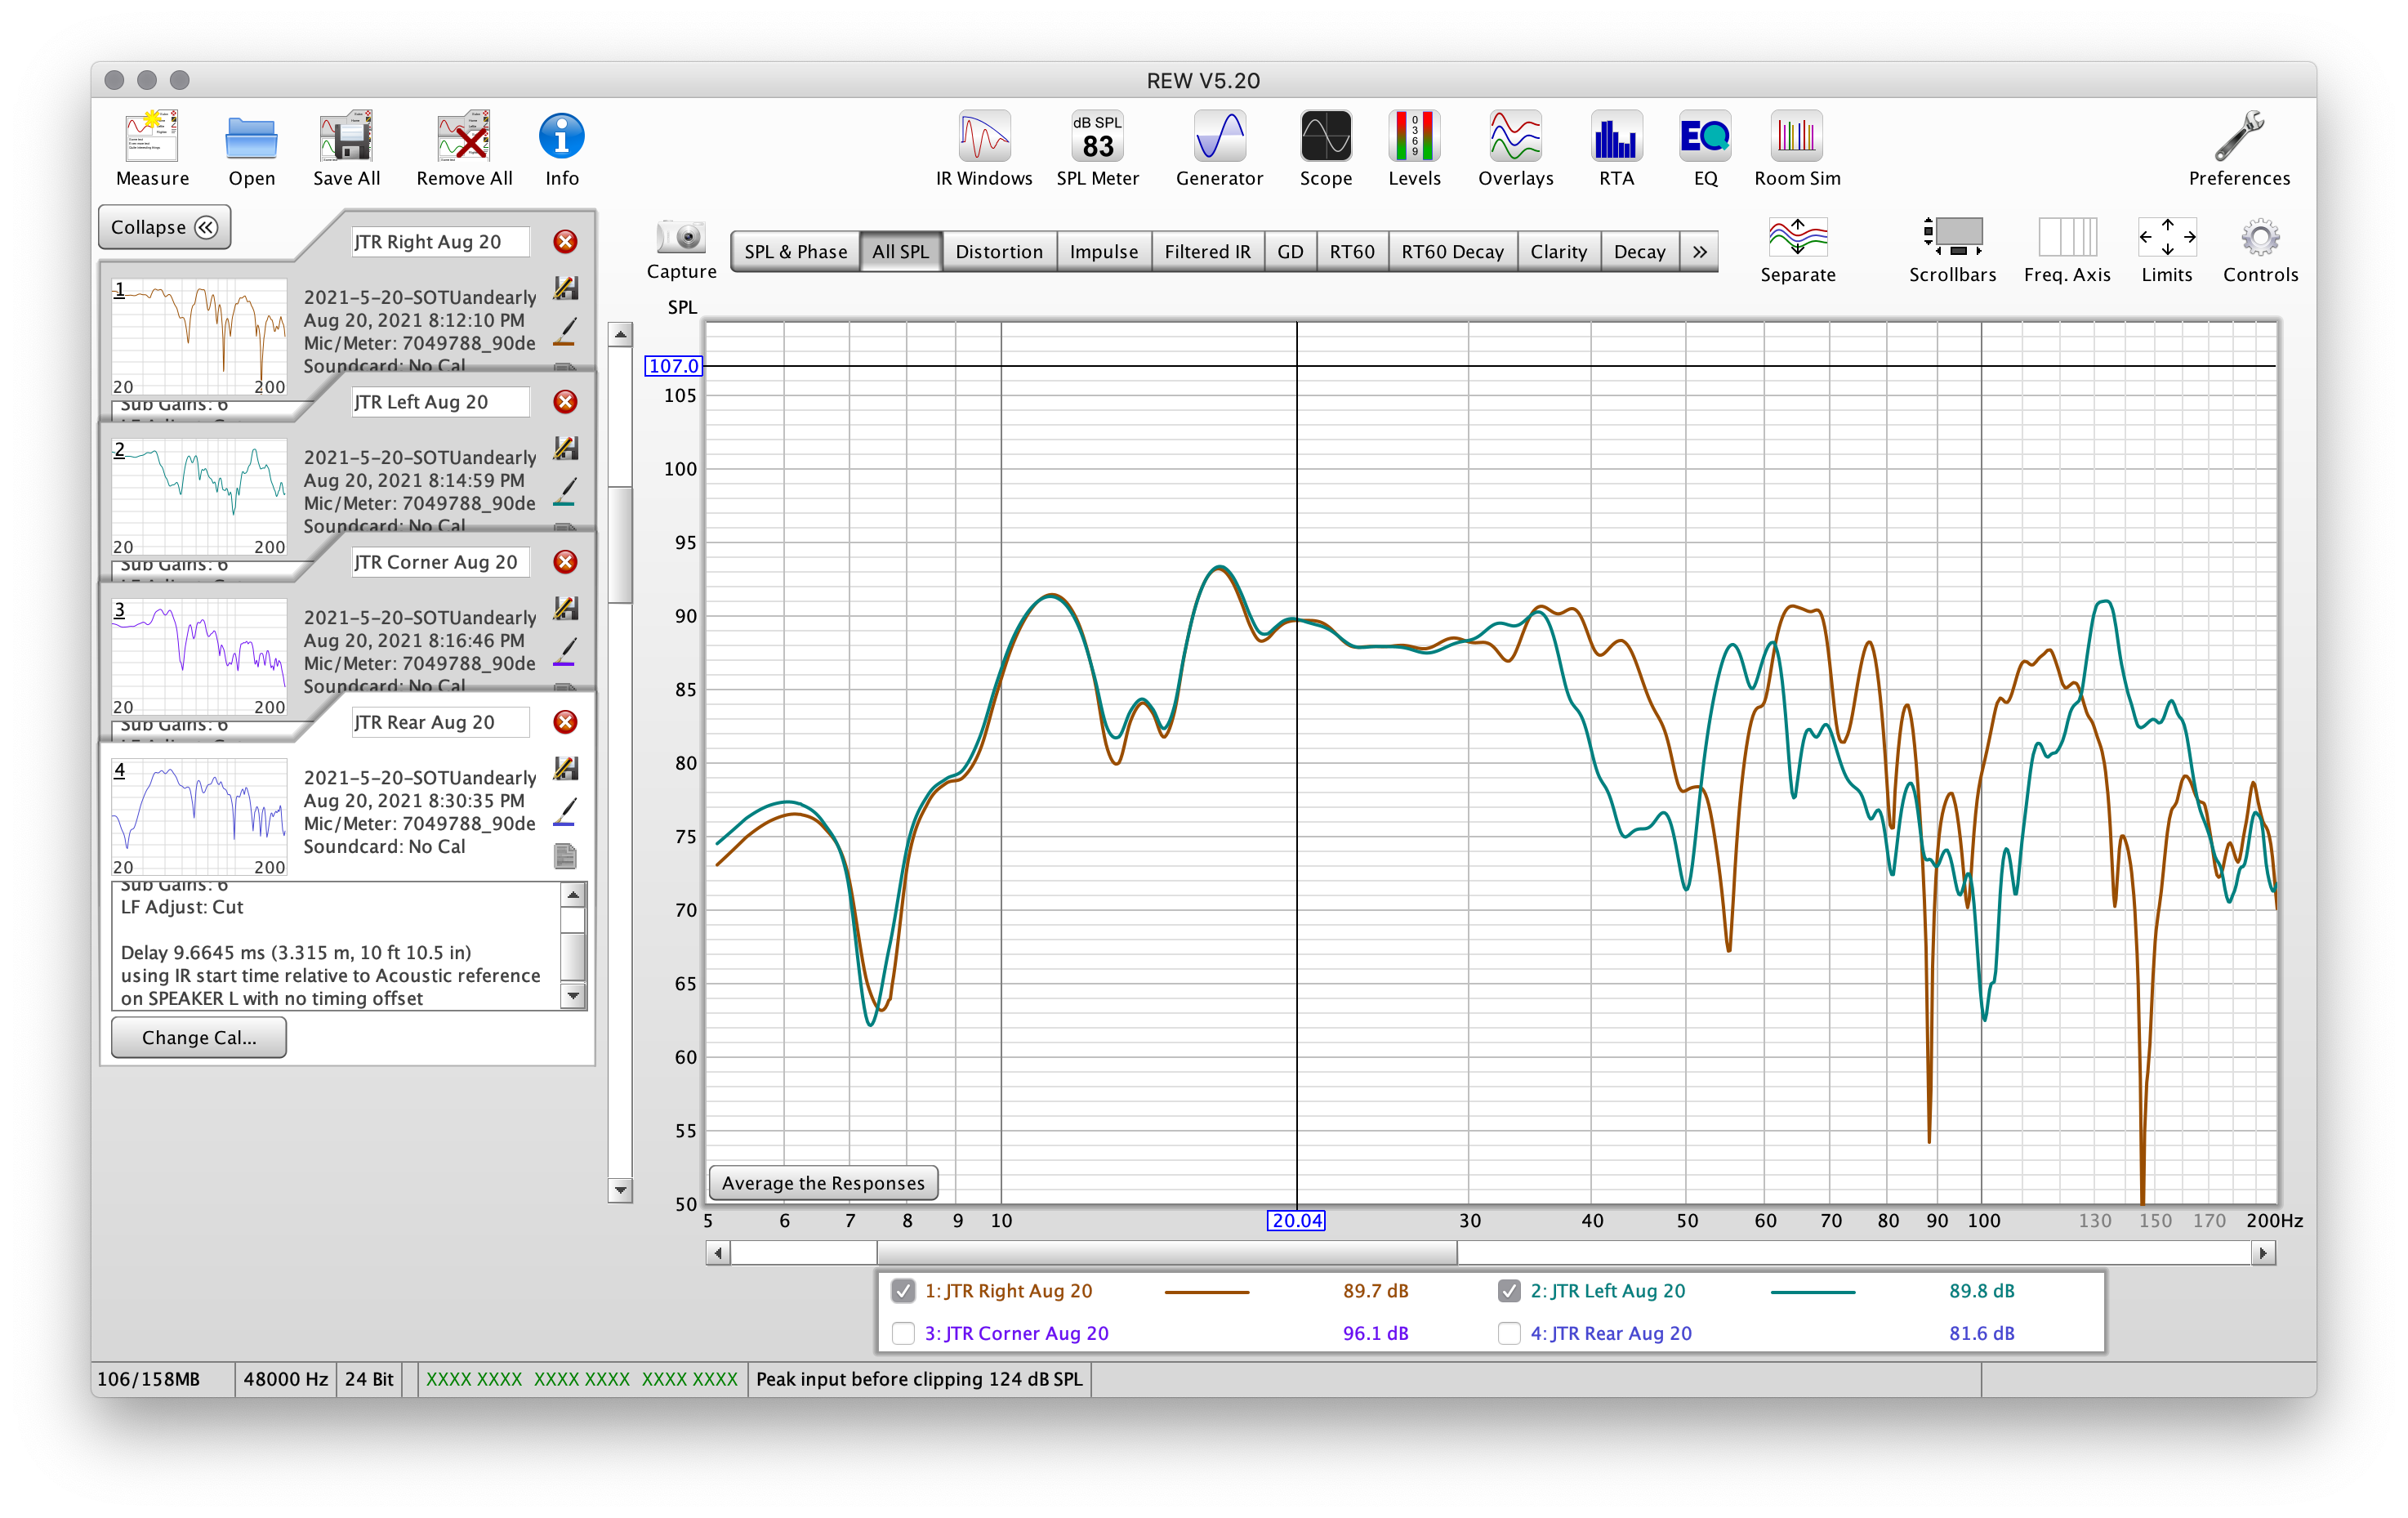
Moving the subwoofer to each location, take a sweep within REW, labelling each accordingly. When complete you should have something like this:
For more information this process, see [THIS - USE THE OLD FILE AND END IT EARLY] article.
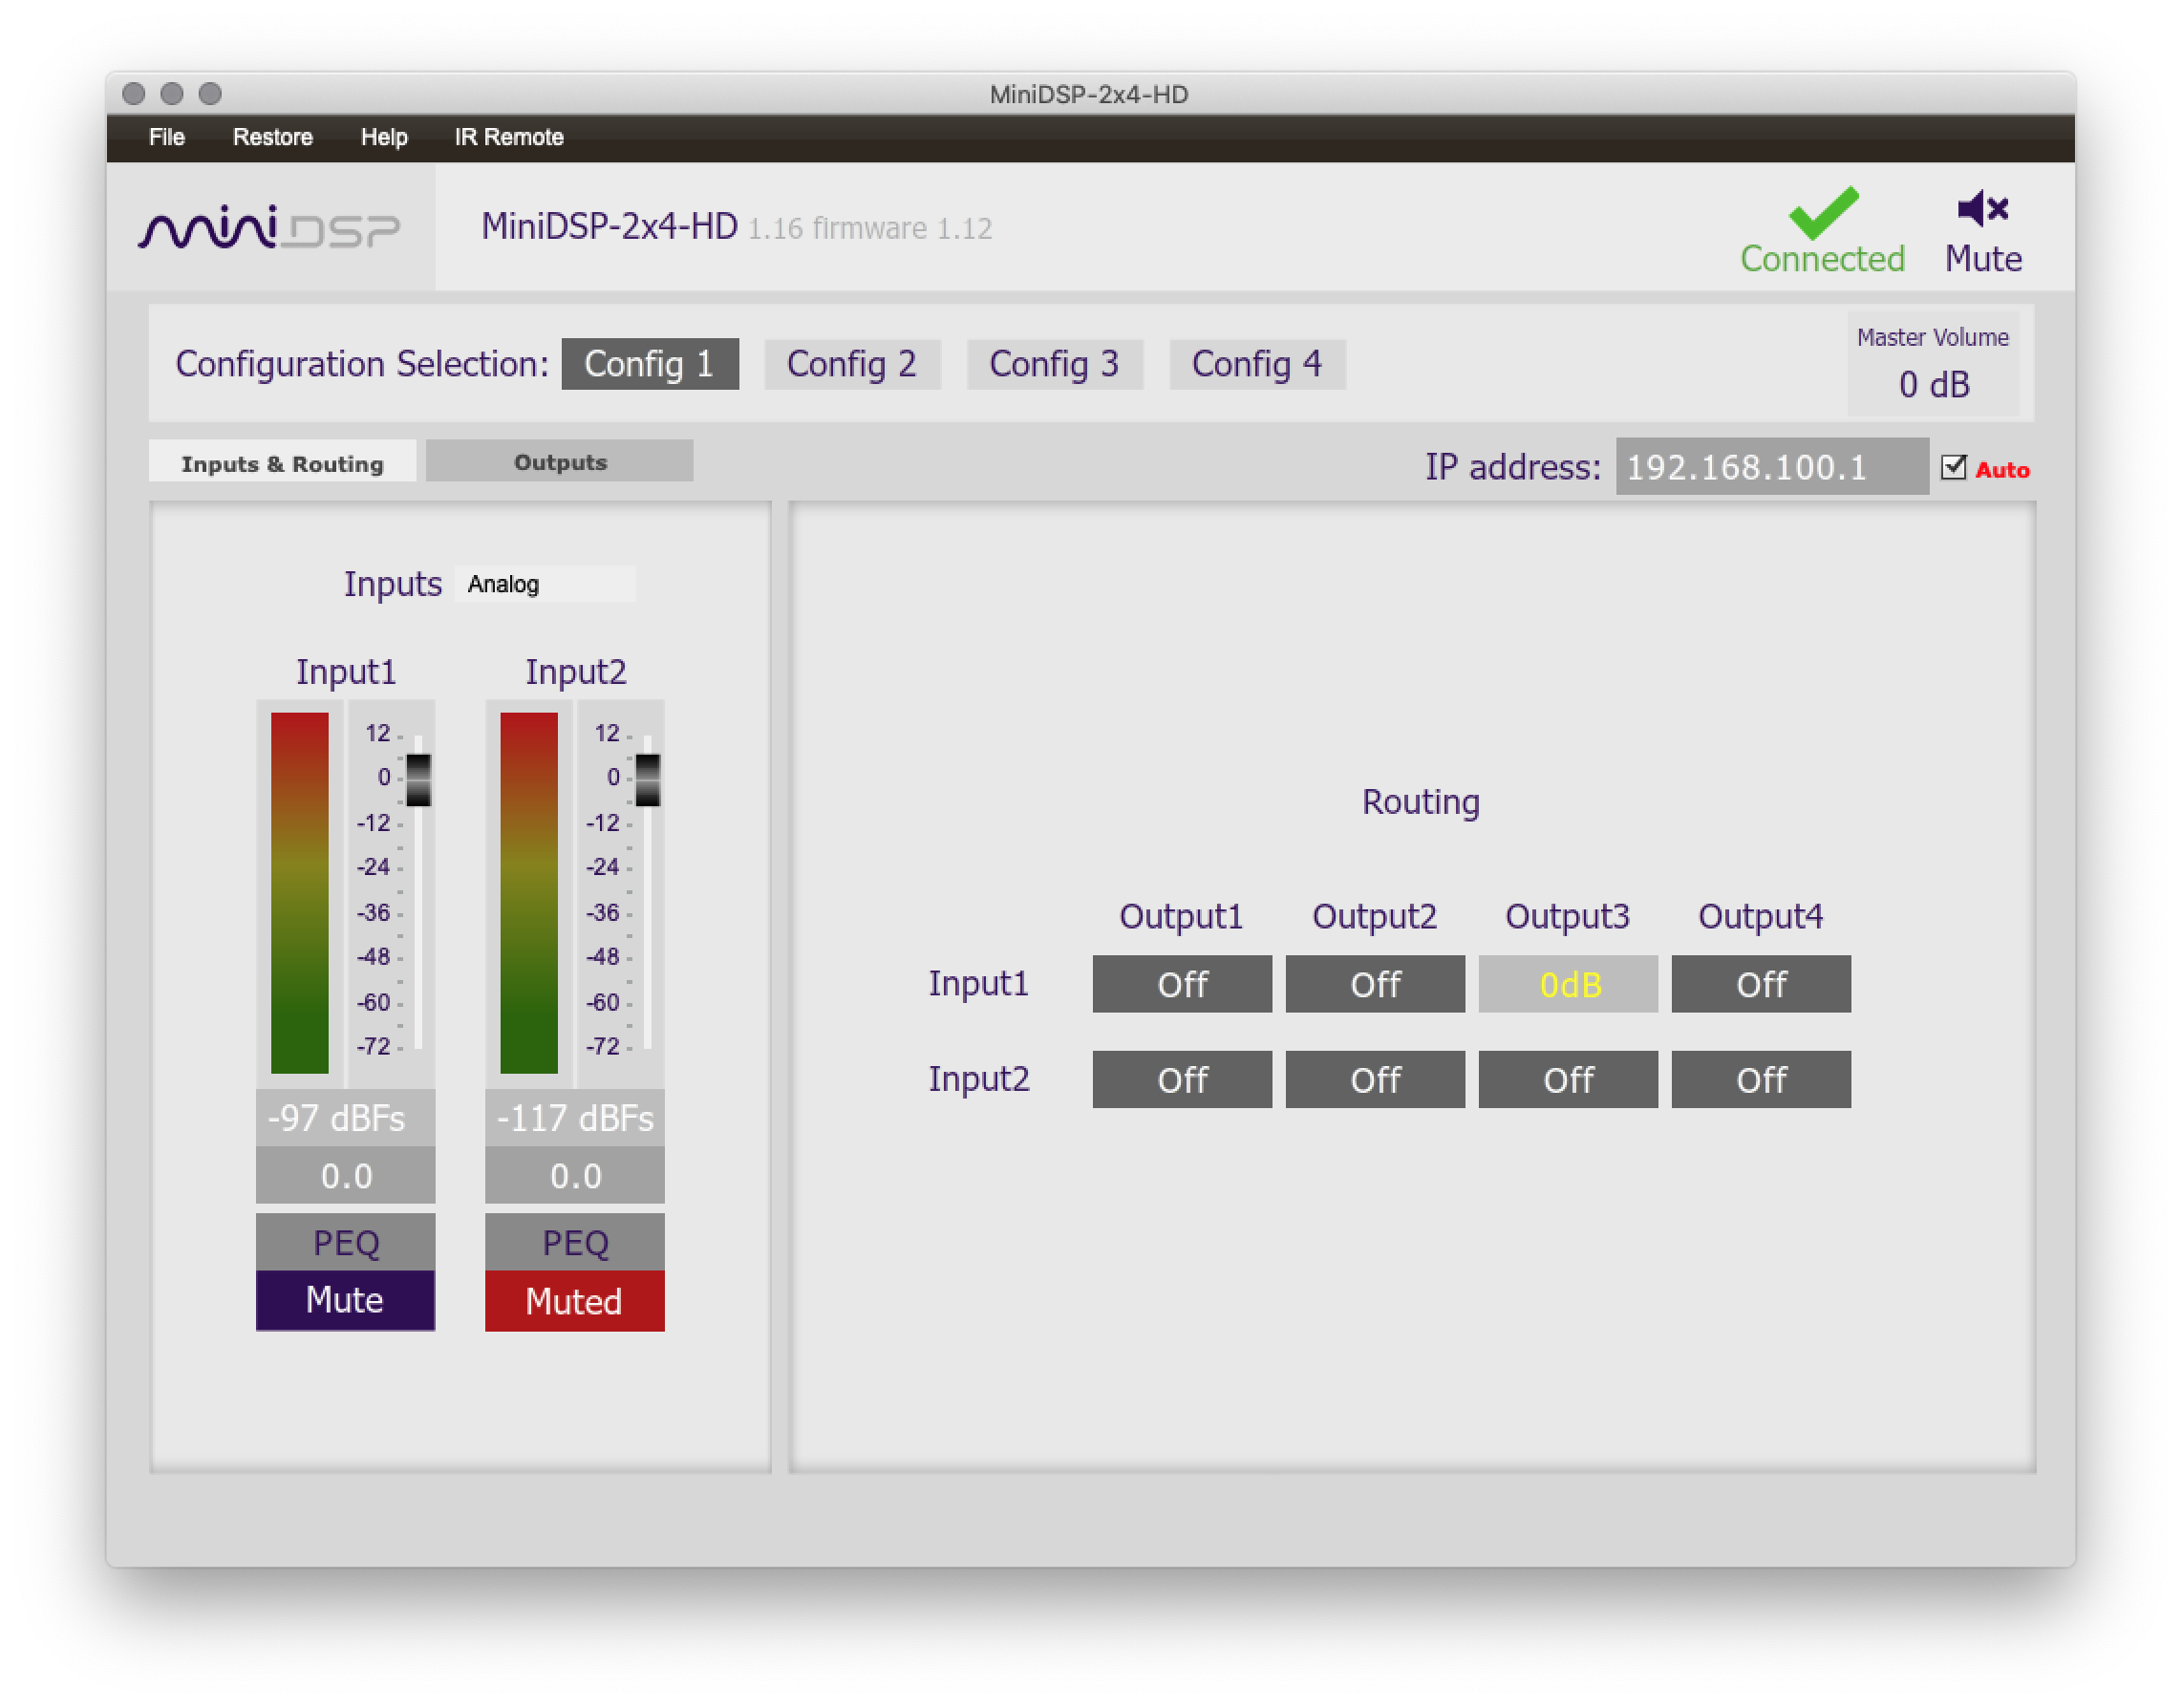
First make sure that when you take these measurements, that there is no EQ enabled upstream. Audyssey needs to be disabled and don't forget to check that your MiniDSP crossovers are disabled and no EQ is being applied within it. MiniDSPs come from the factory with some pre-set crossover highpass/lowpass enabled, which has thrown me through a loop before. Check each output and input!
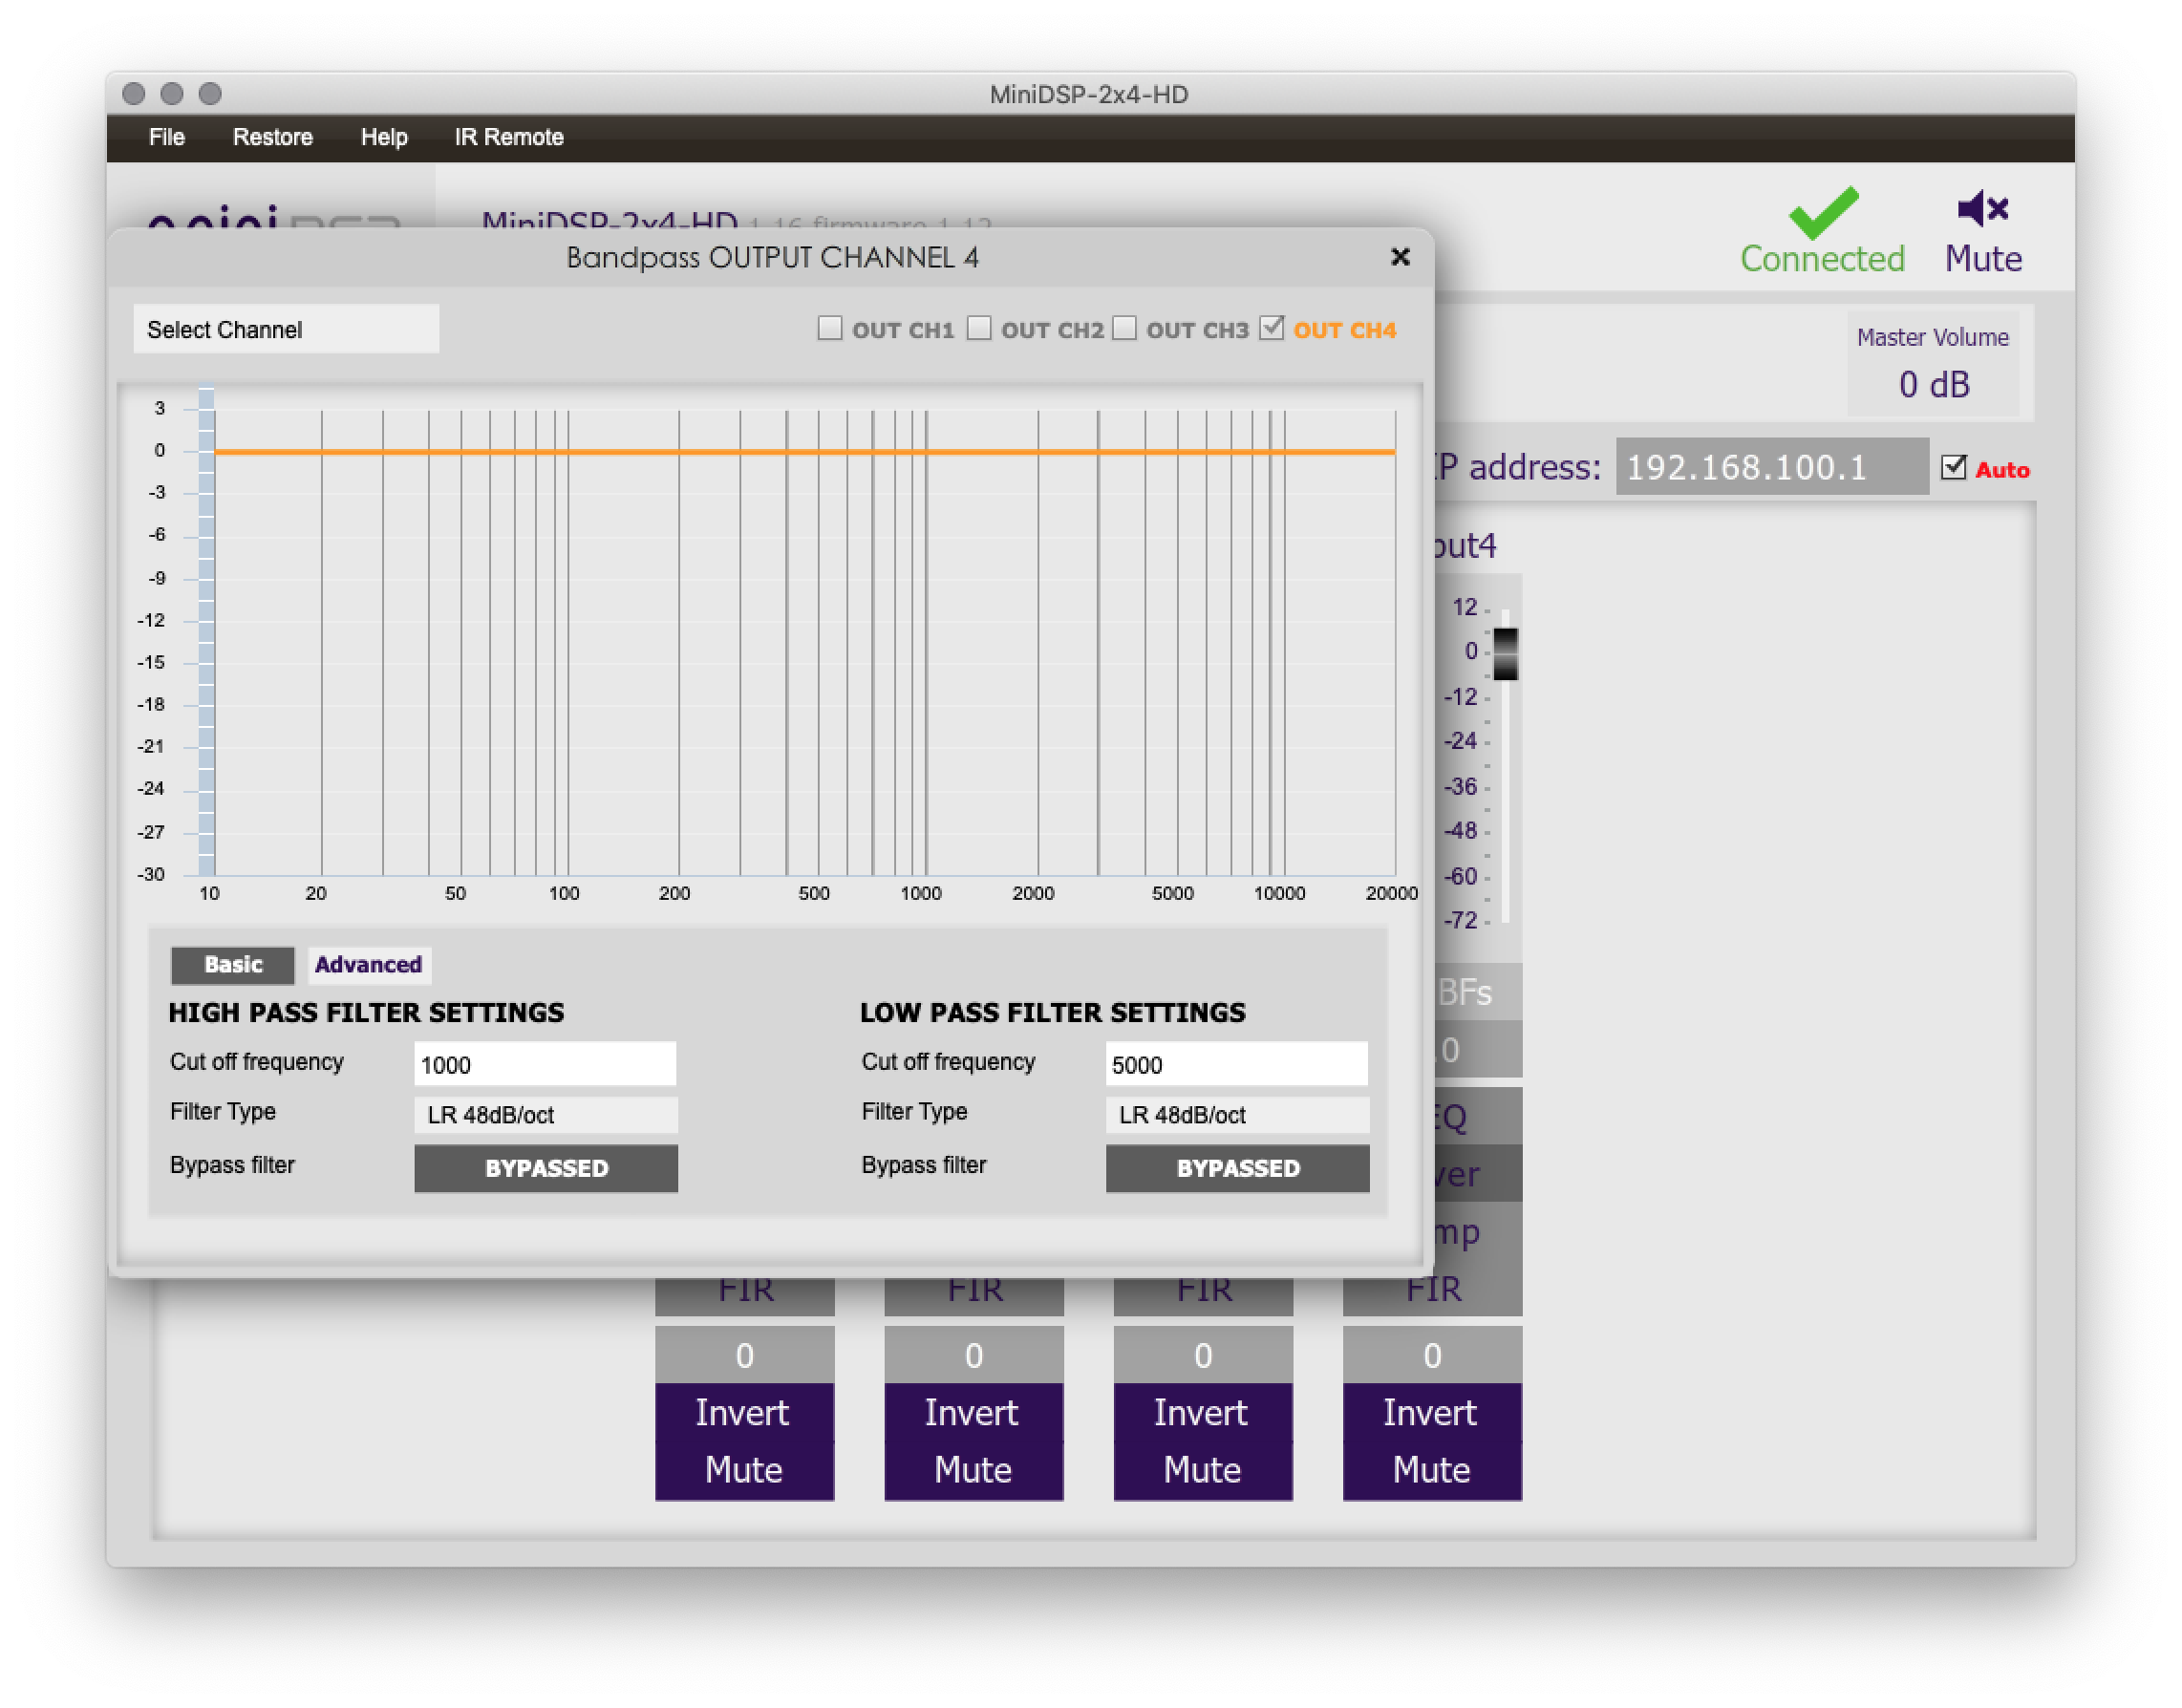
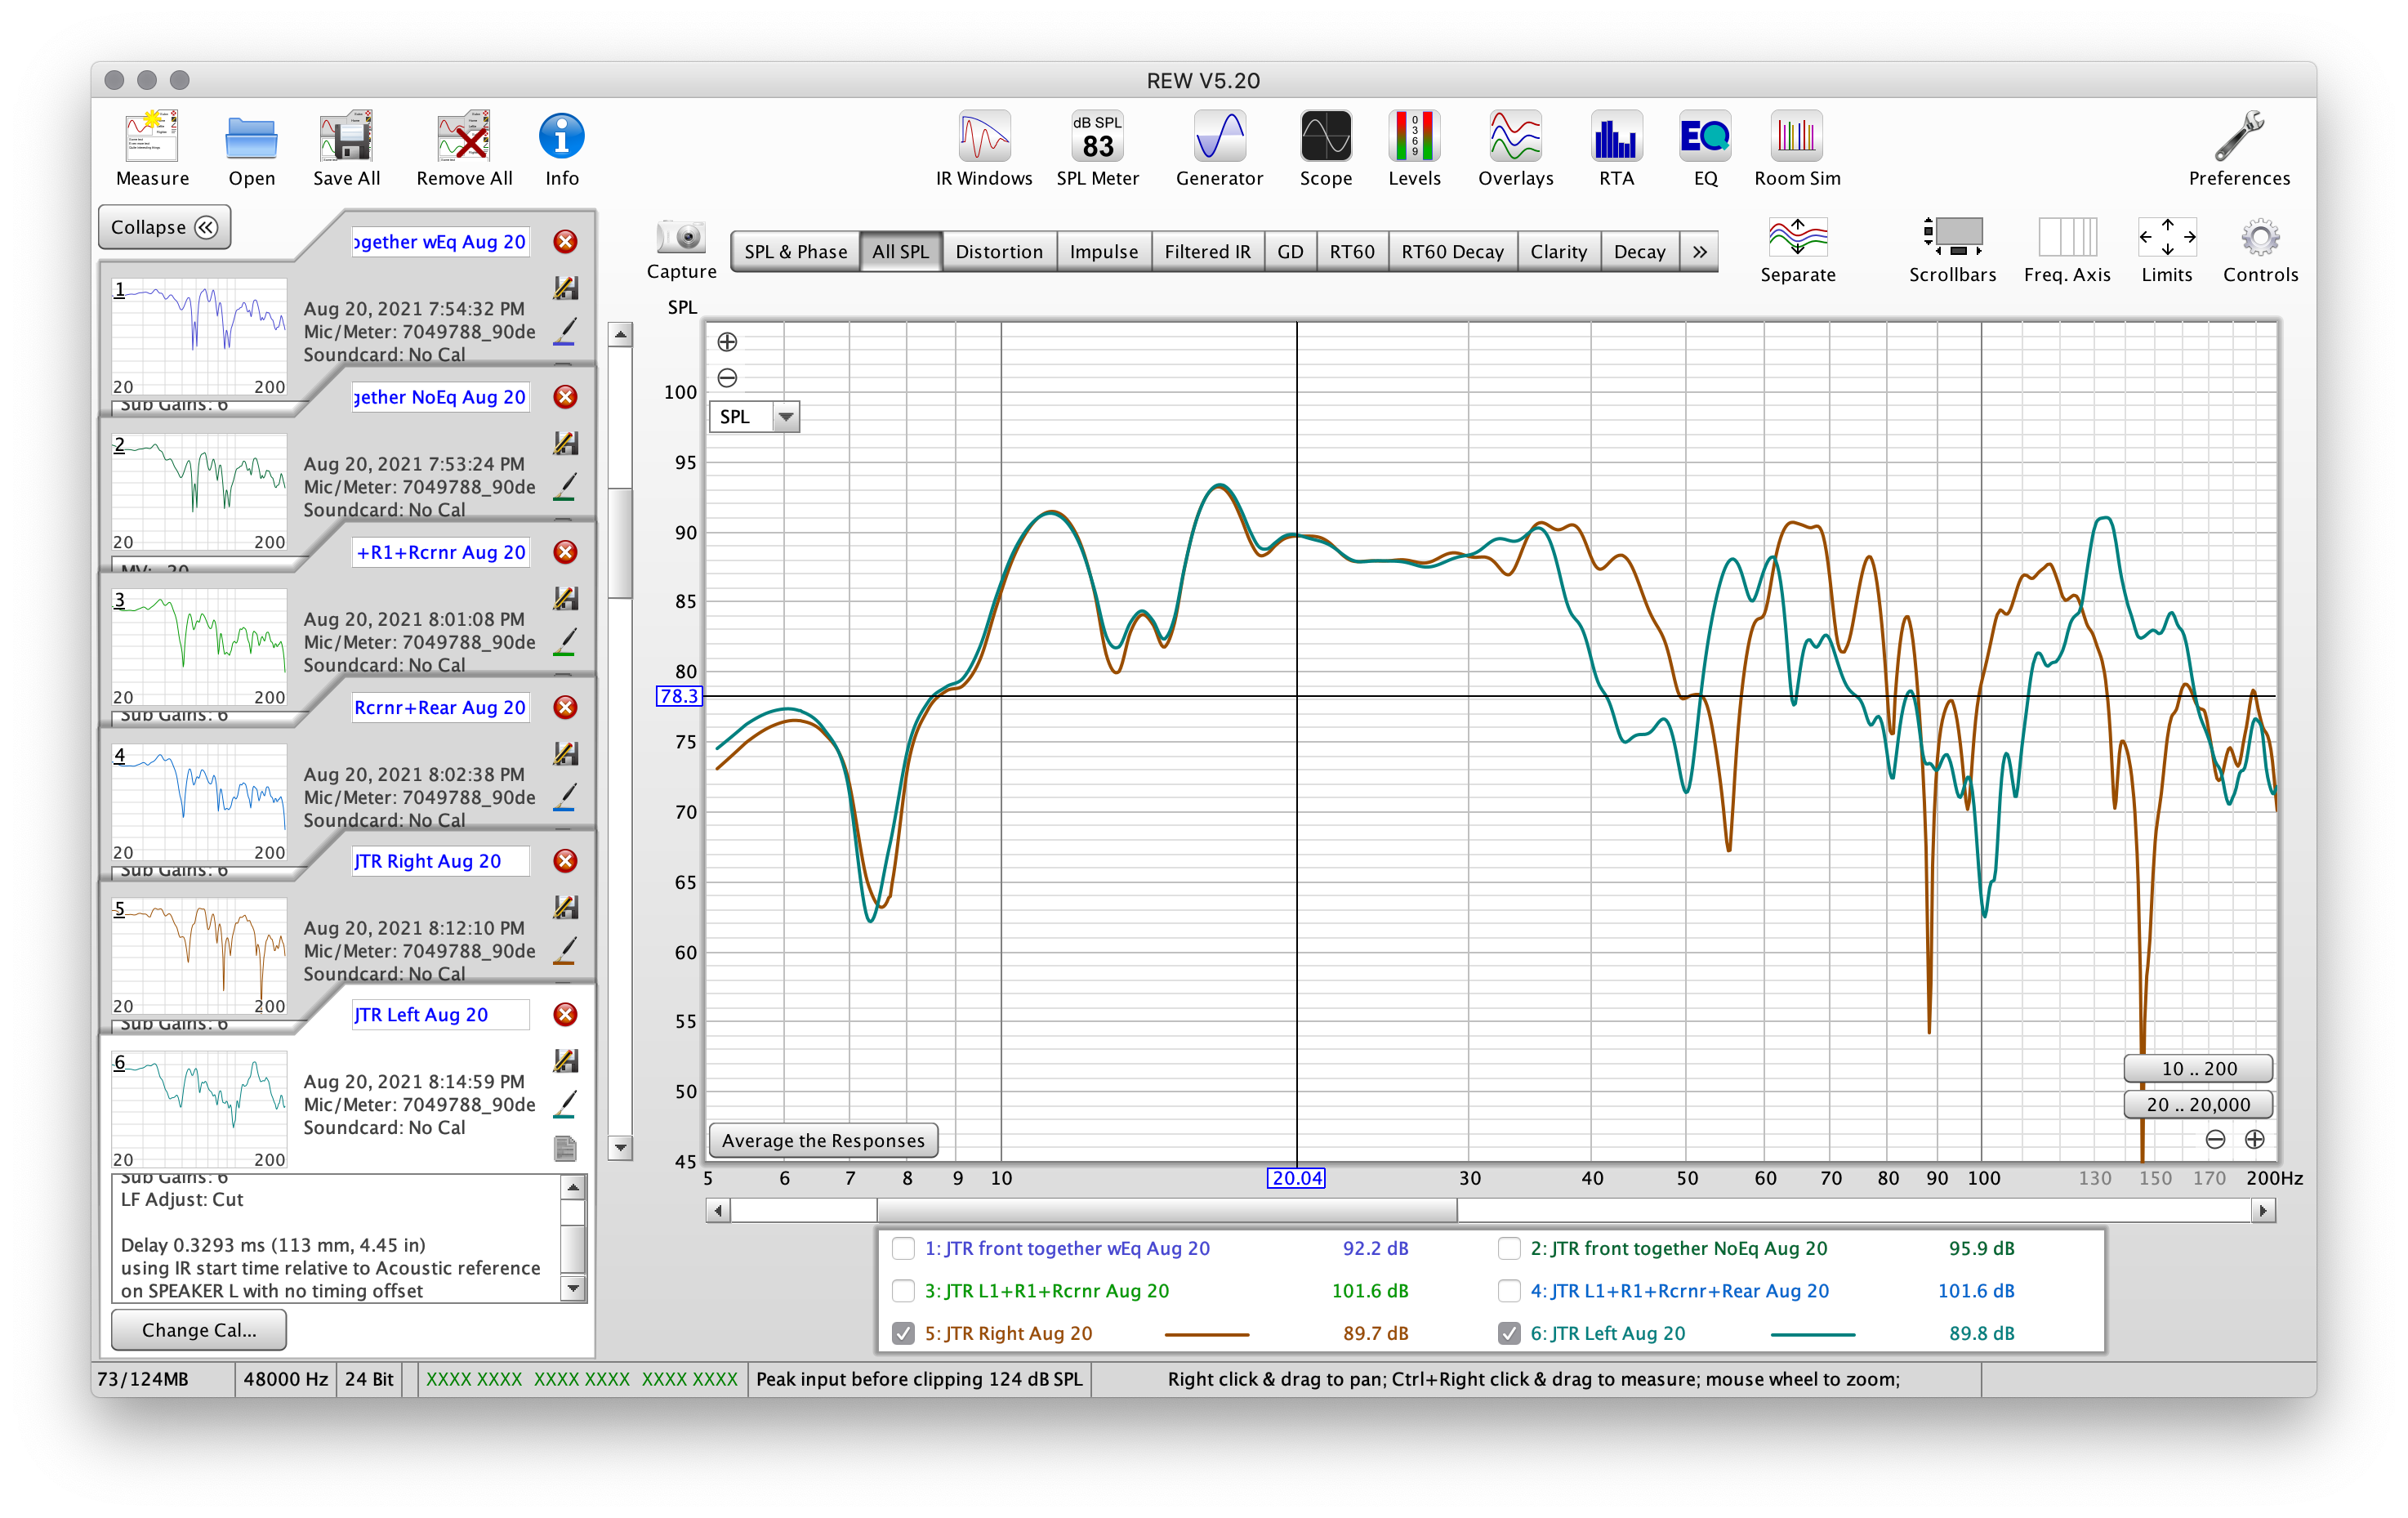
First, I'm going to take a measurement of the "Right" location (no EQ). I have four subwoofers connected, so I'm just going to enable the one output from the MiniDSP and disable the rest - that way I'm just measuring the subwoofer location of interest:

Now we'll use REW to take a measurement of just that particular subwoofer:
Next, we're going to select only output 2 in the miniDSP to measure the left subwoofer location alone.

That measurement yielded this result:
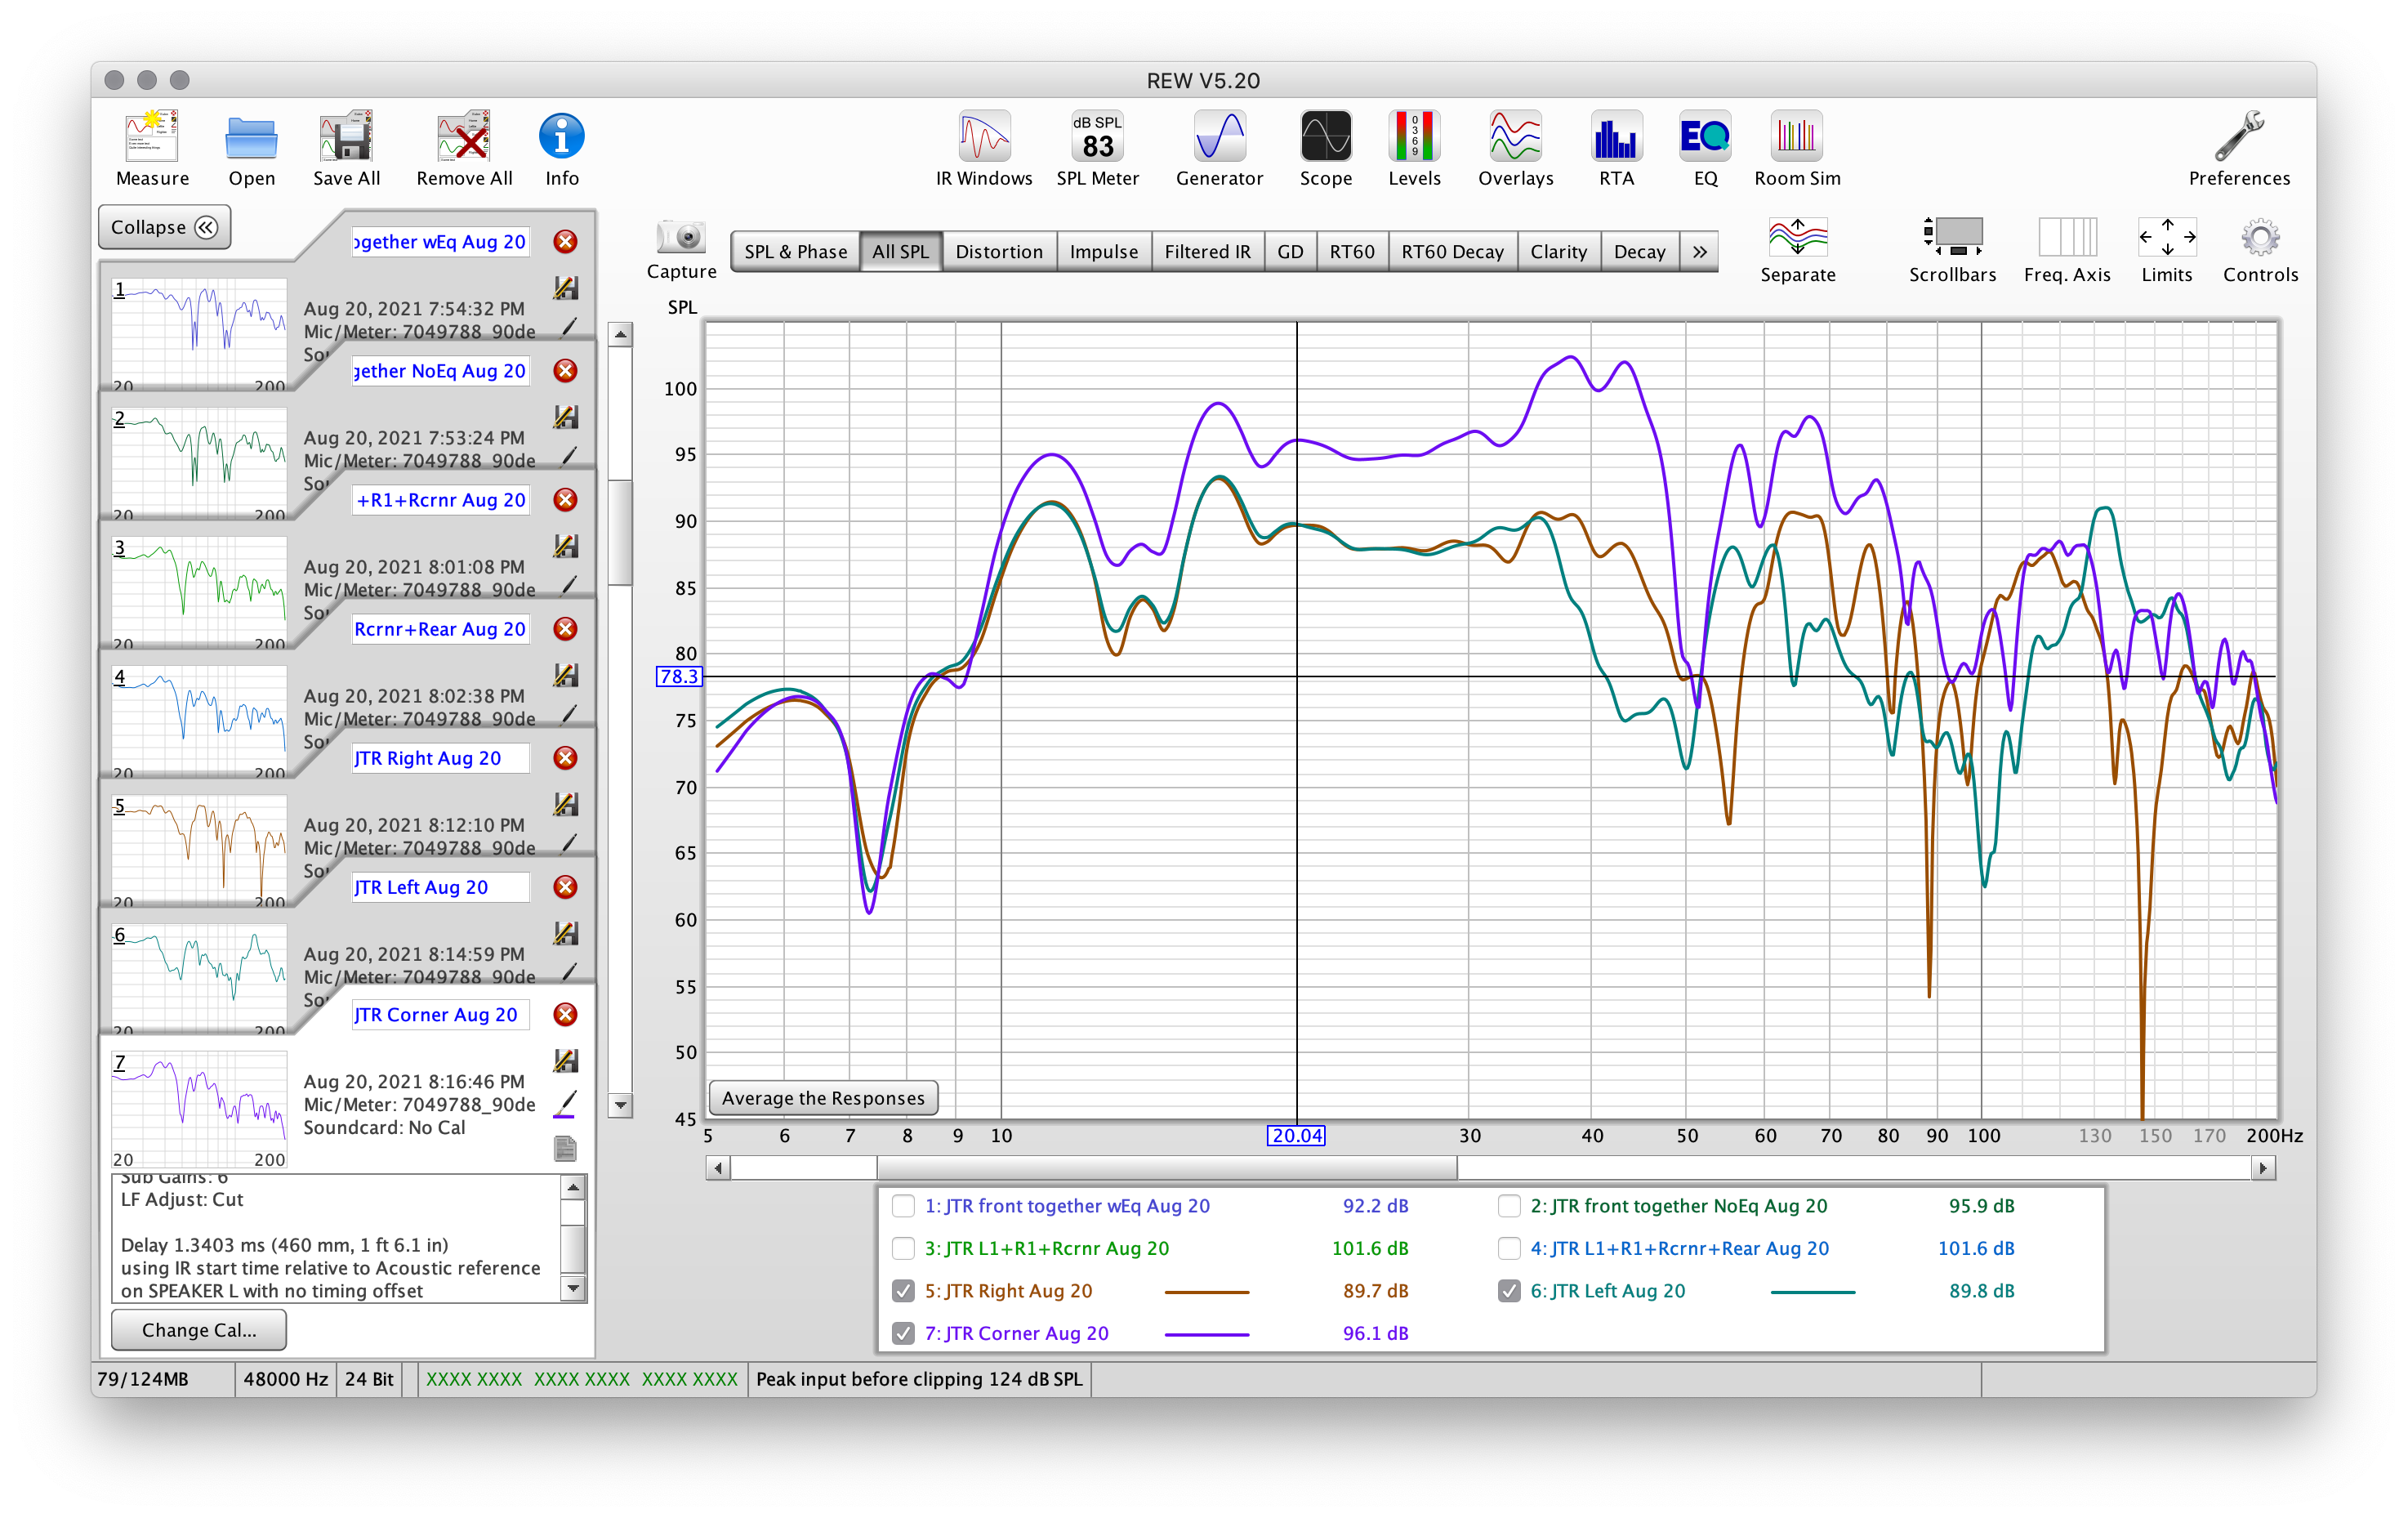
Now I'm going to select only output 3 in the miniDSP to measure the corner subwoofer location alone.
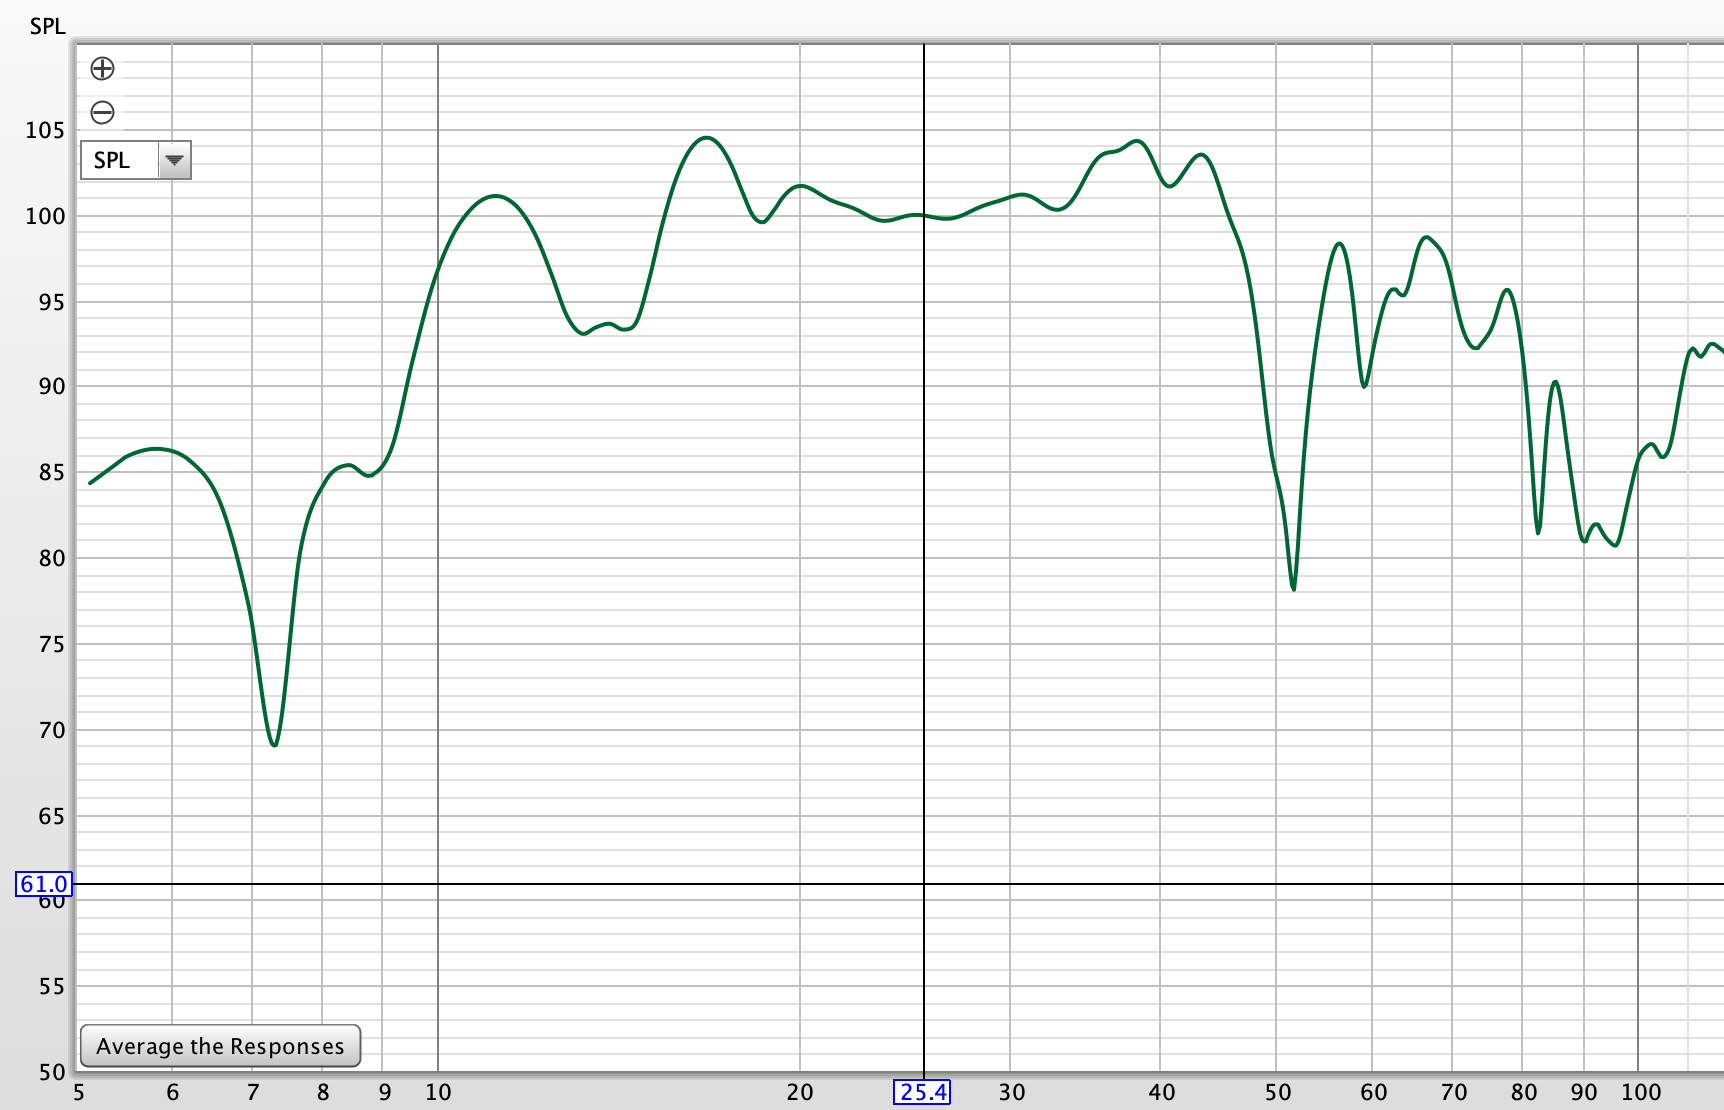
The result of the corner subwoofer:
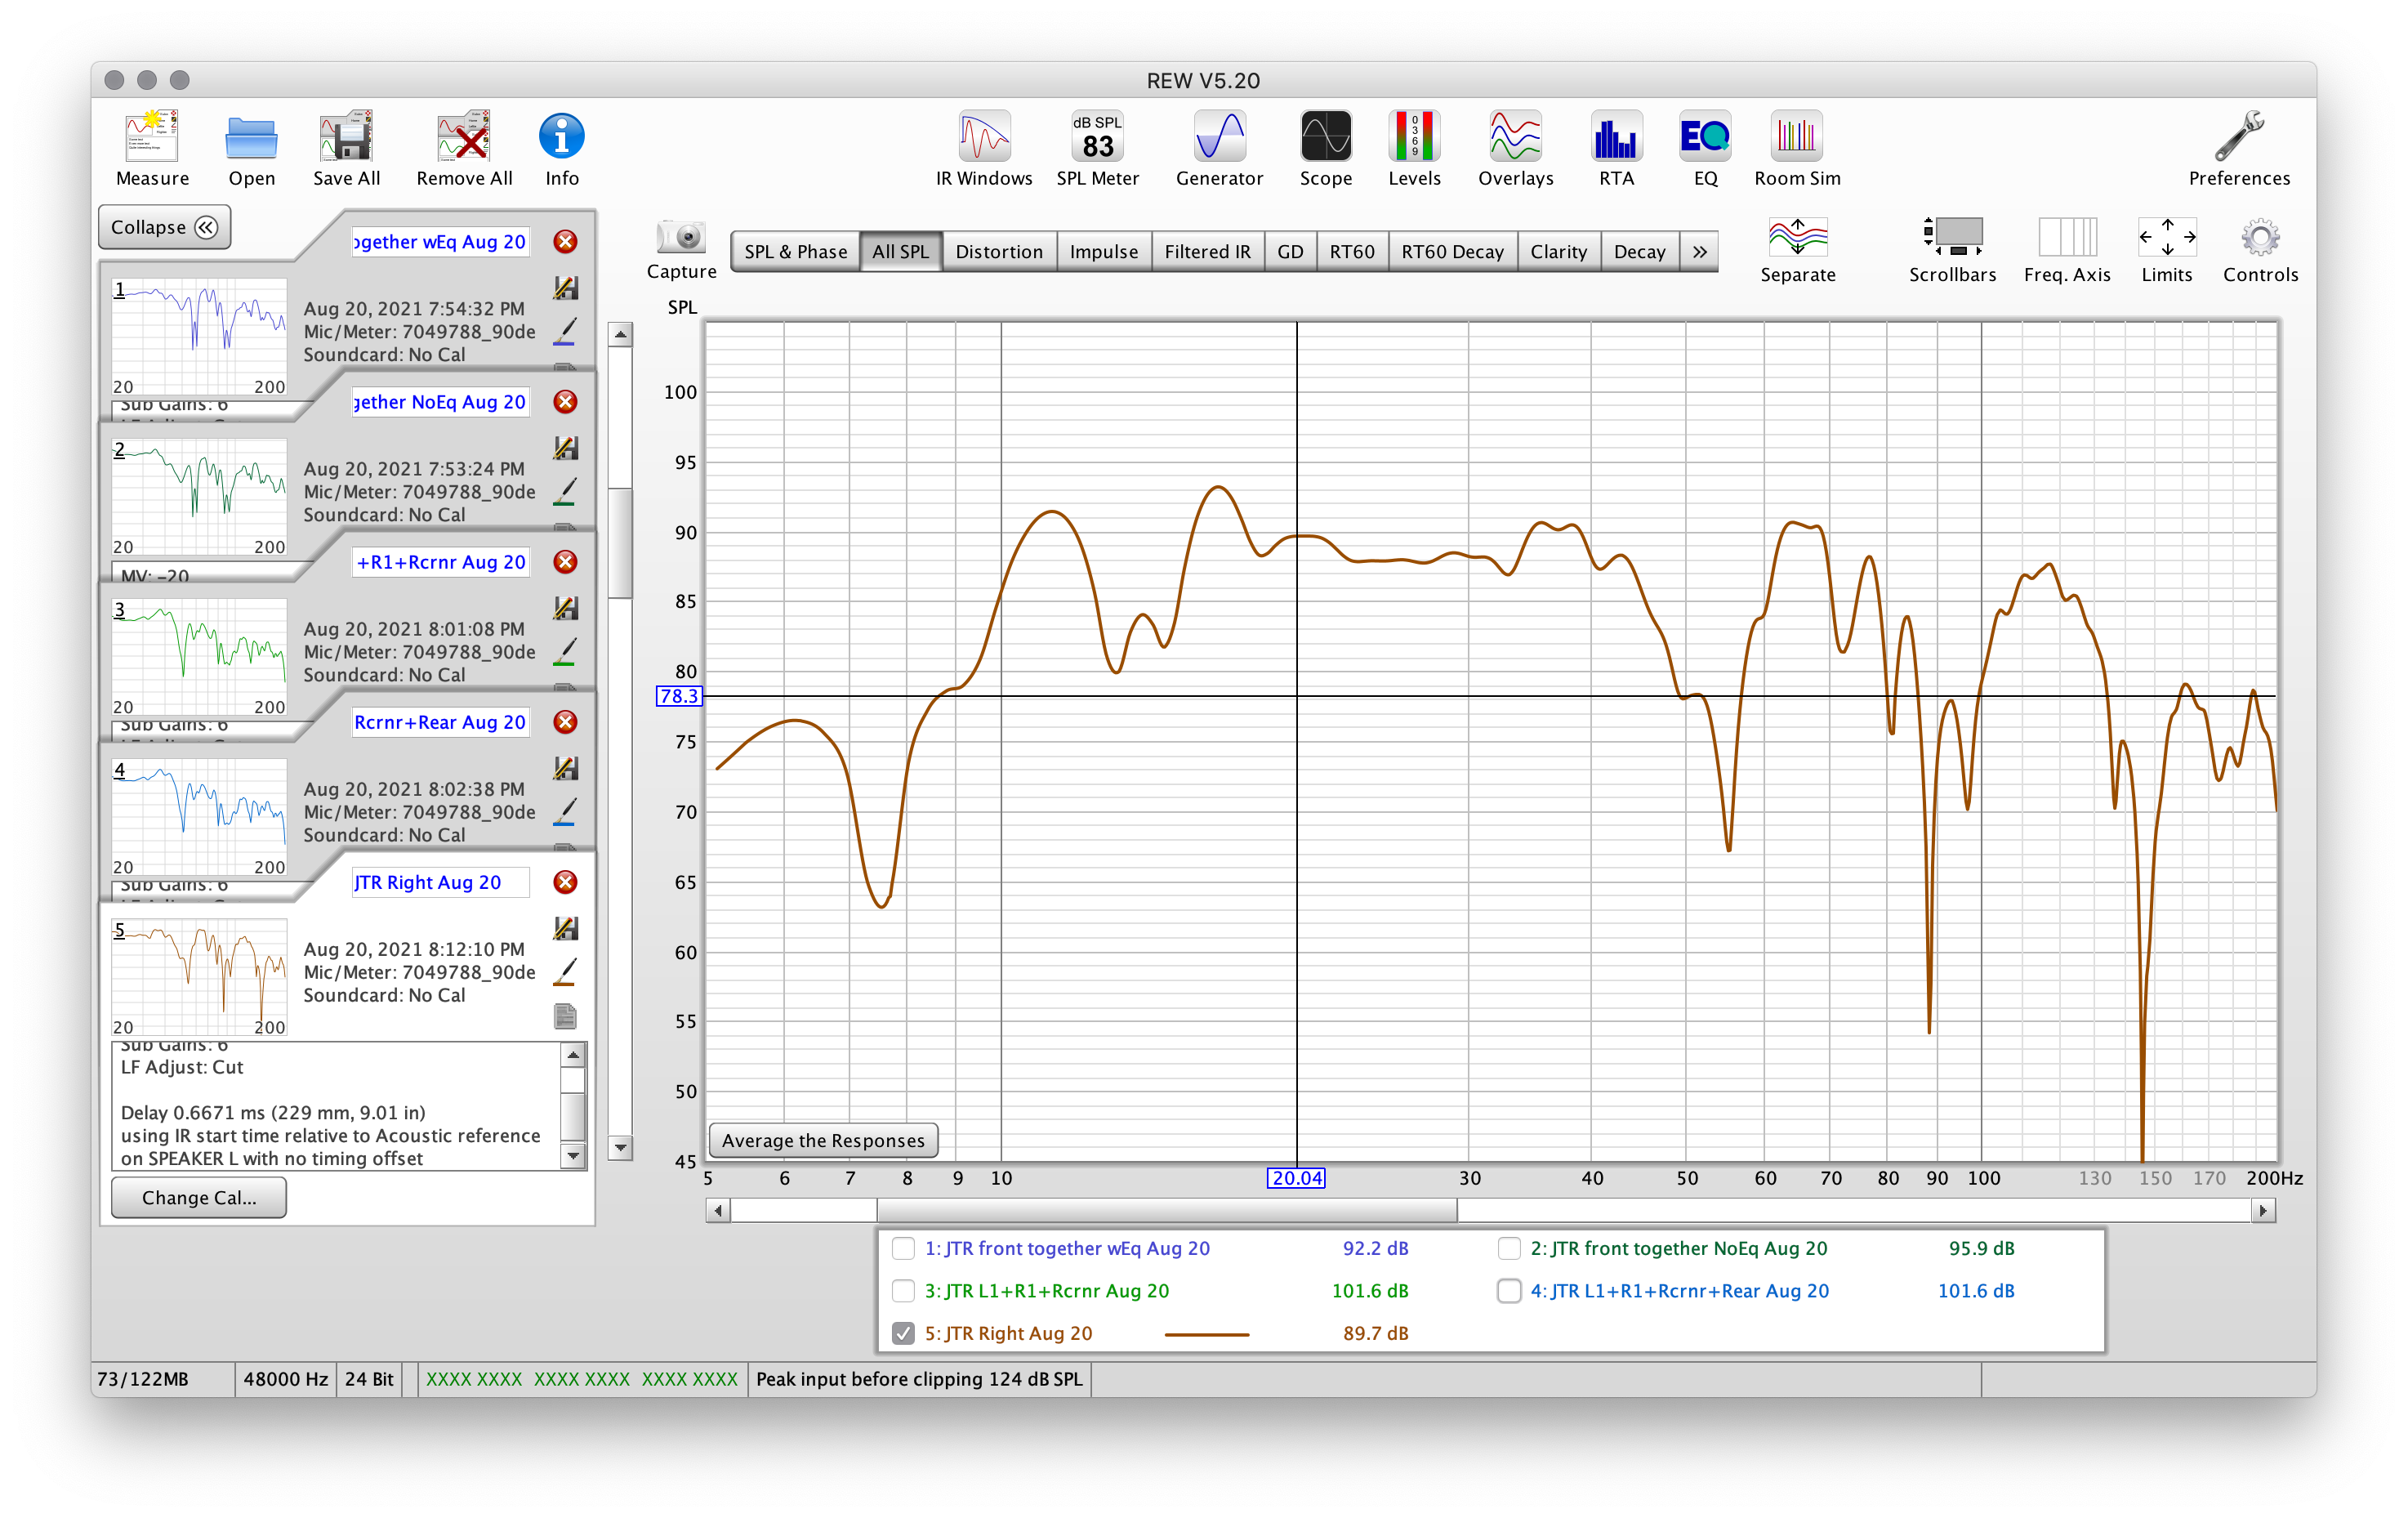
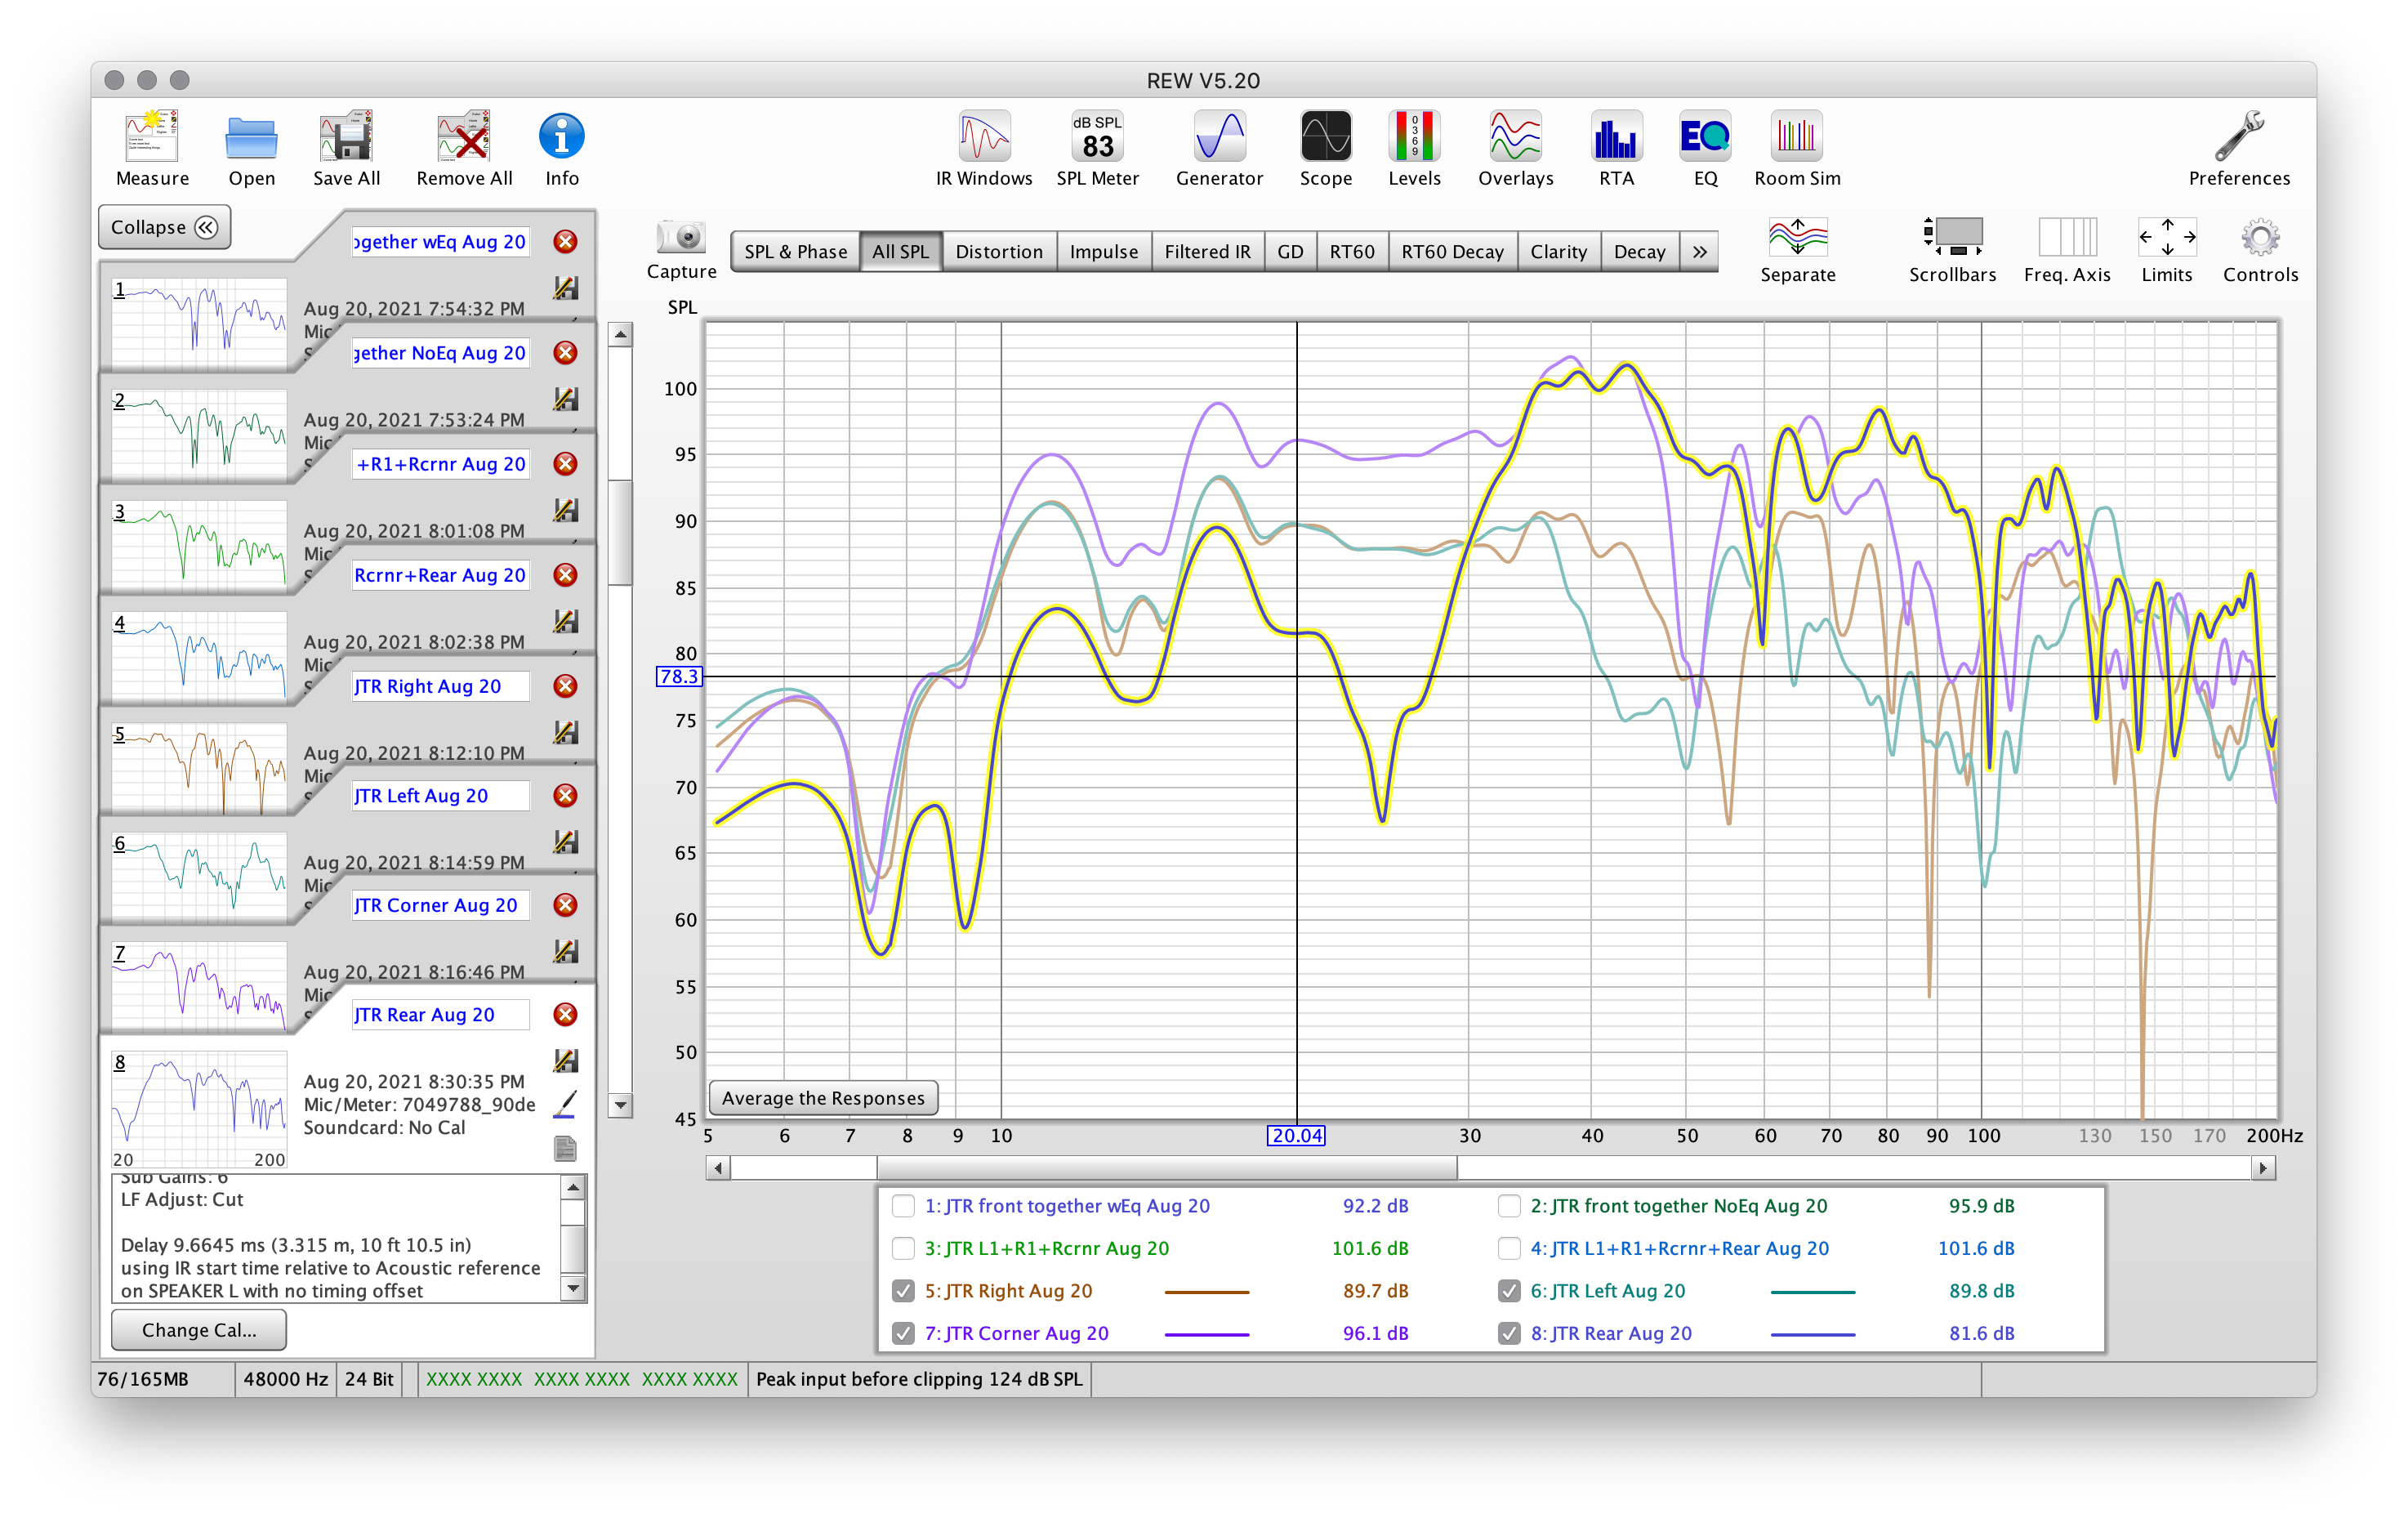
And finally lets measure the subwoofer in the rear location - remember to select the correct output if using multiples connected simultaneously.
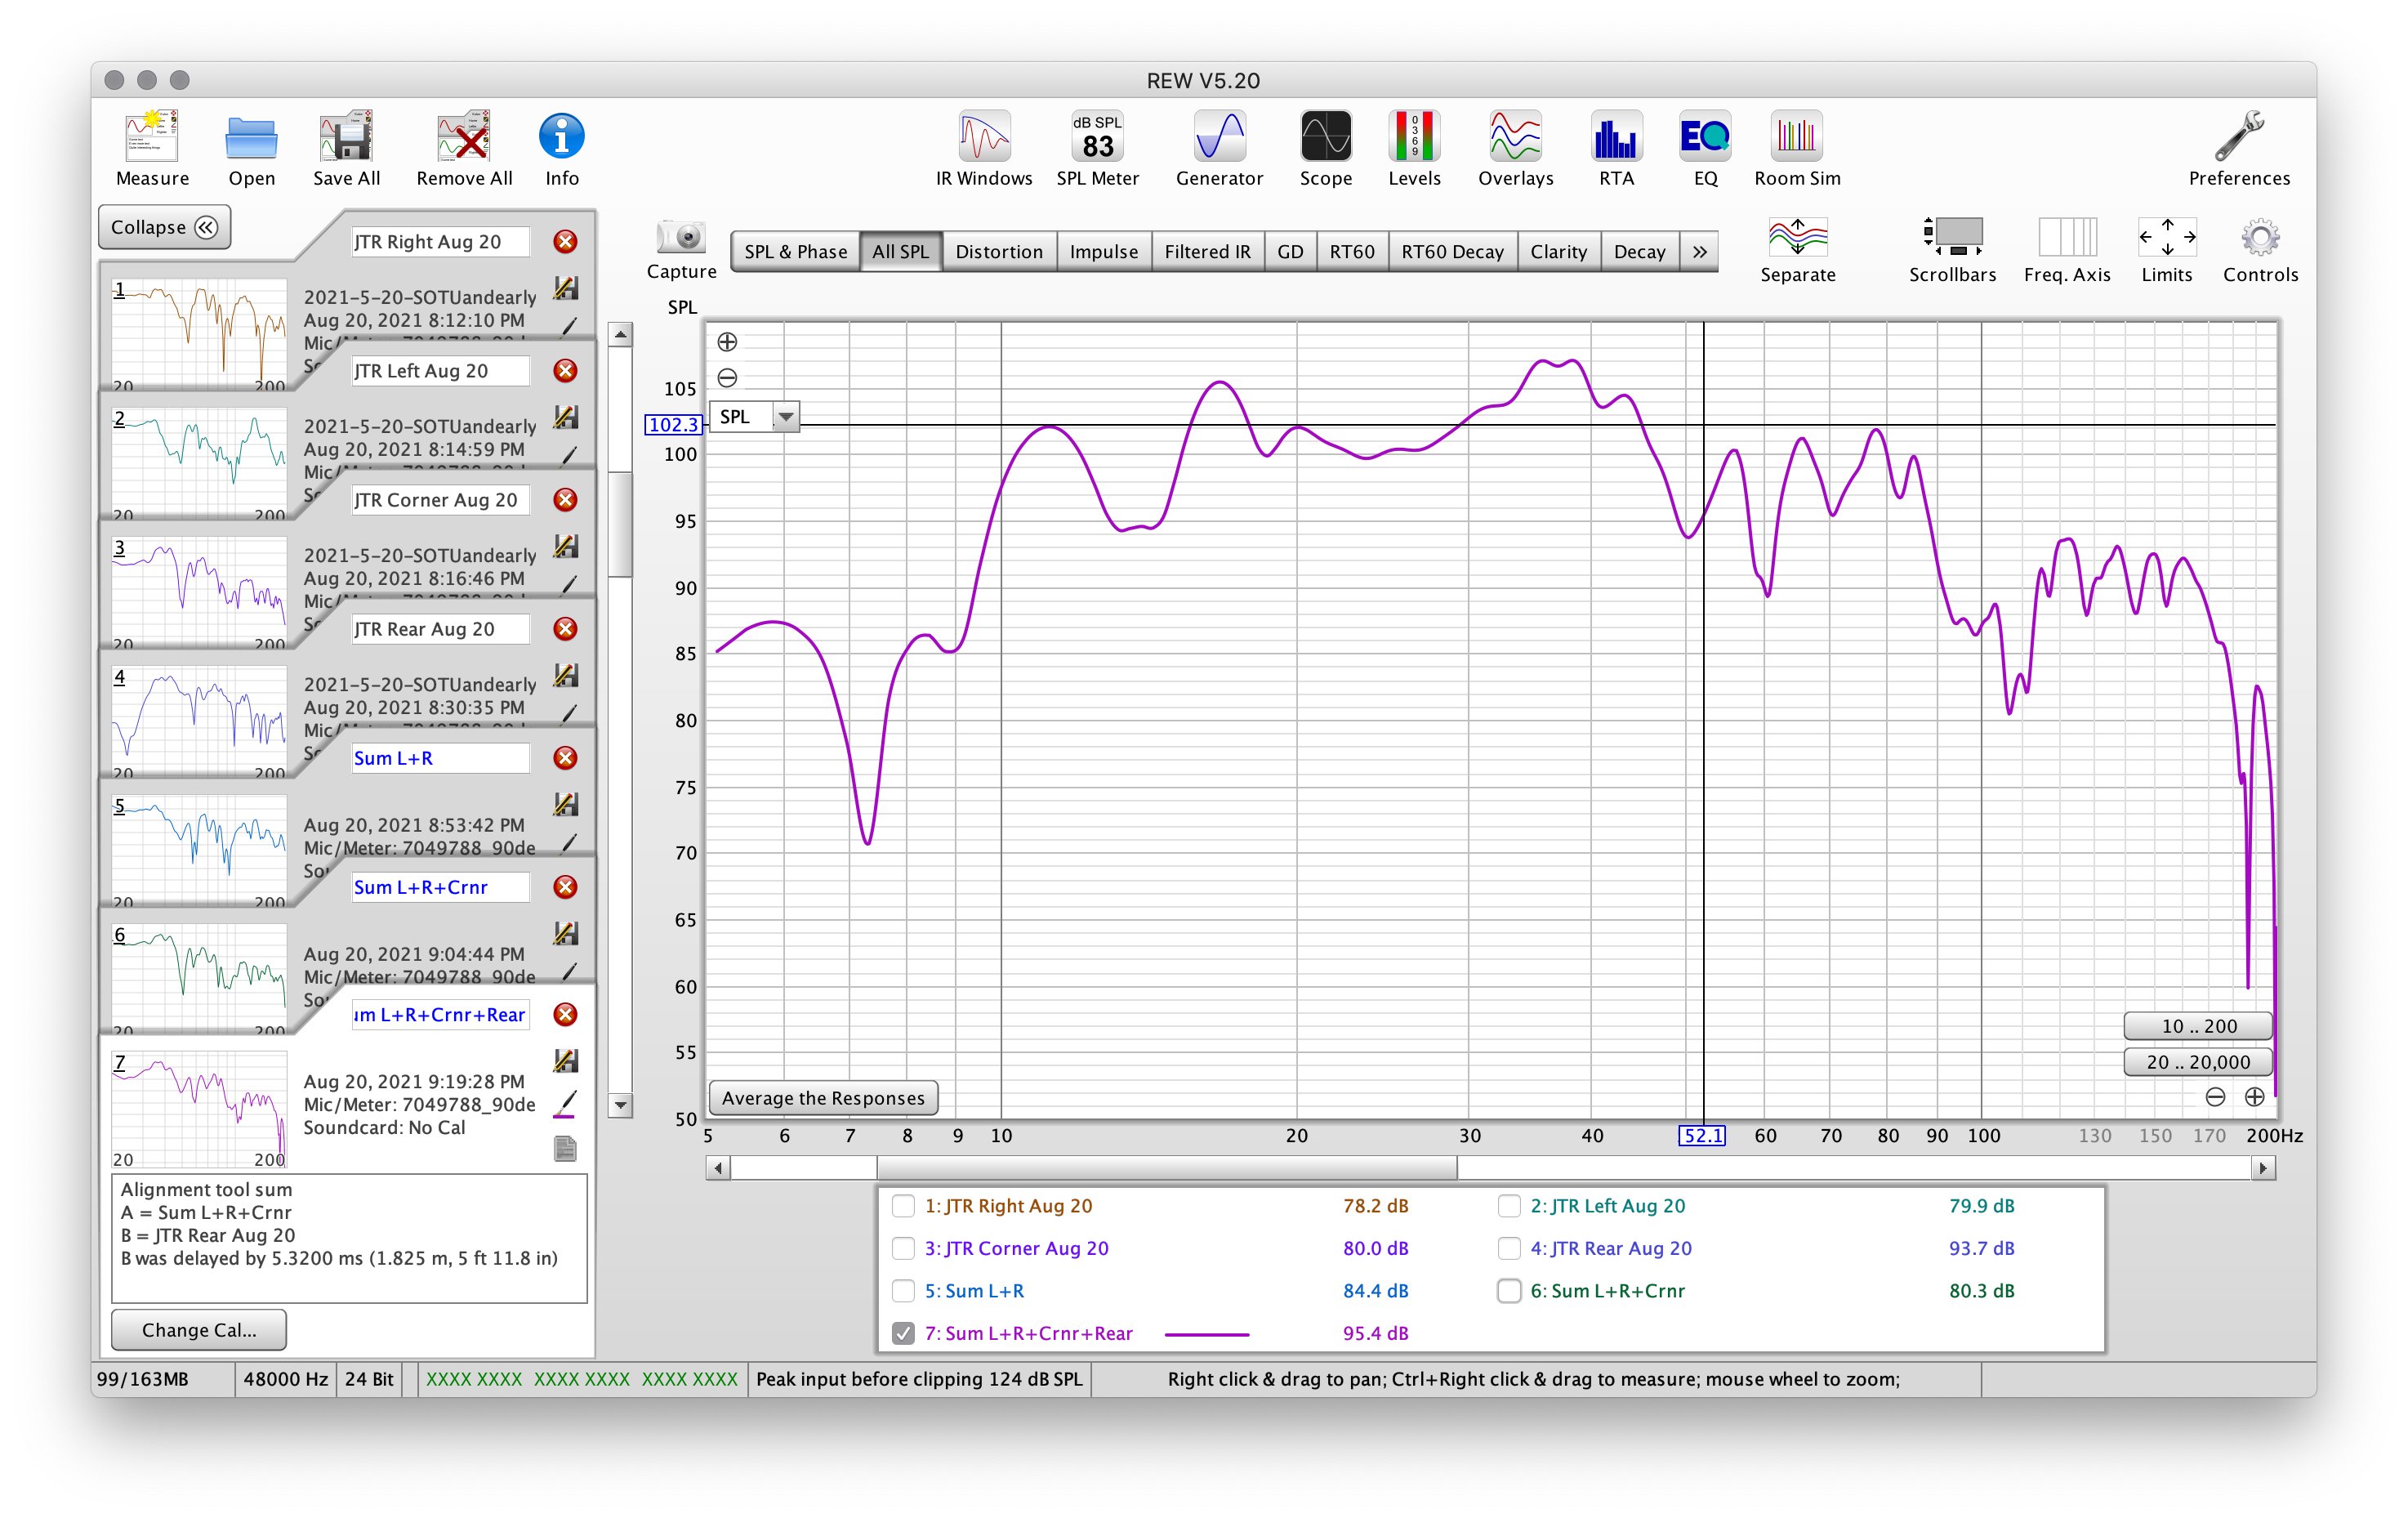
We now have individual measurements from our locations of interest. We're going to use this to show how to sum the locations properly.
First, let's show the measurements for the subwoofers to the left and right of the center channel only. You can de-select the others via the check boxes in the lower portion of the window.
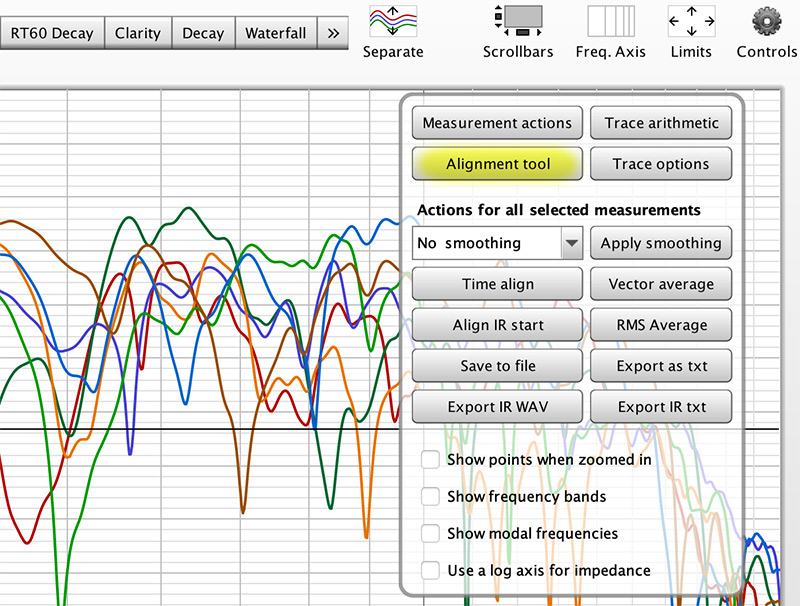
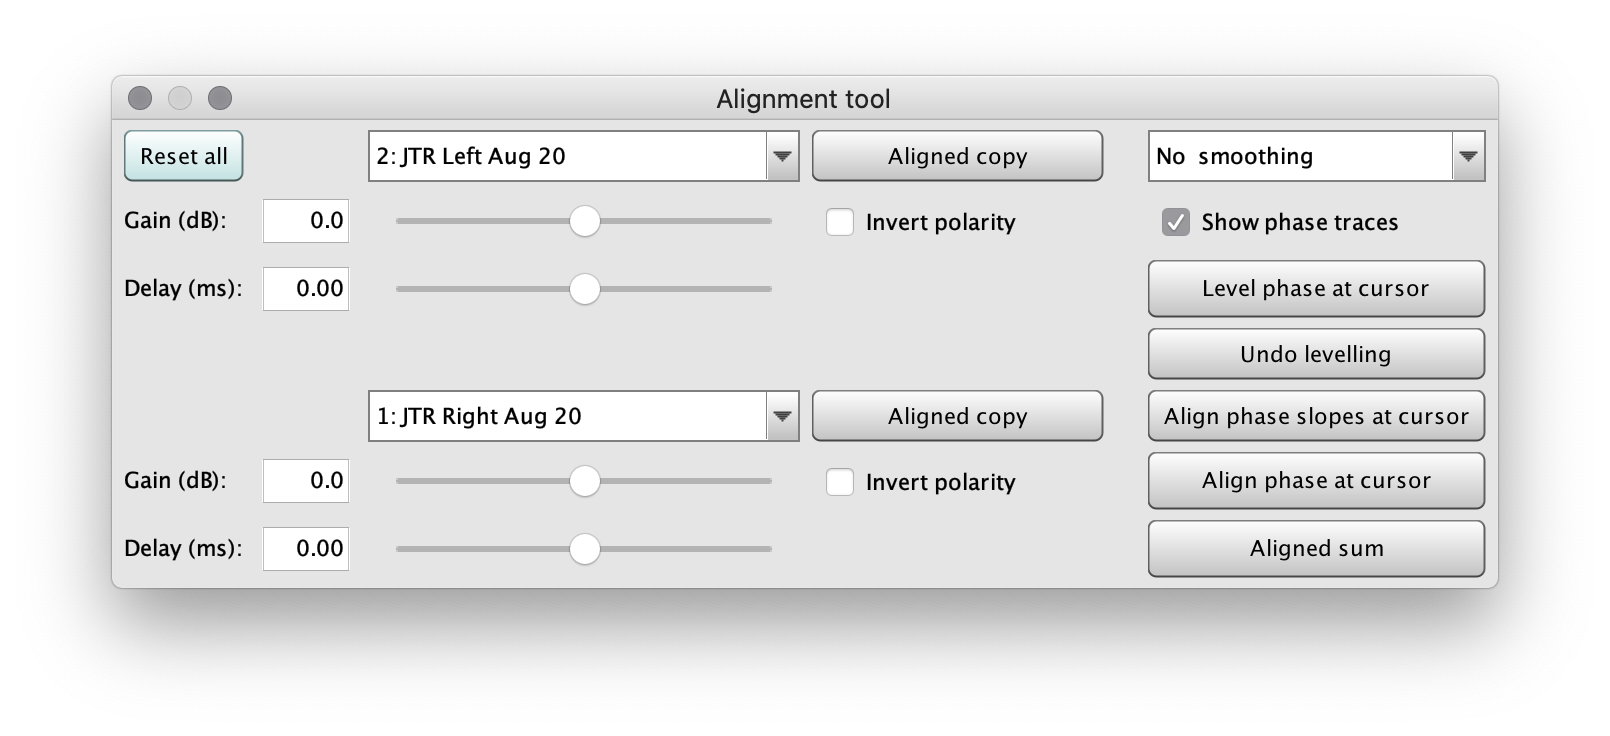
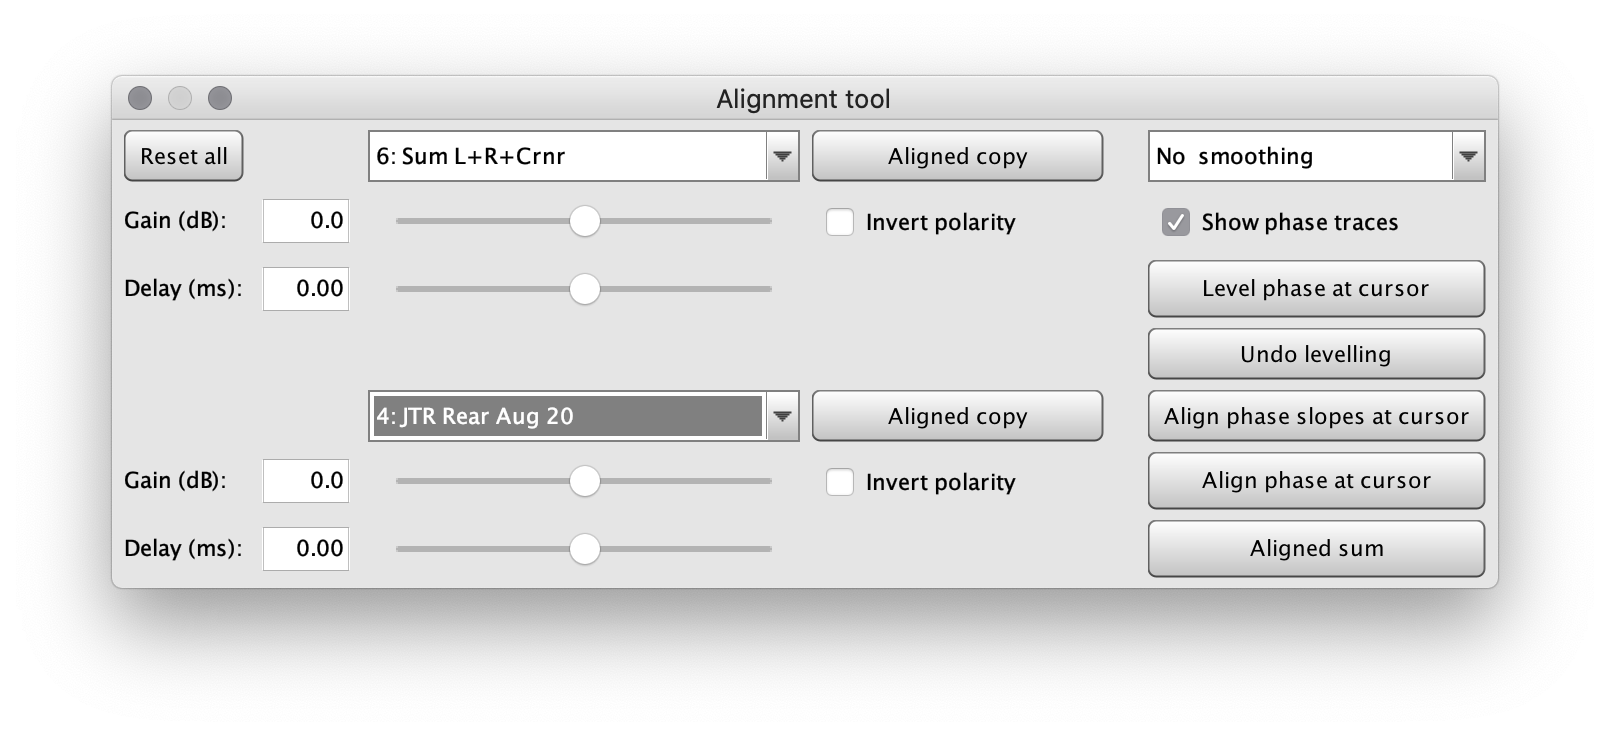
Next we want to sum the various combinations to see which gives us the most even response. For a basic summation, we can use the Trace Arithmetic tool, but we also want to add delays and adjust the gain, so we'll be using REW's Alignment Tool. Make sure each individual measurement is loaded, but it does not matter which is selected as the tool will allow us to choose within it.
To access the Alignment Tool, we're going to select Controls
![]()
...followed by Alignment Tool
When the Alignment Tool loads, you'll see those two subwoofers measurements shown in their respective colors, along with a black line showing what happens when they summate.
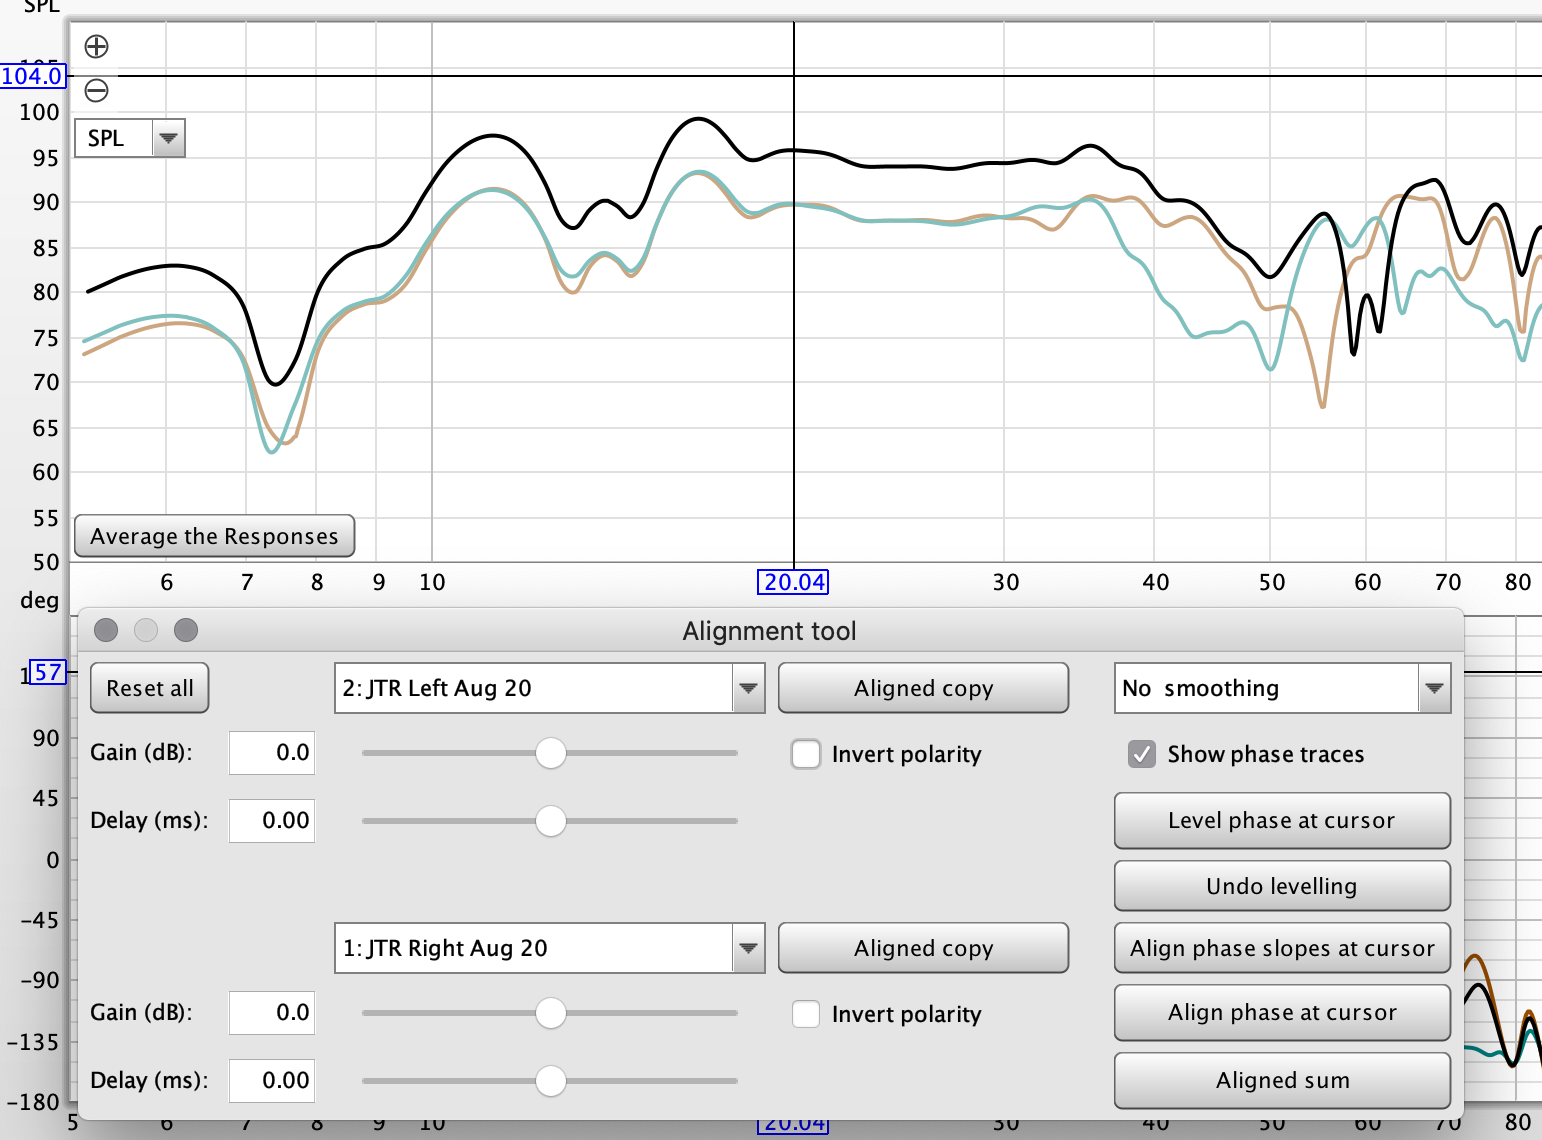
We can see by moving the delay that the black line (summed frequency response at the MLP) moves with it.

In this first case, no delay is needed because they're the same distance from the MLP.
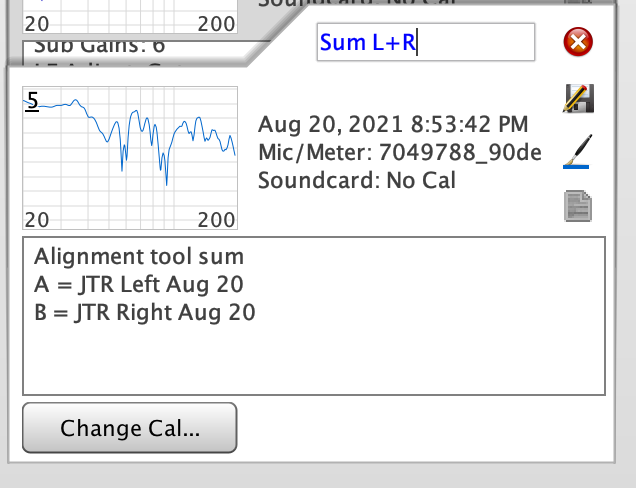
Now press Aligned sum and REW will save that summation as a measurement.
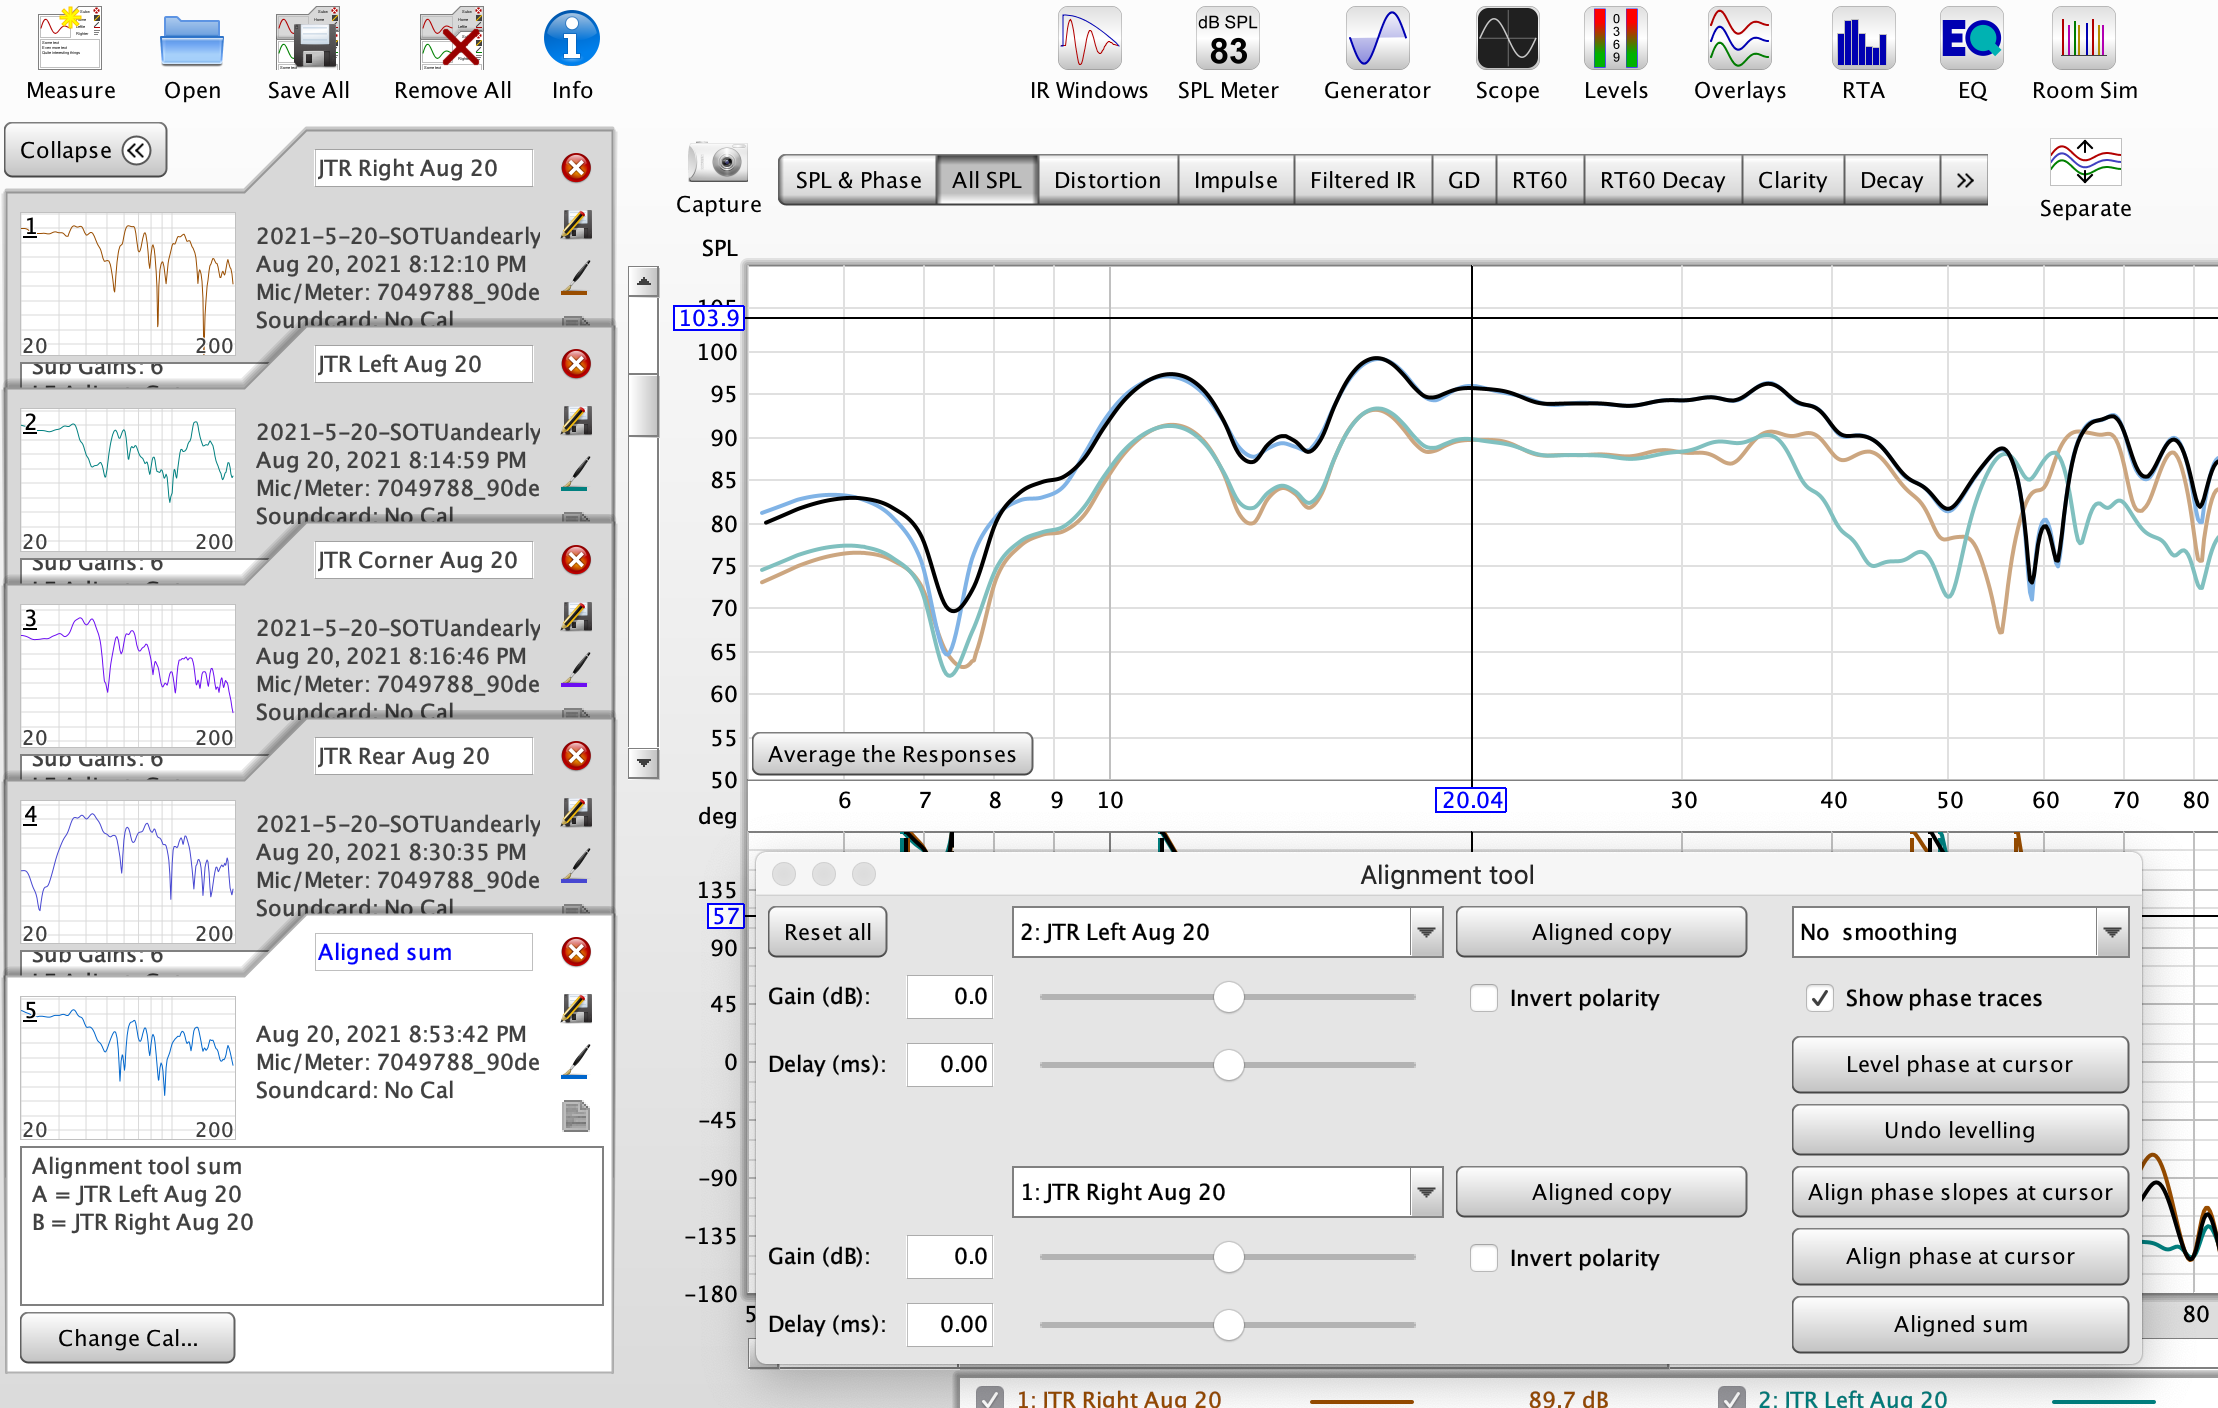
Make sure to use detailed notations so you remember which is which.
Now we're going to use the newly minted aligned sum to align with the subwoofer that's in the corner / the third subwoofer.
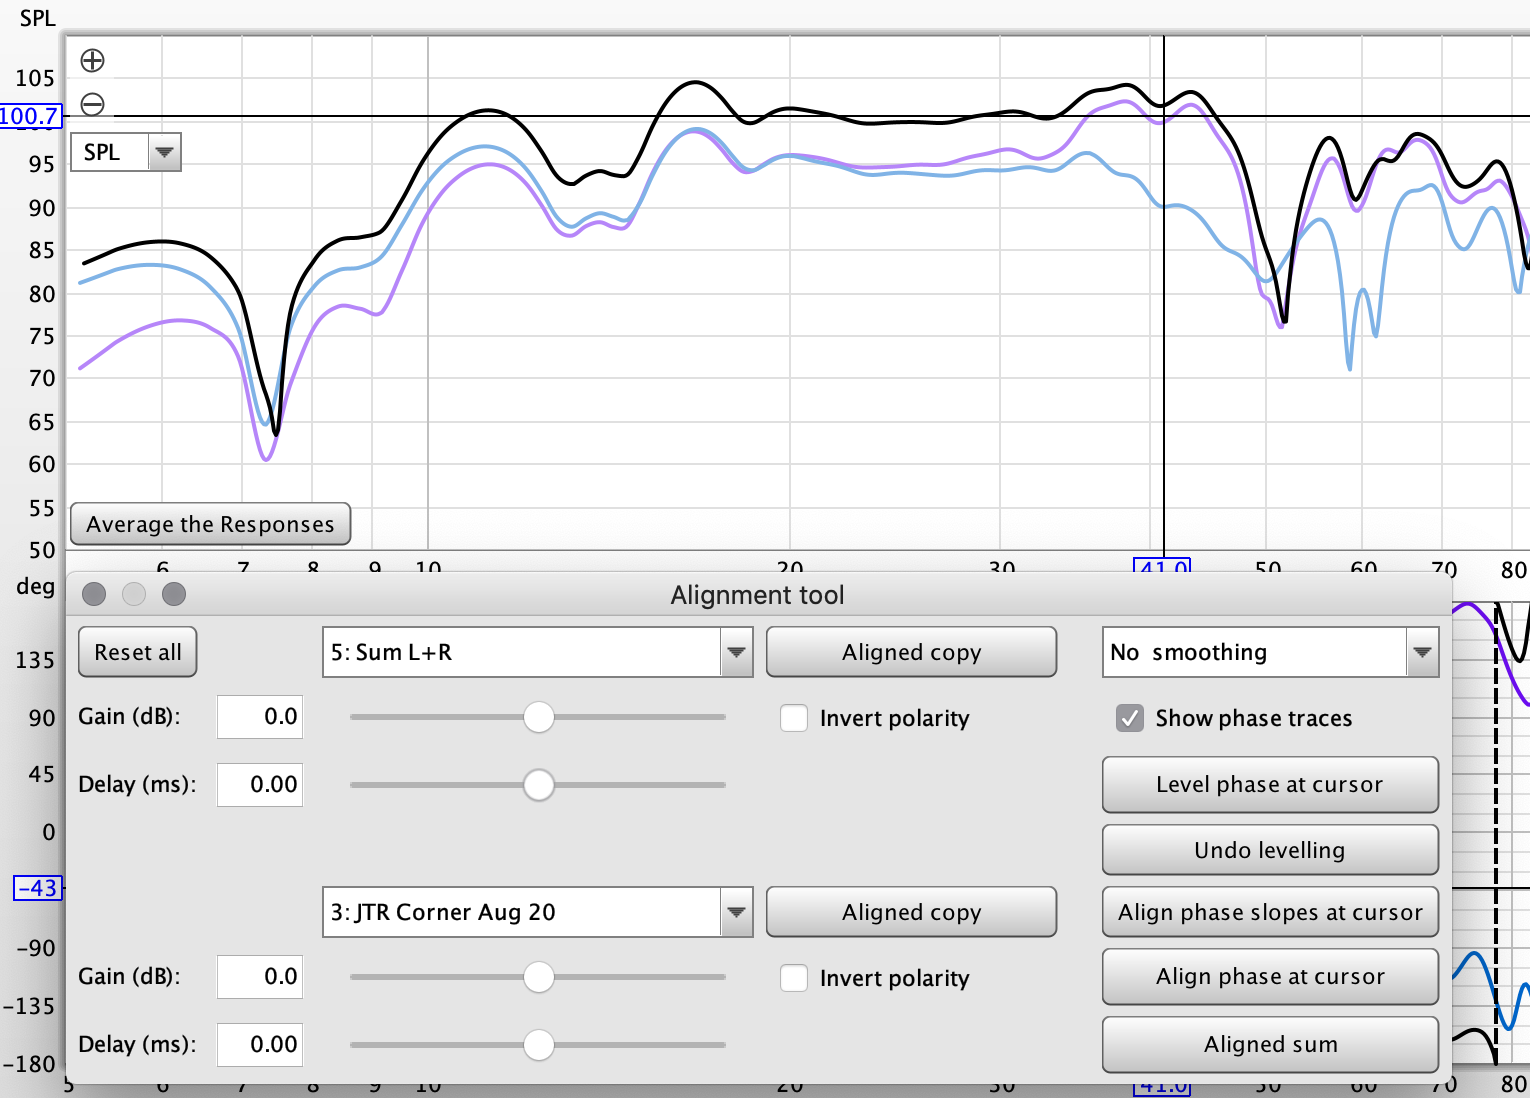
Similar to the first two, the third is roughly the same distance and didn't need delay. Don't worry though, we'll get to one that does.
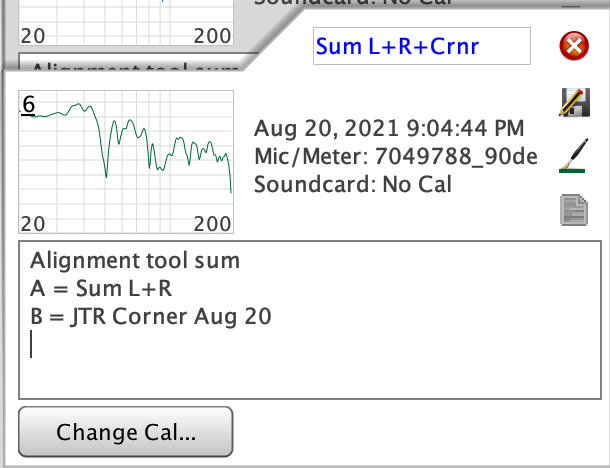
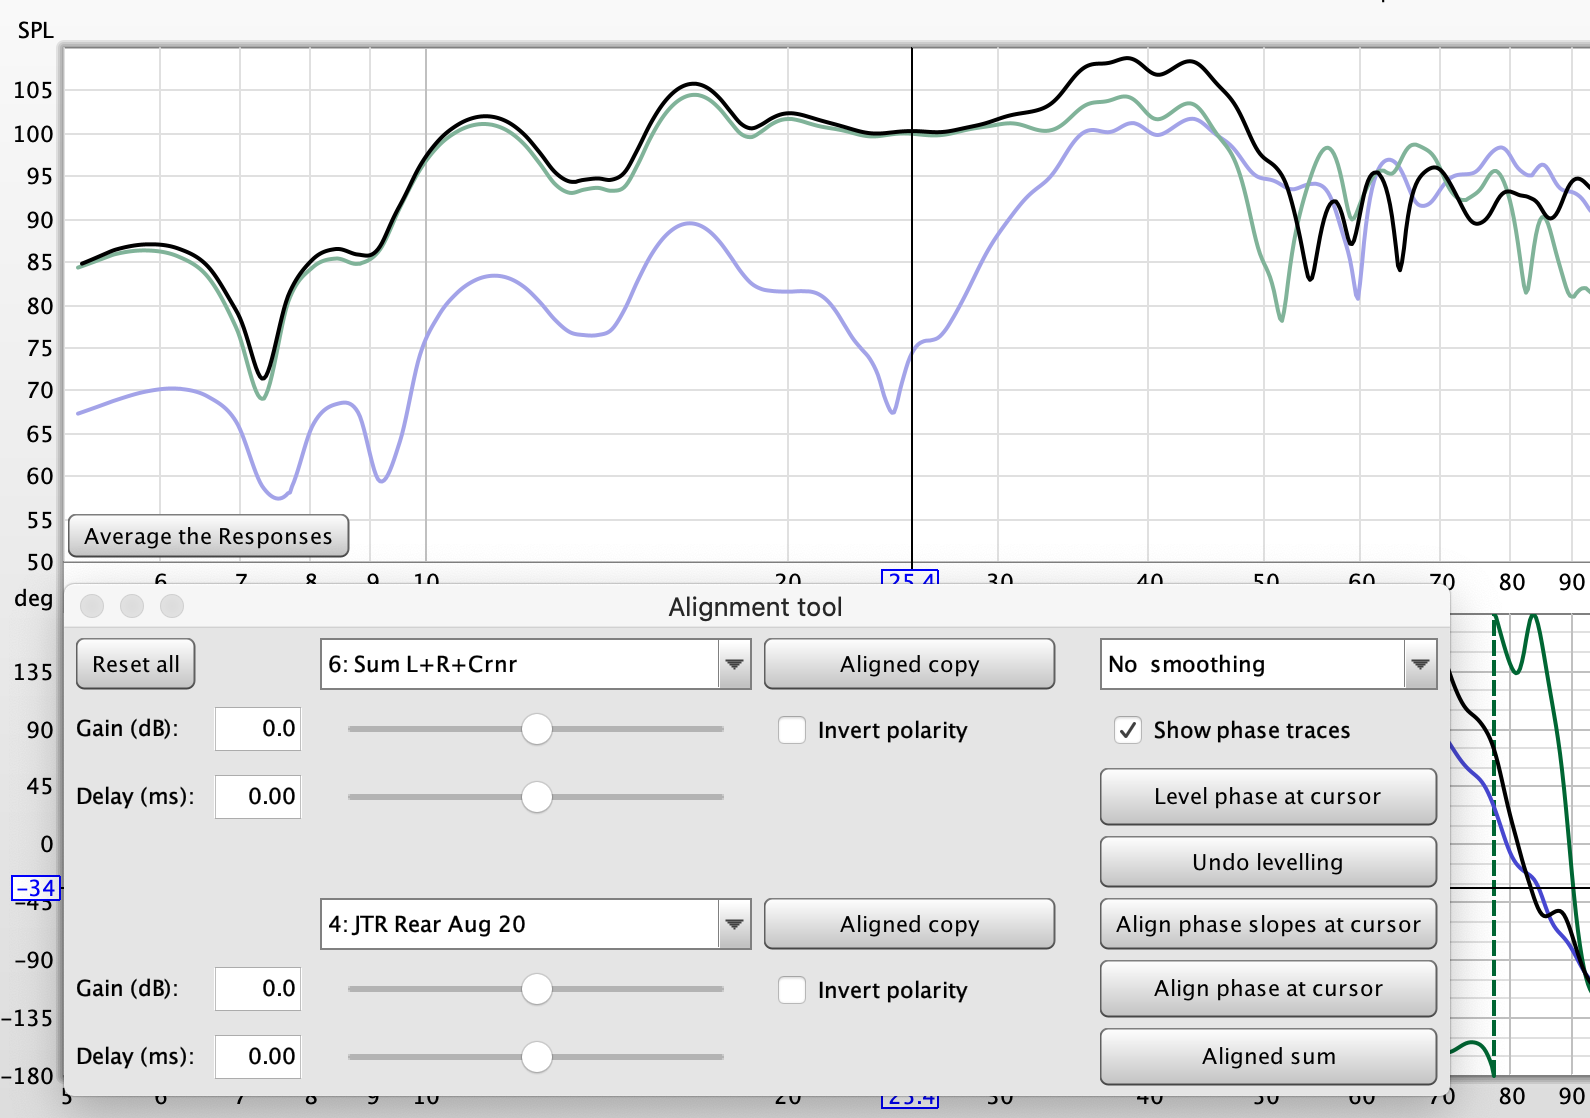
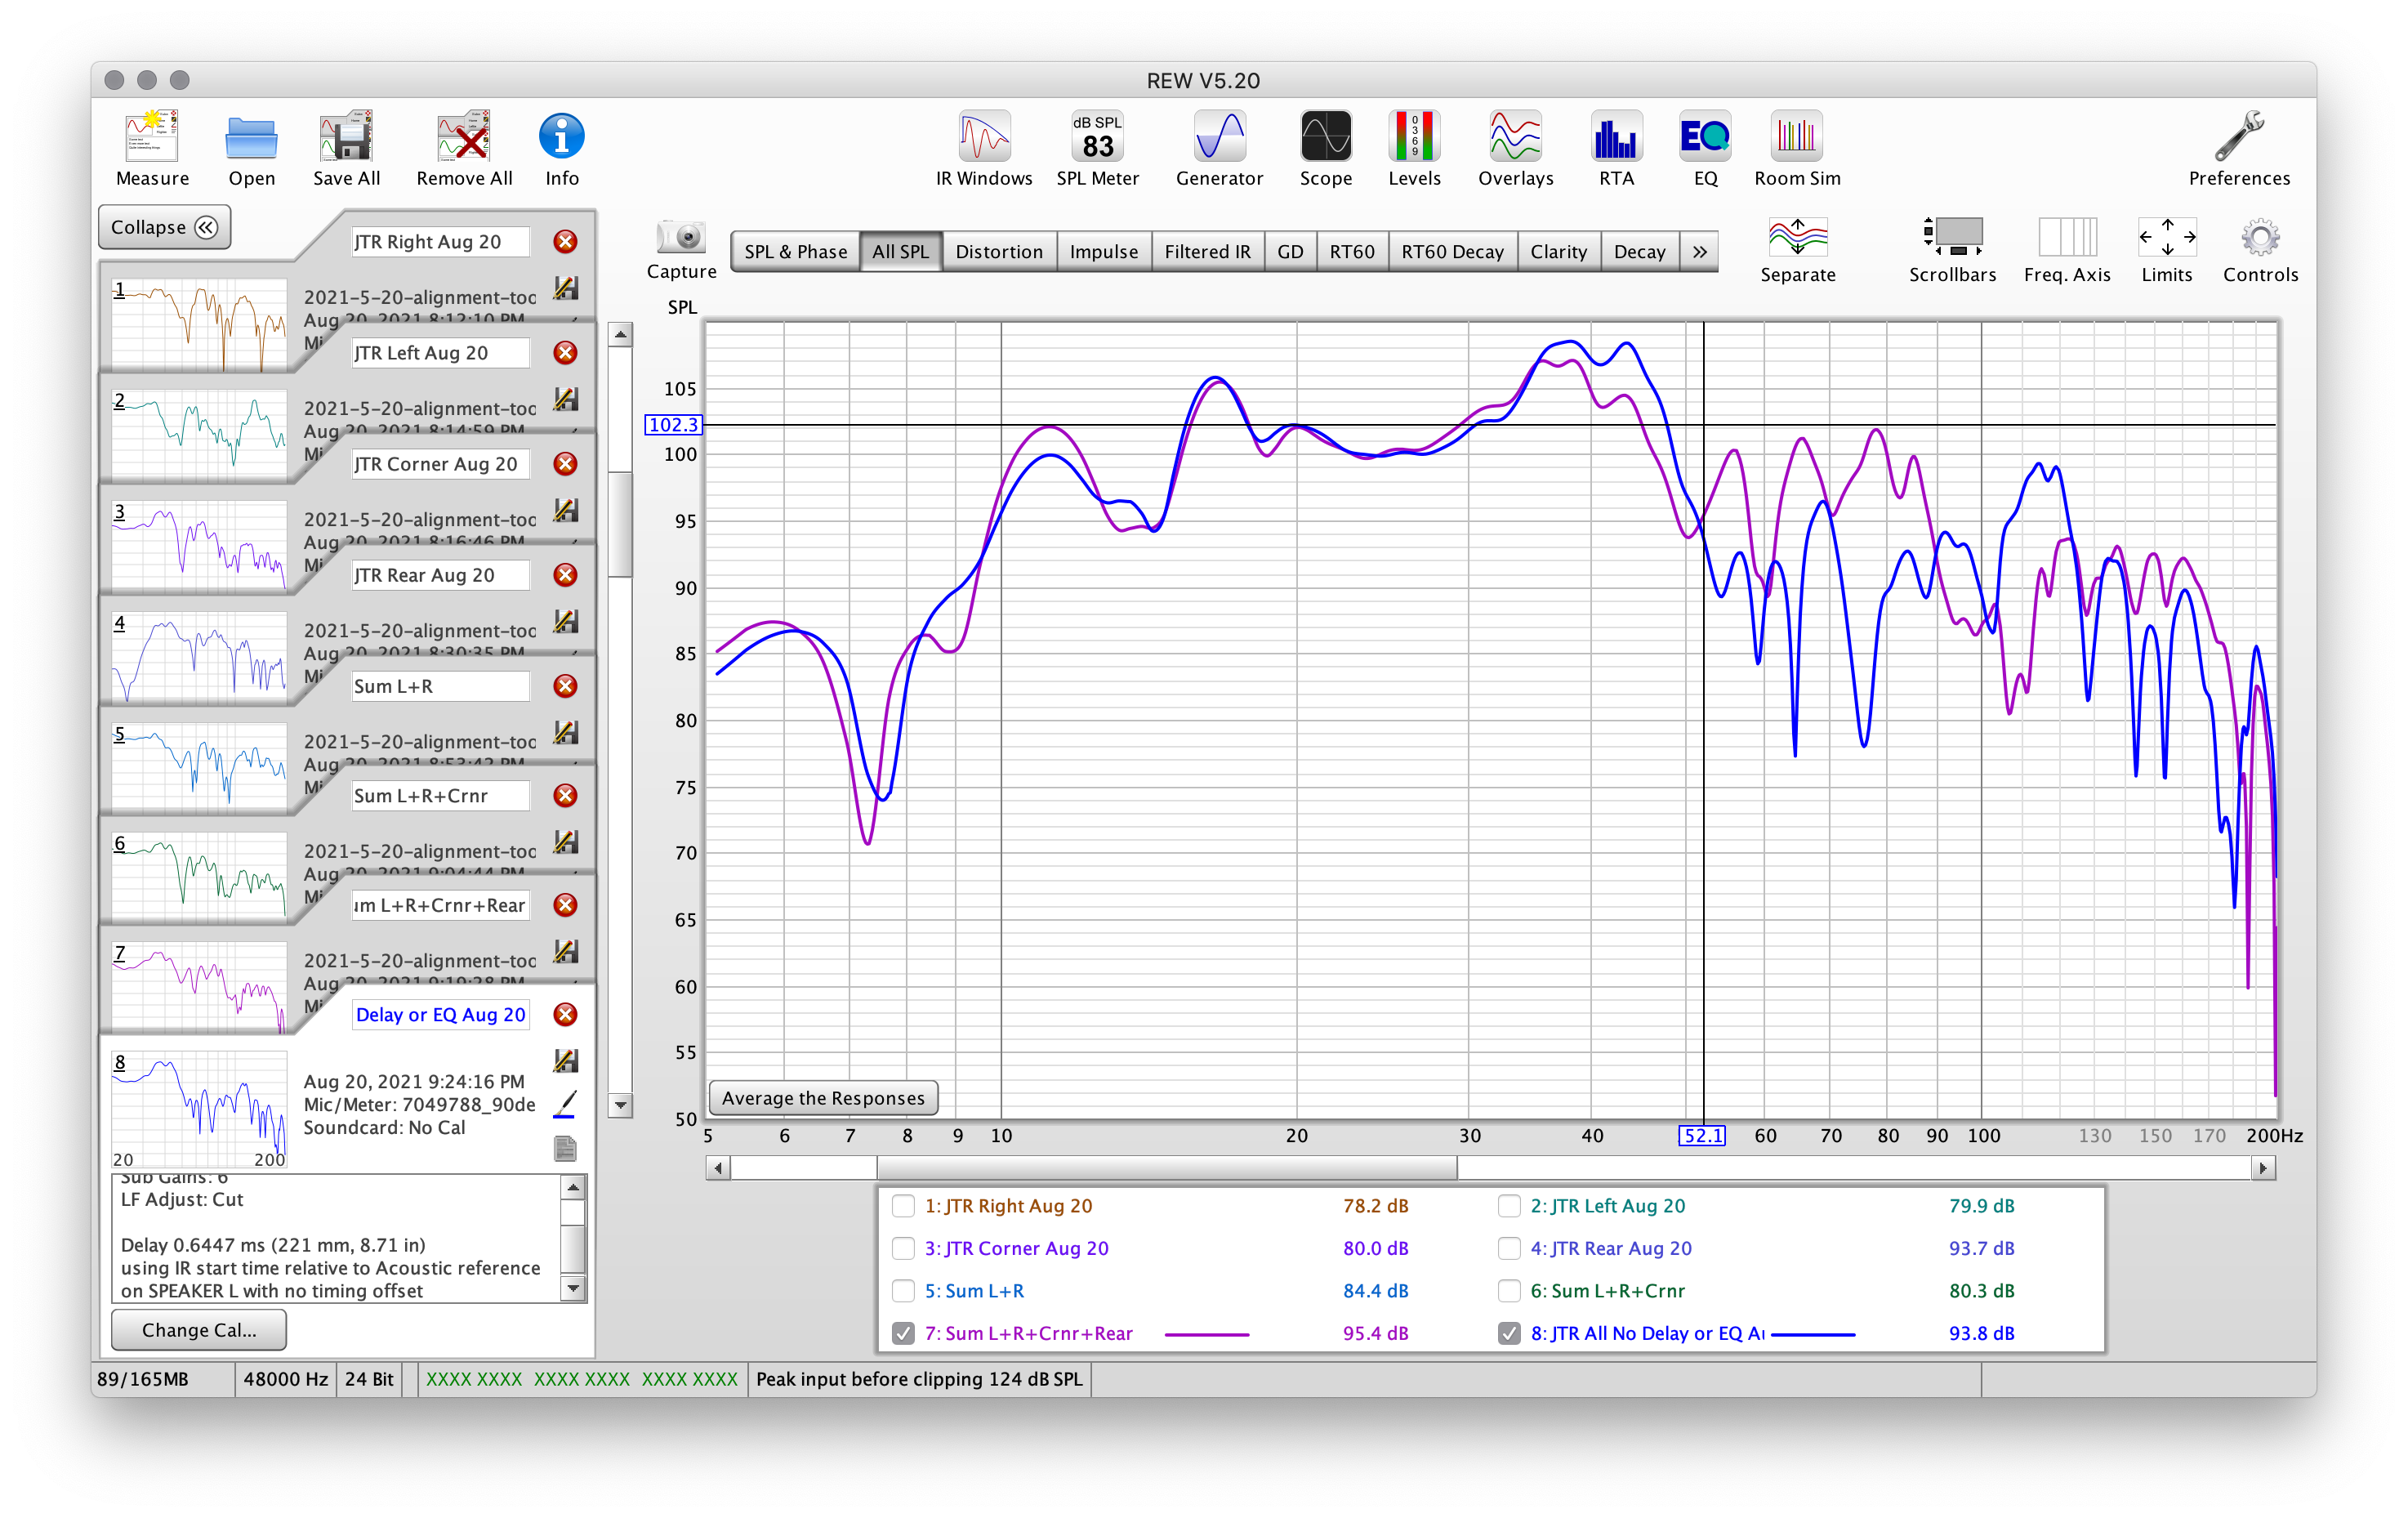
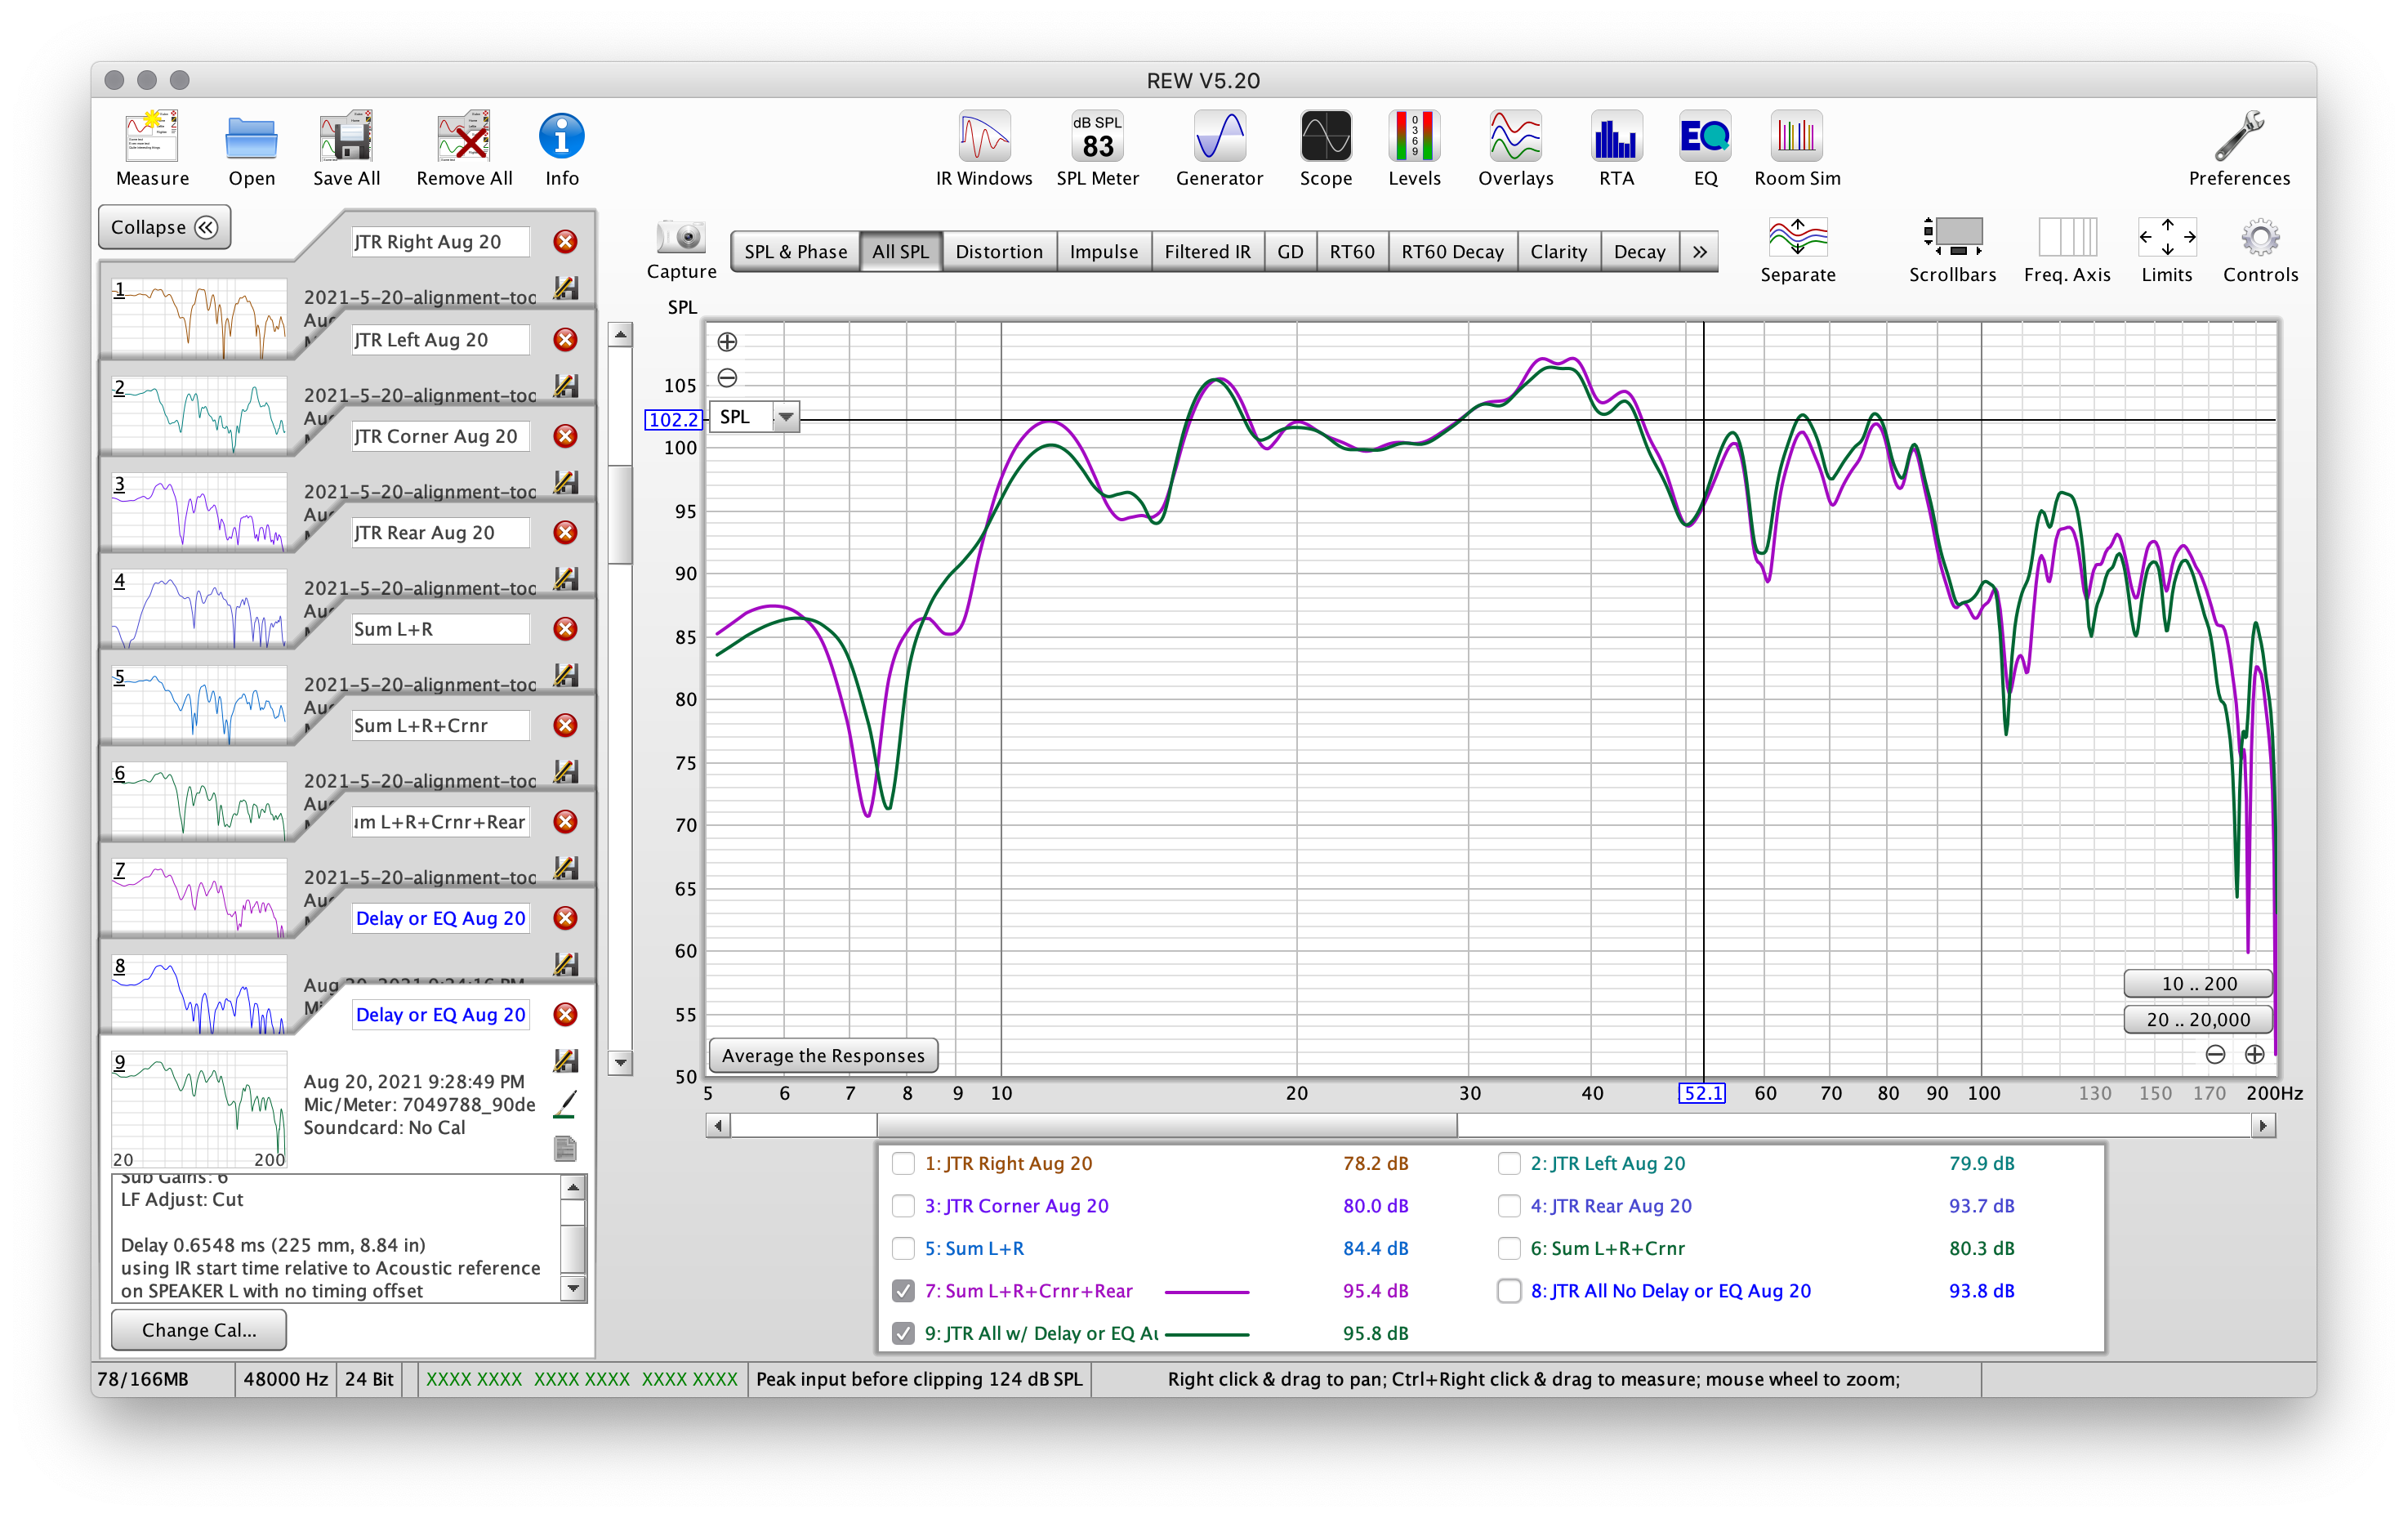
We can see our three subwoofers summed still isn't looking great, so the all important rear subwoofer will now be added into the mix.
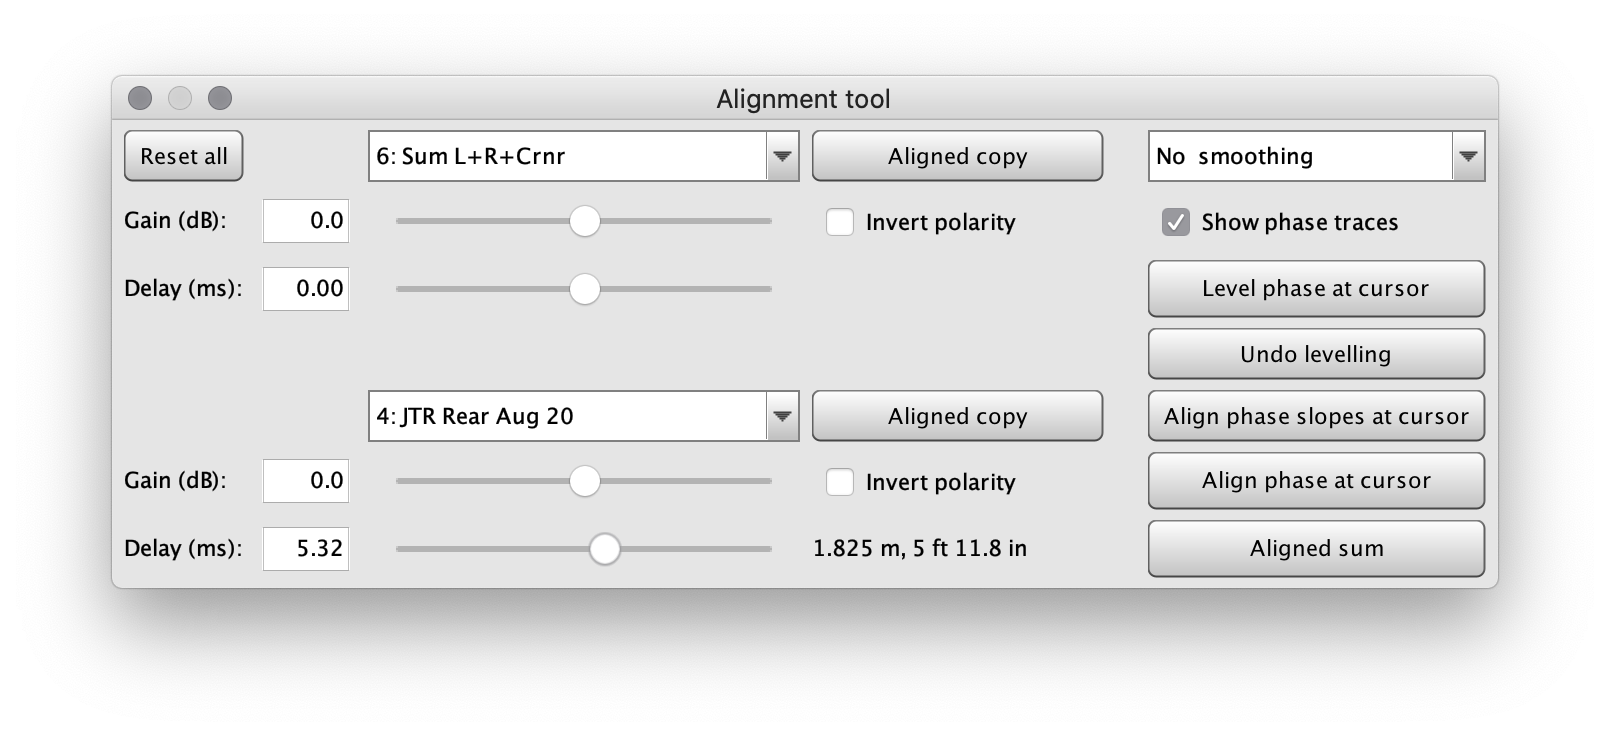
Let's load up the Alignment tool and use the summation from the last step combined with the rear subwoofer.
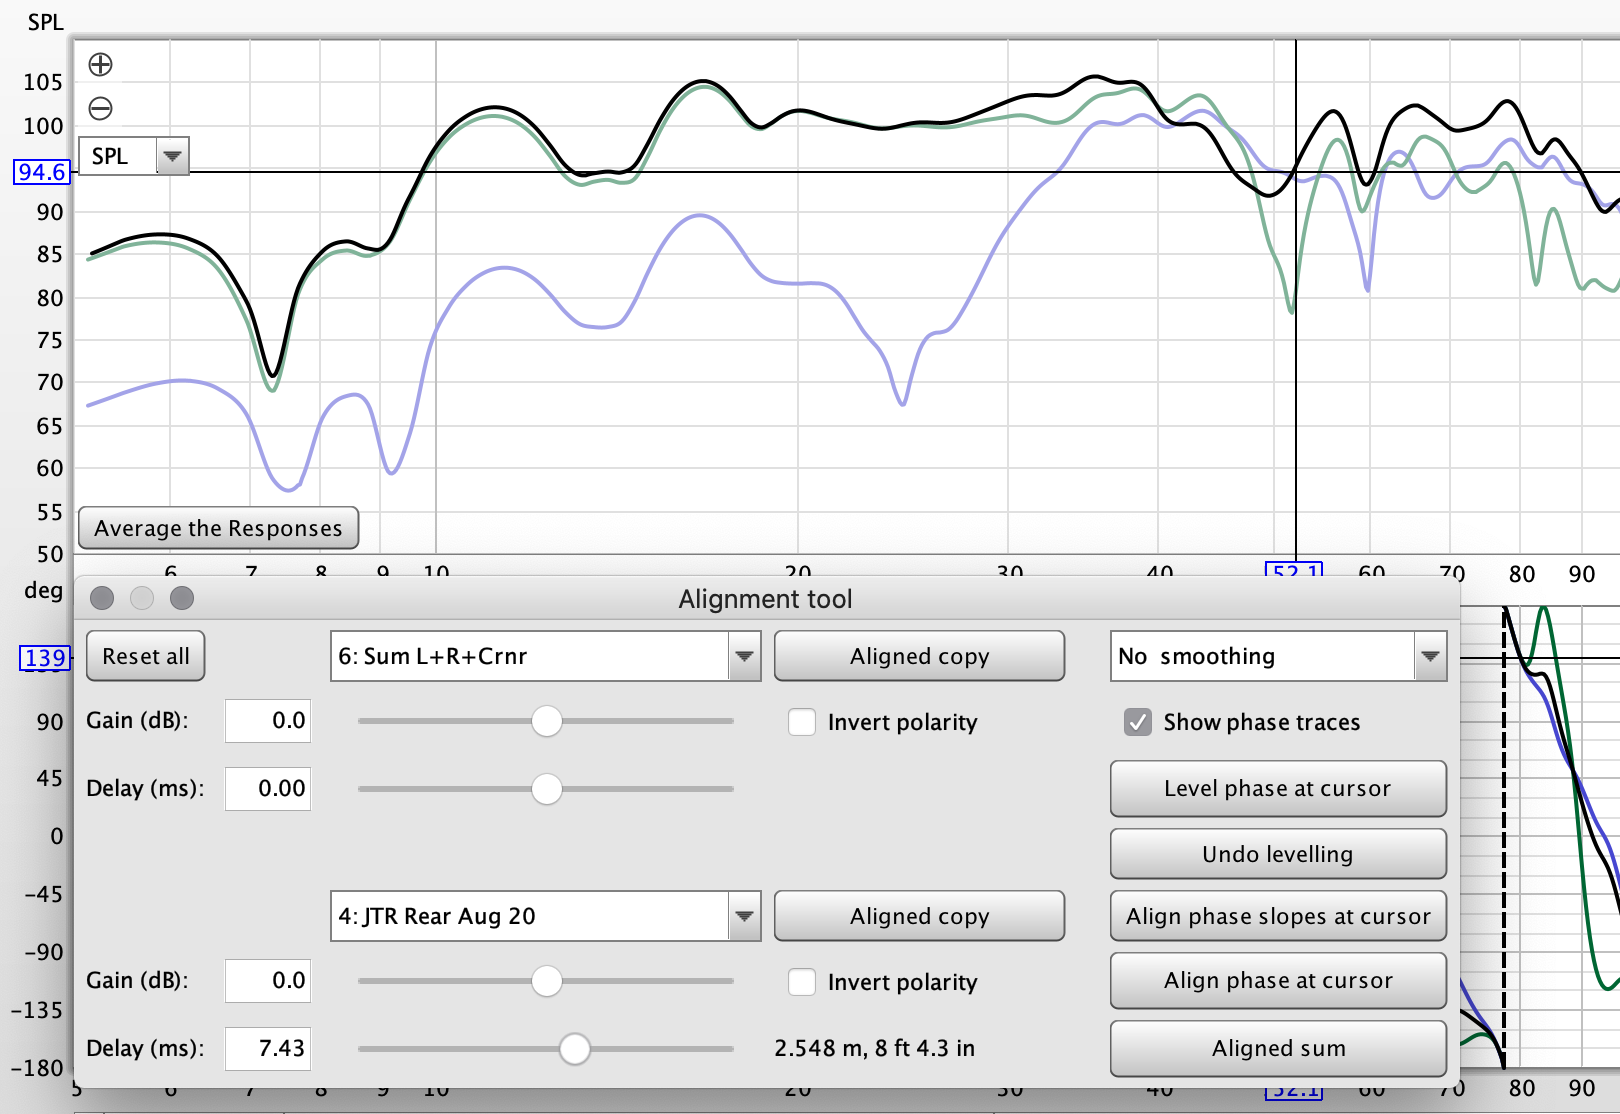
This subwoofer is dramatically closer, so some delay makes sense here likely.
Around 7.43ms seemed to work best.
I decided to measure the distance between the front row of subwoofers and my rear subwoofer, to determine the difference between them.
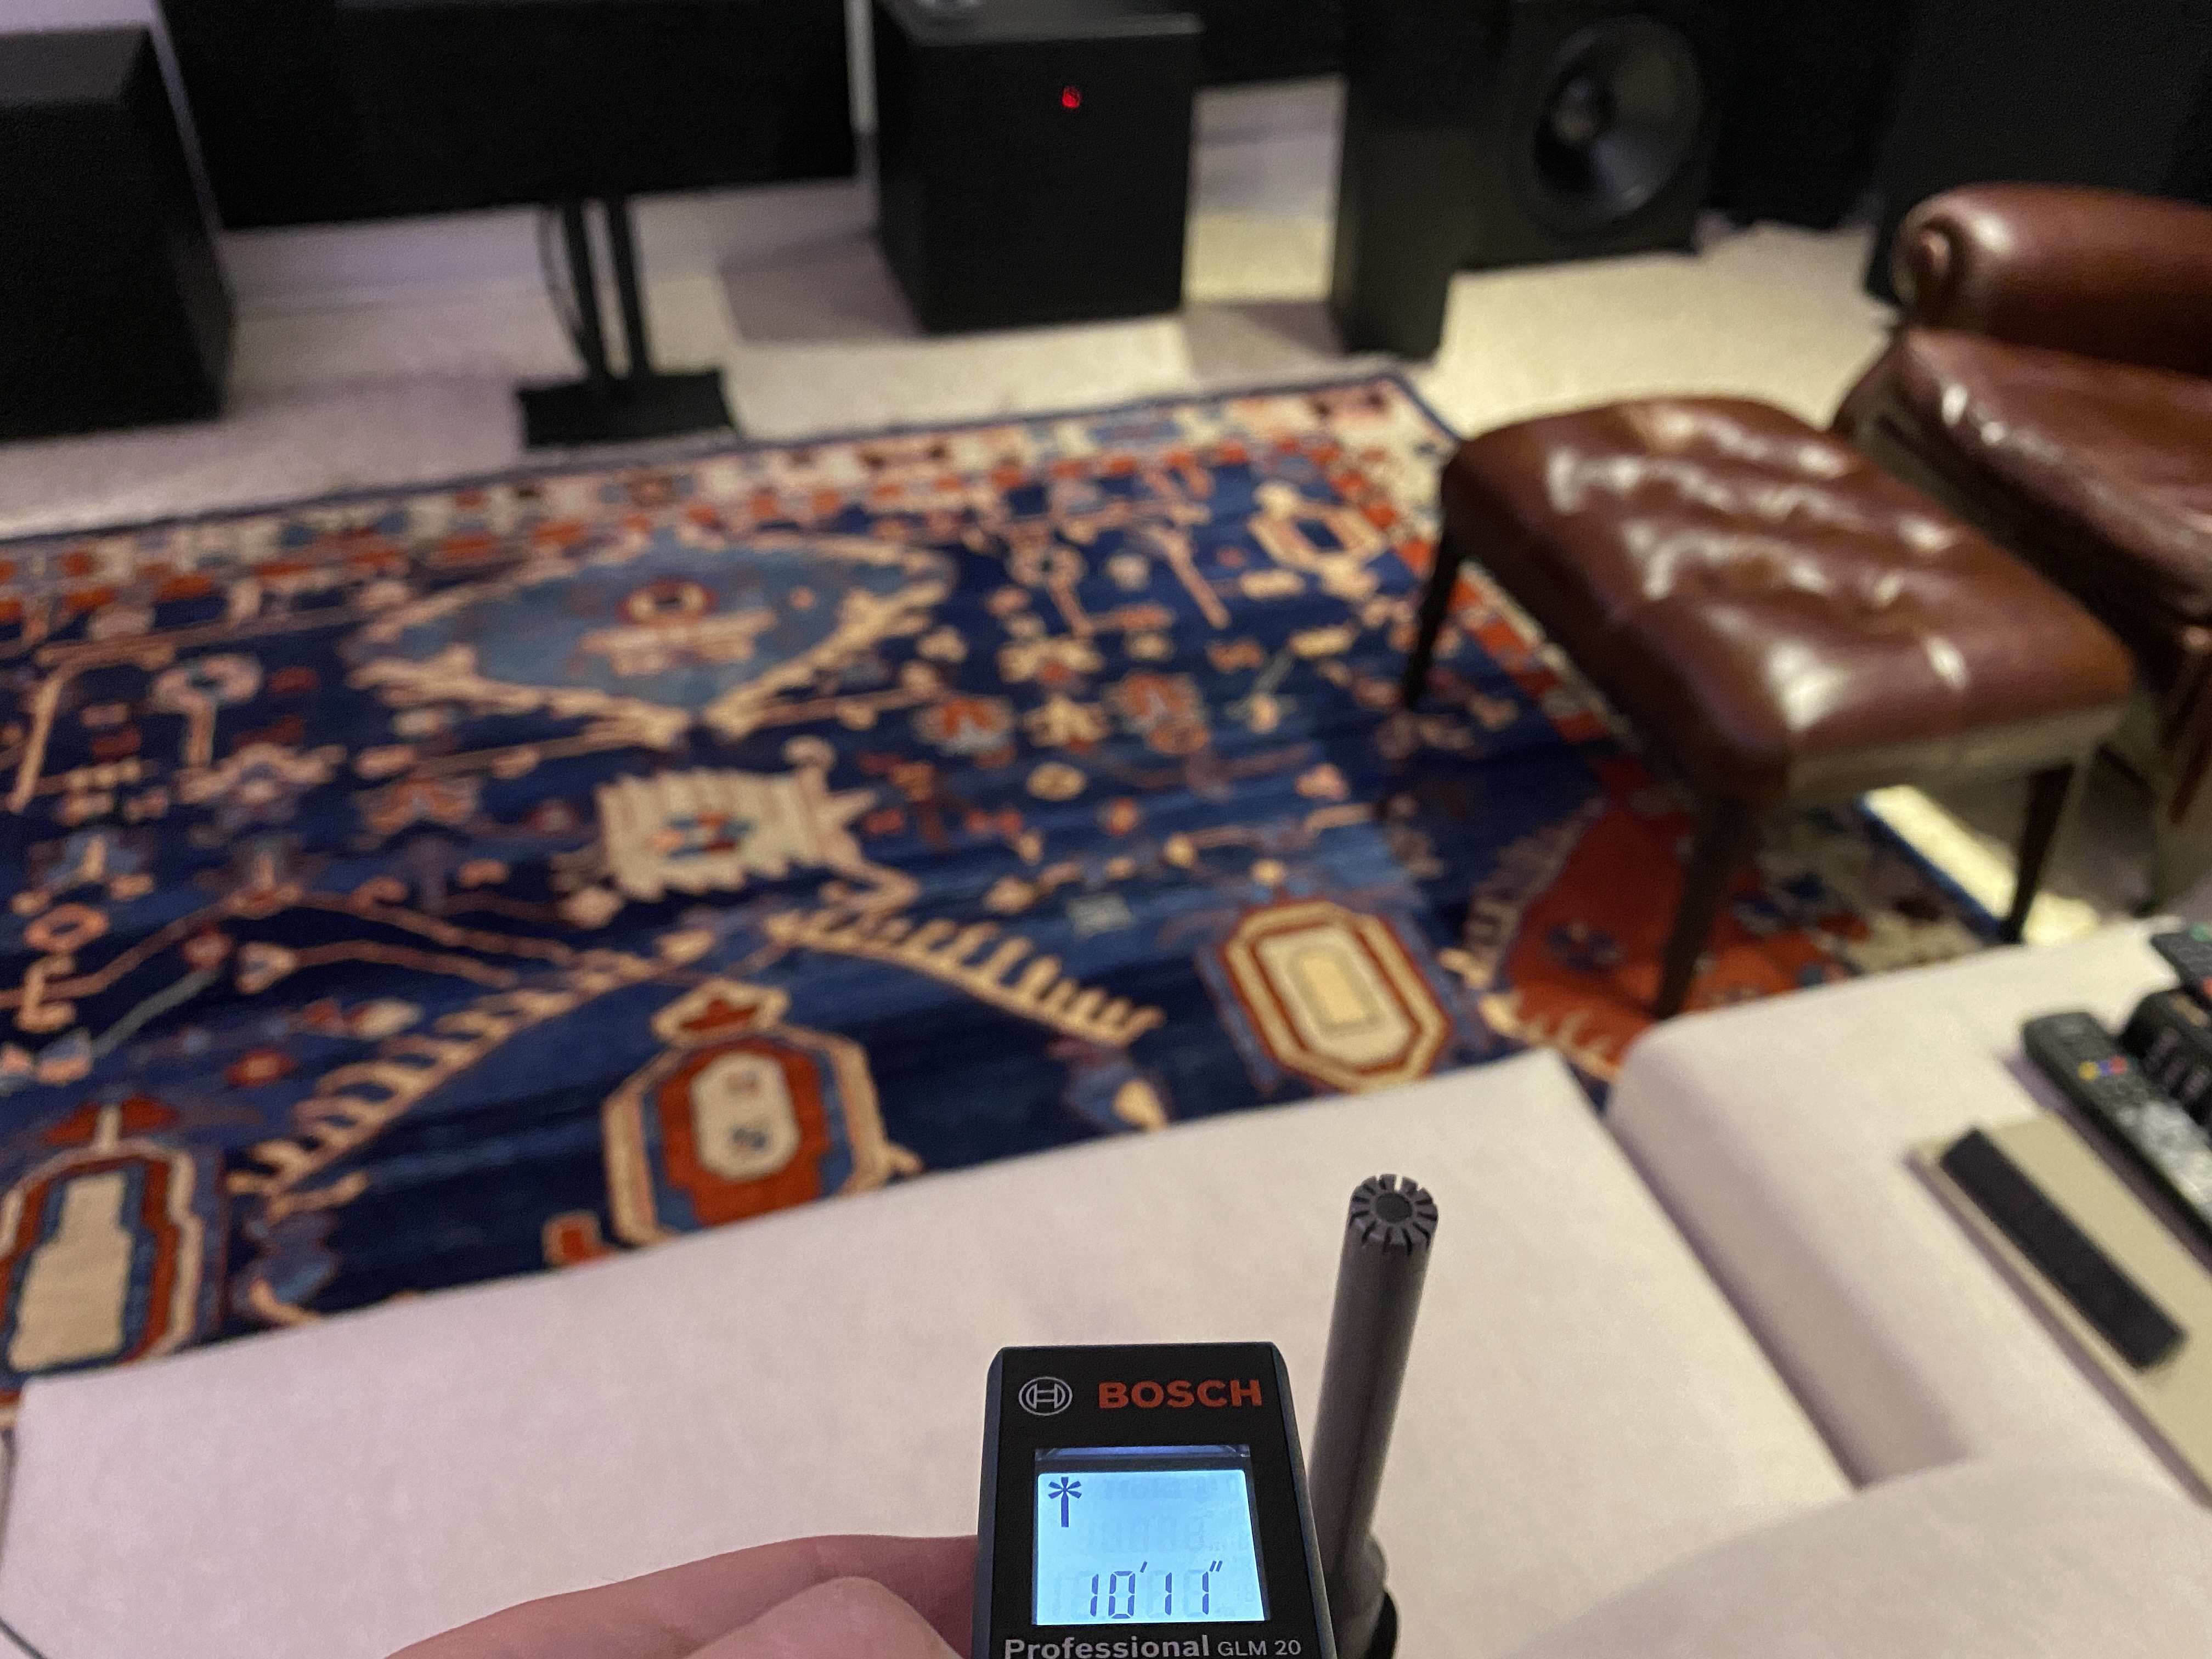
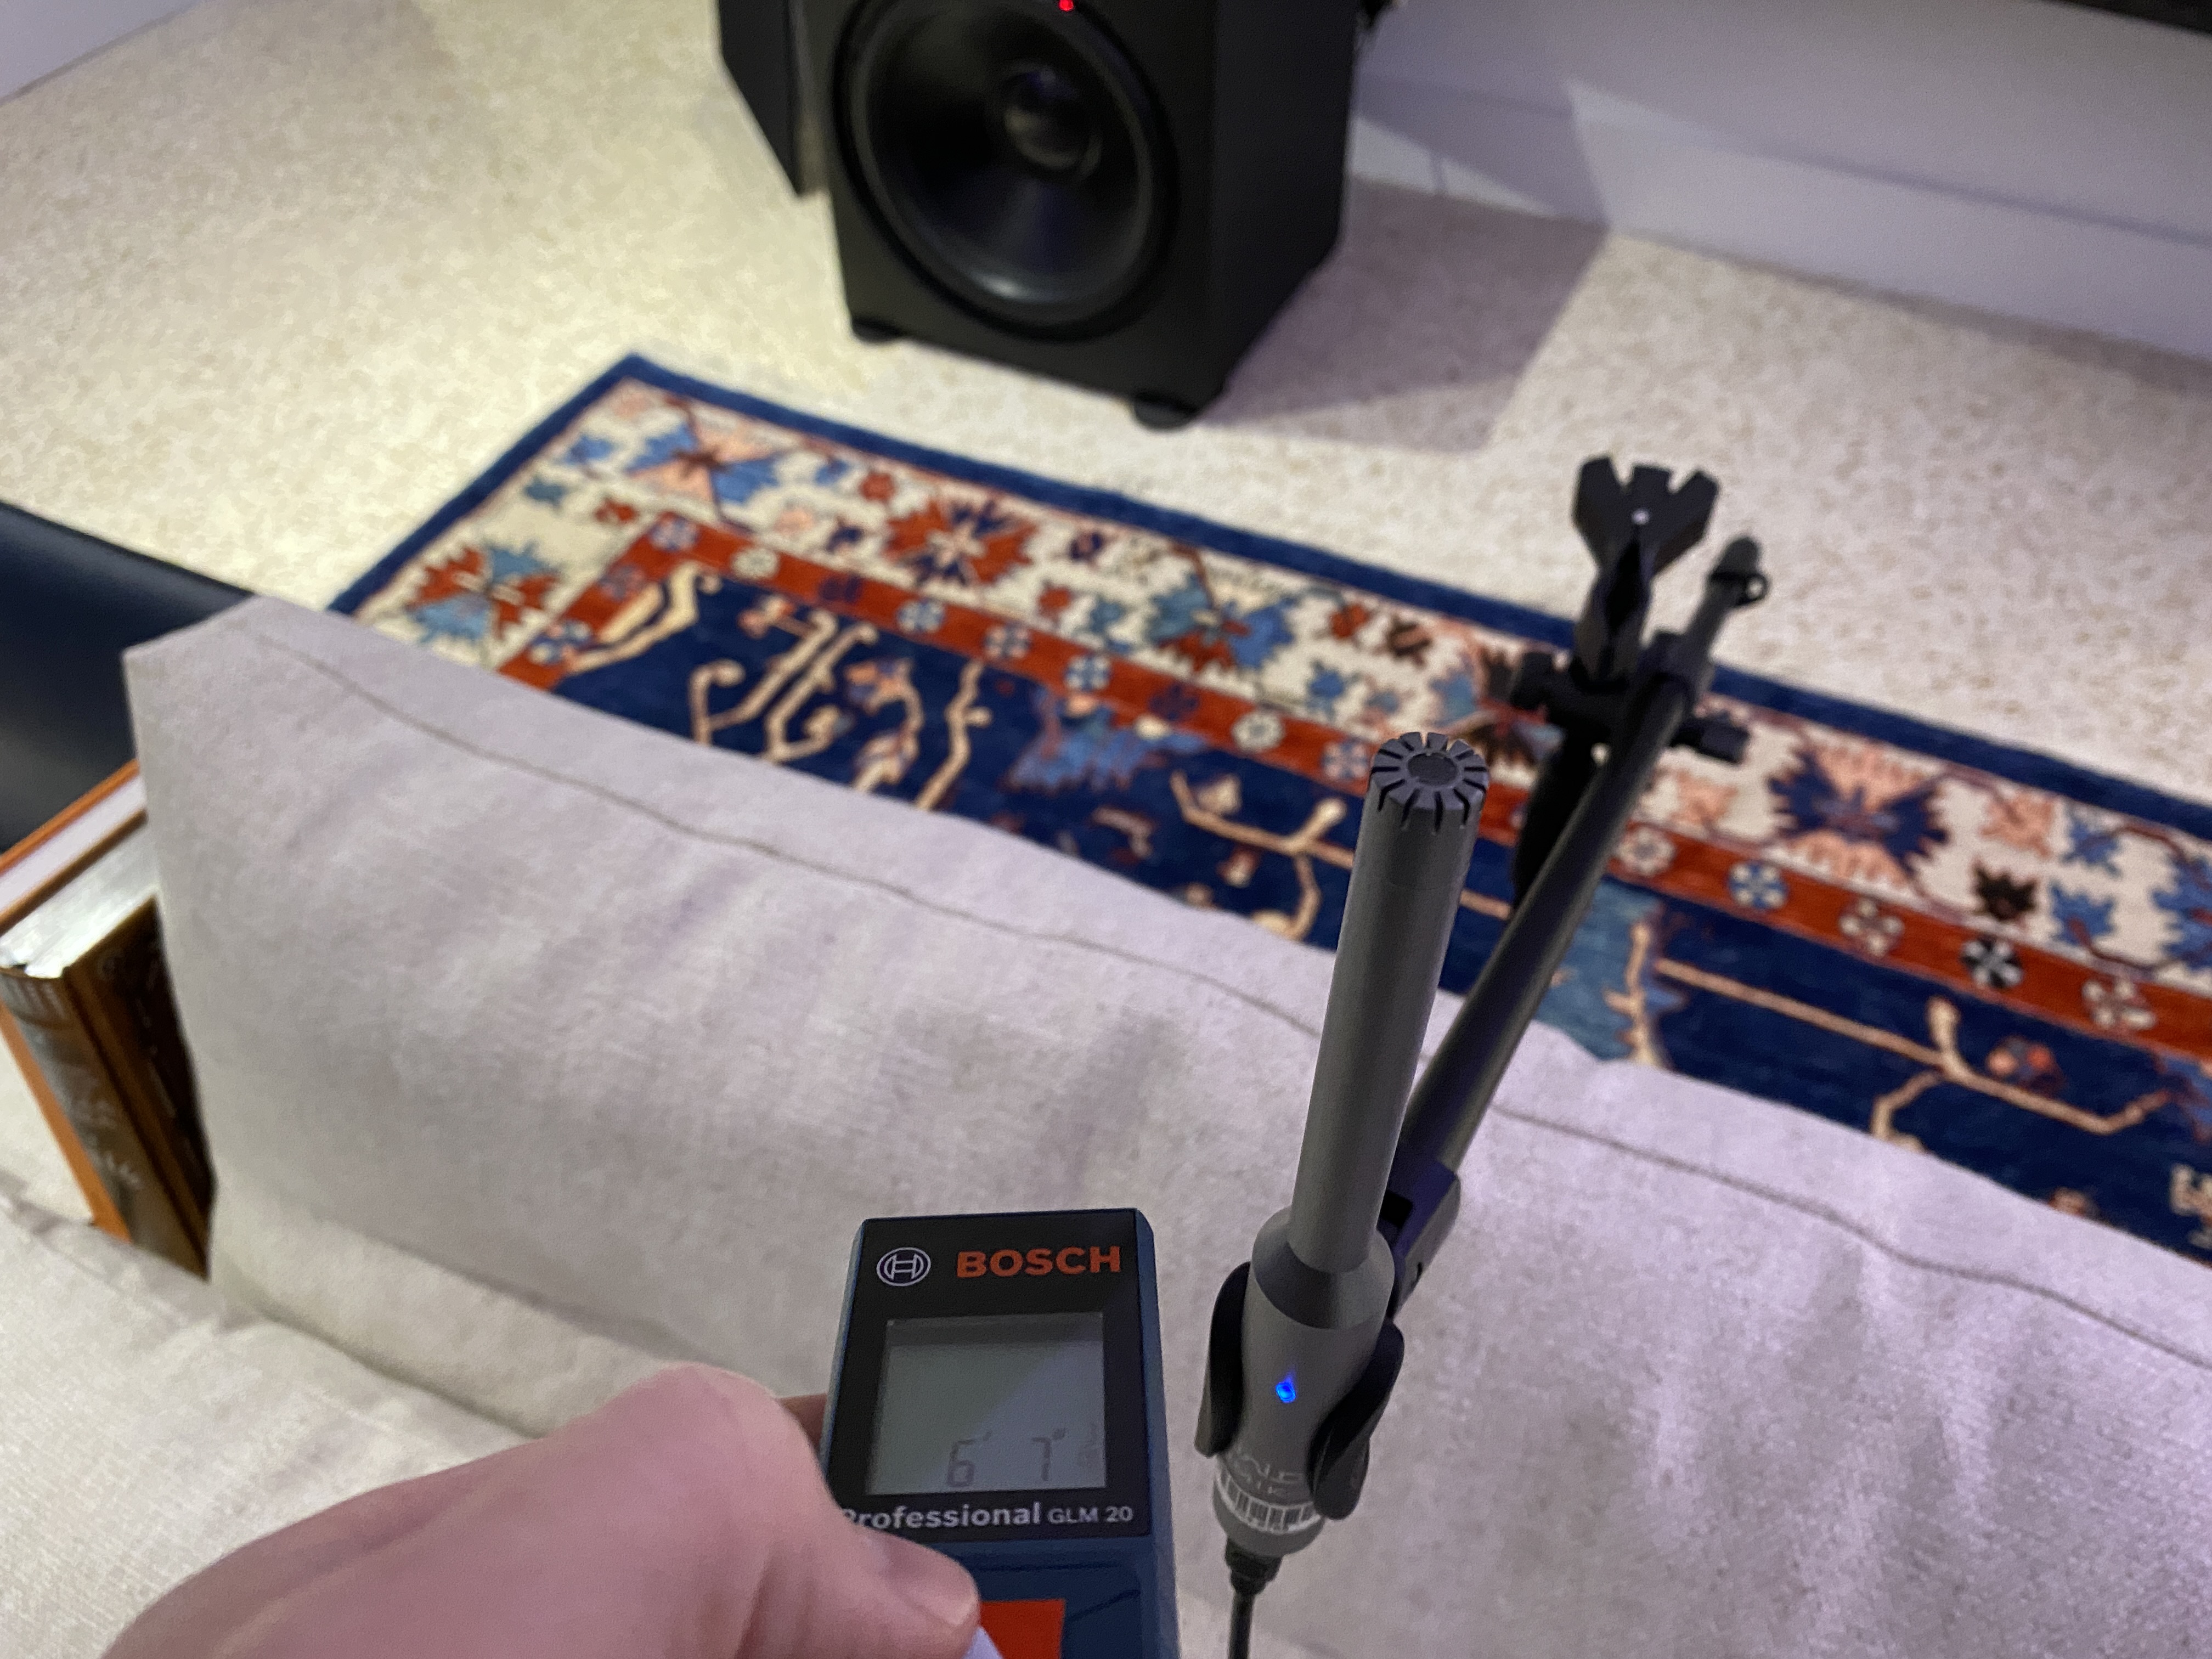
They're about 4ft difference, but REW says 5.32ms or 6ft difference is a bit better. This is likely because my rear subwoofer is wireless.
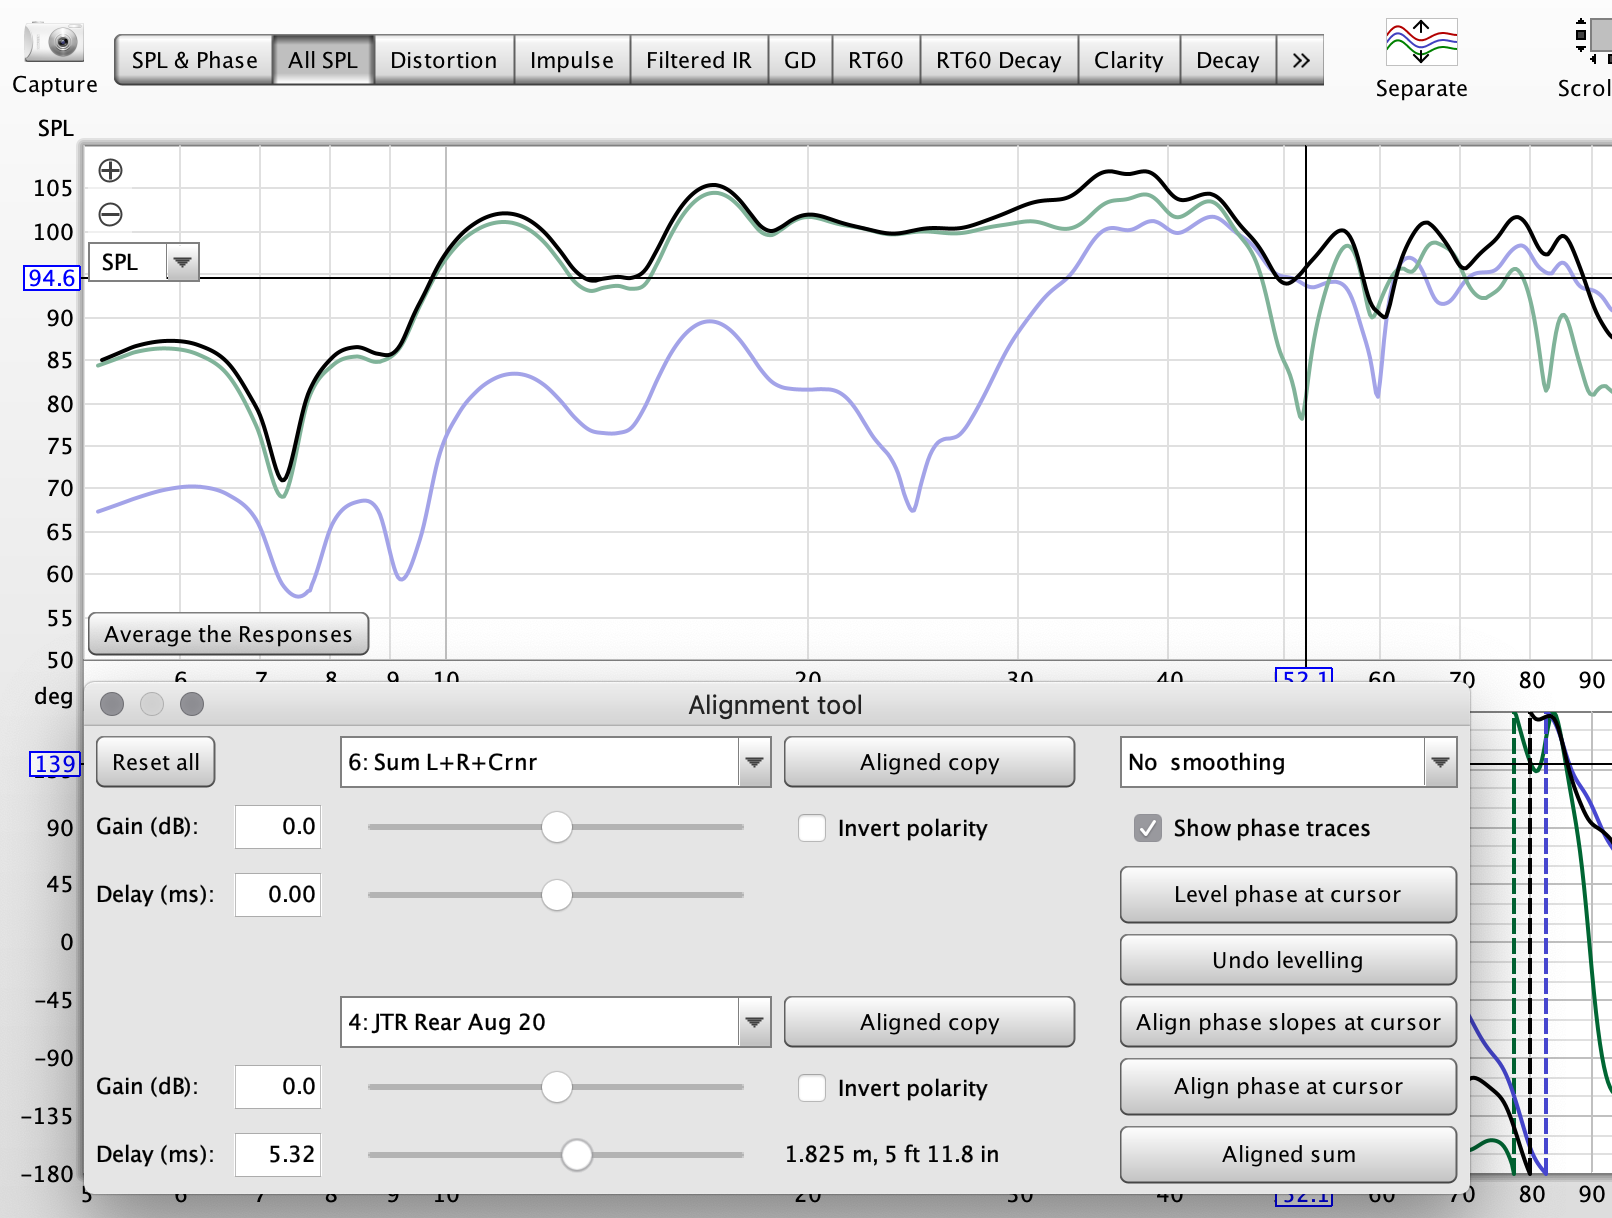
Resulting summation...
Blue is no delay, purple is the expected result with:
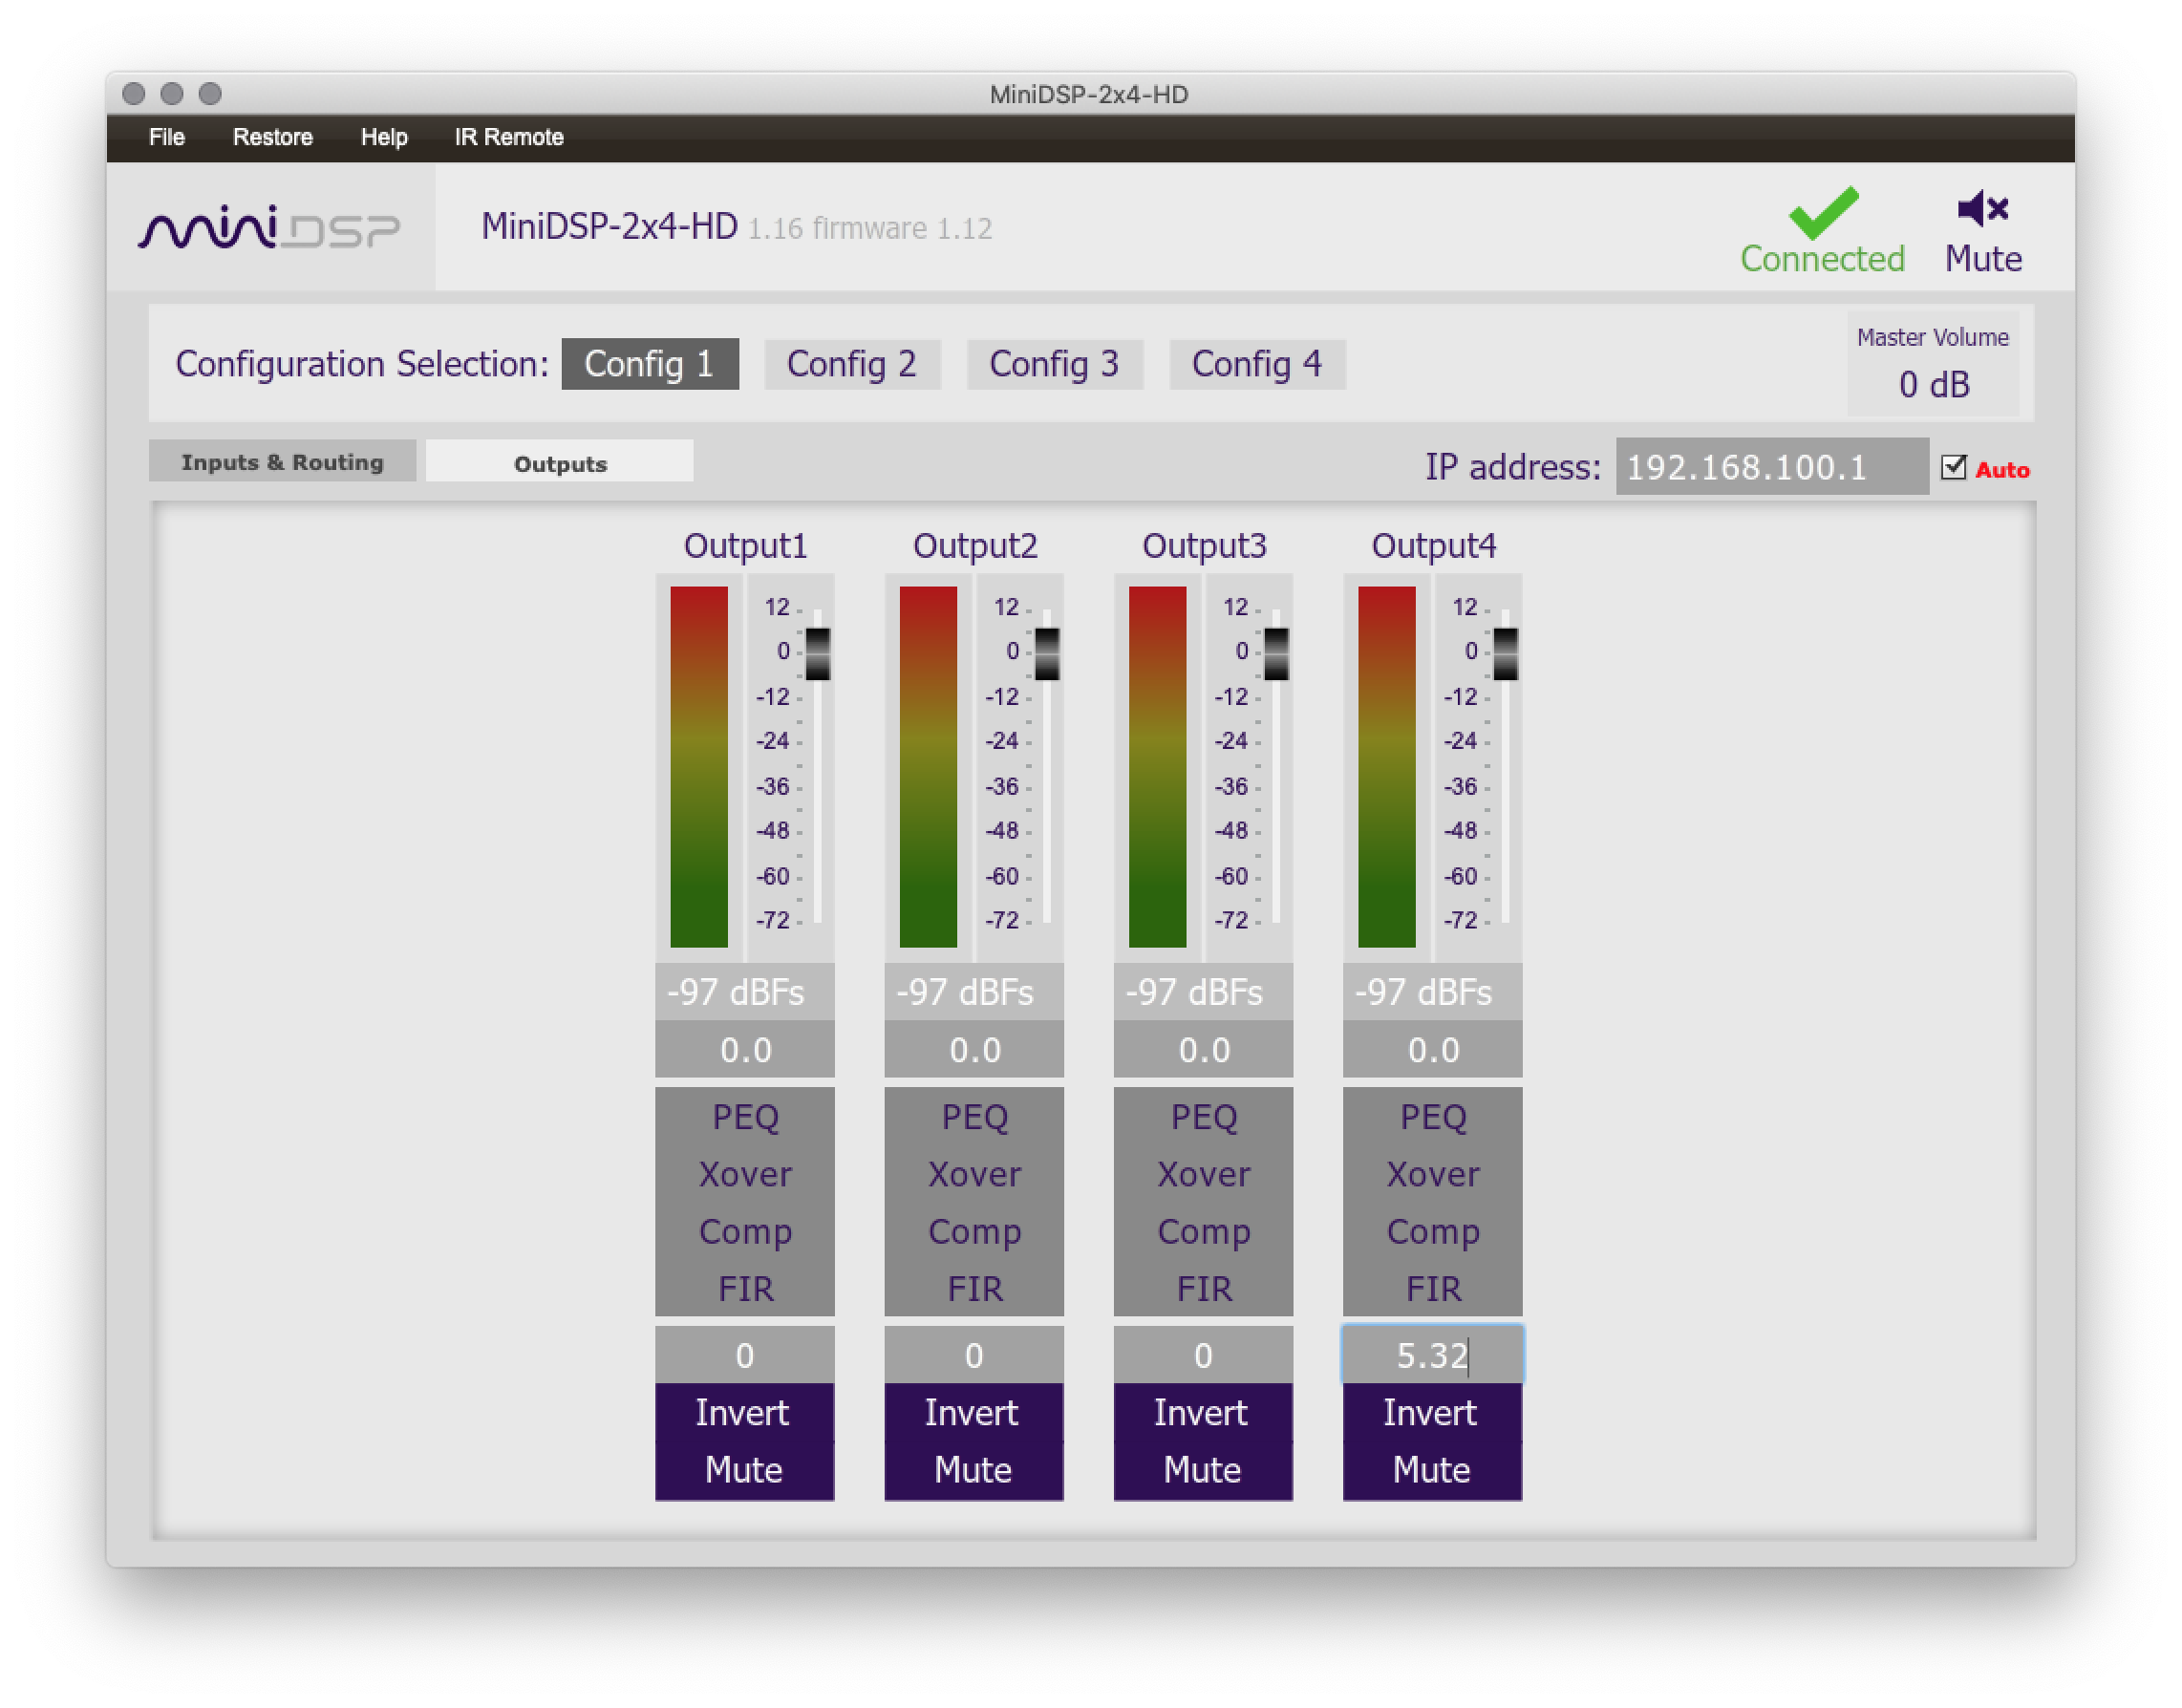
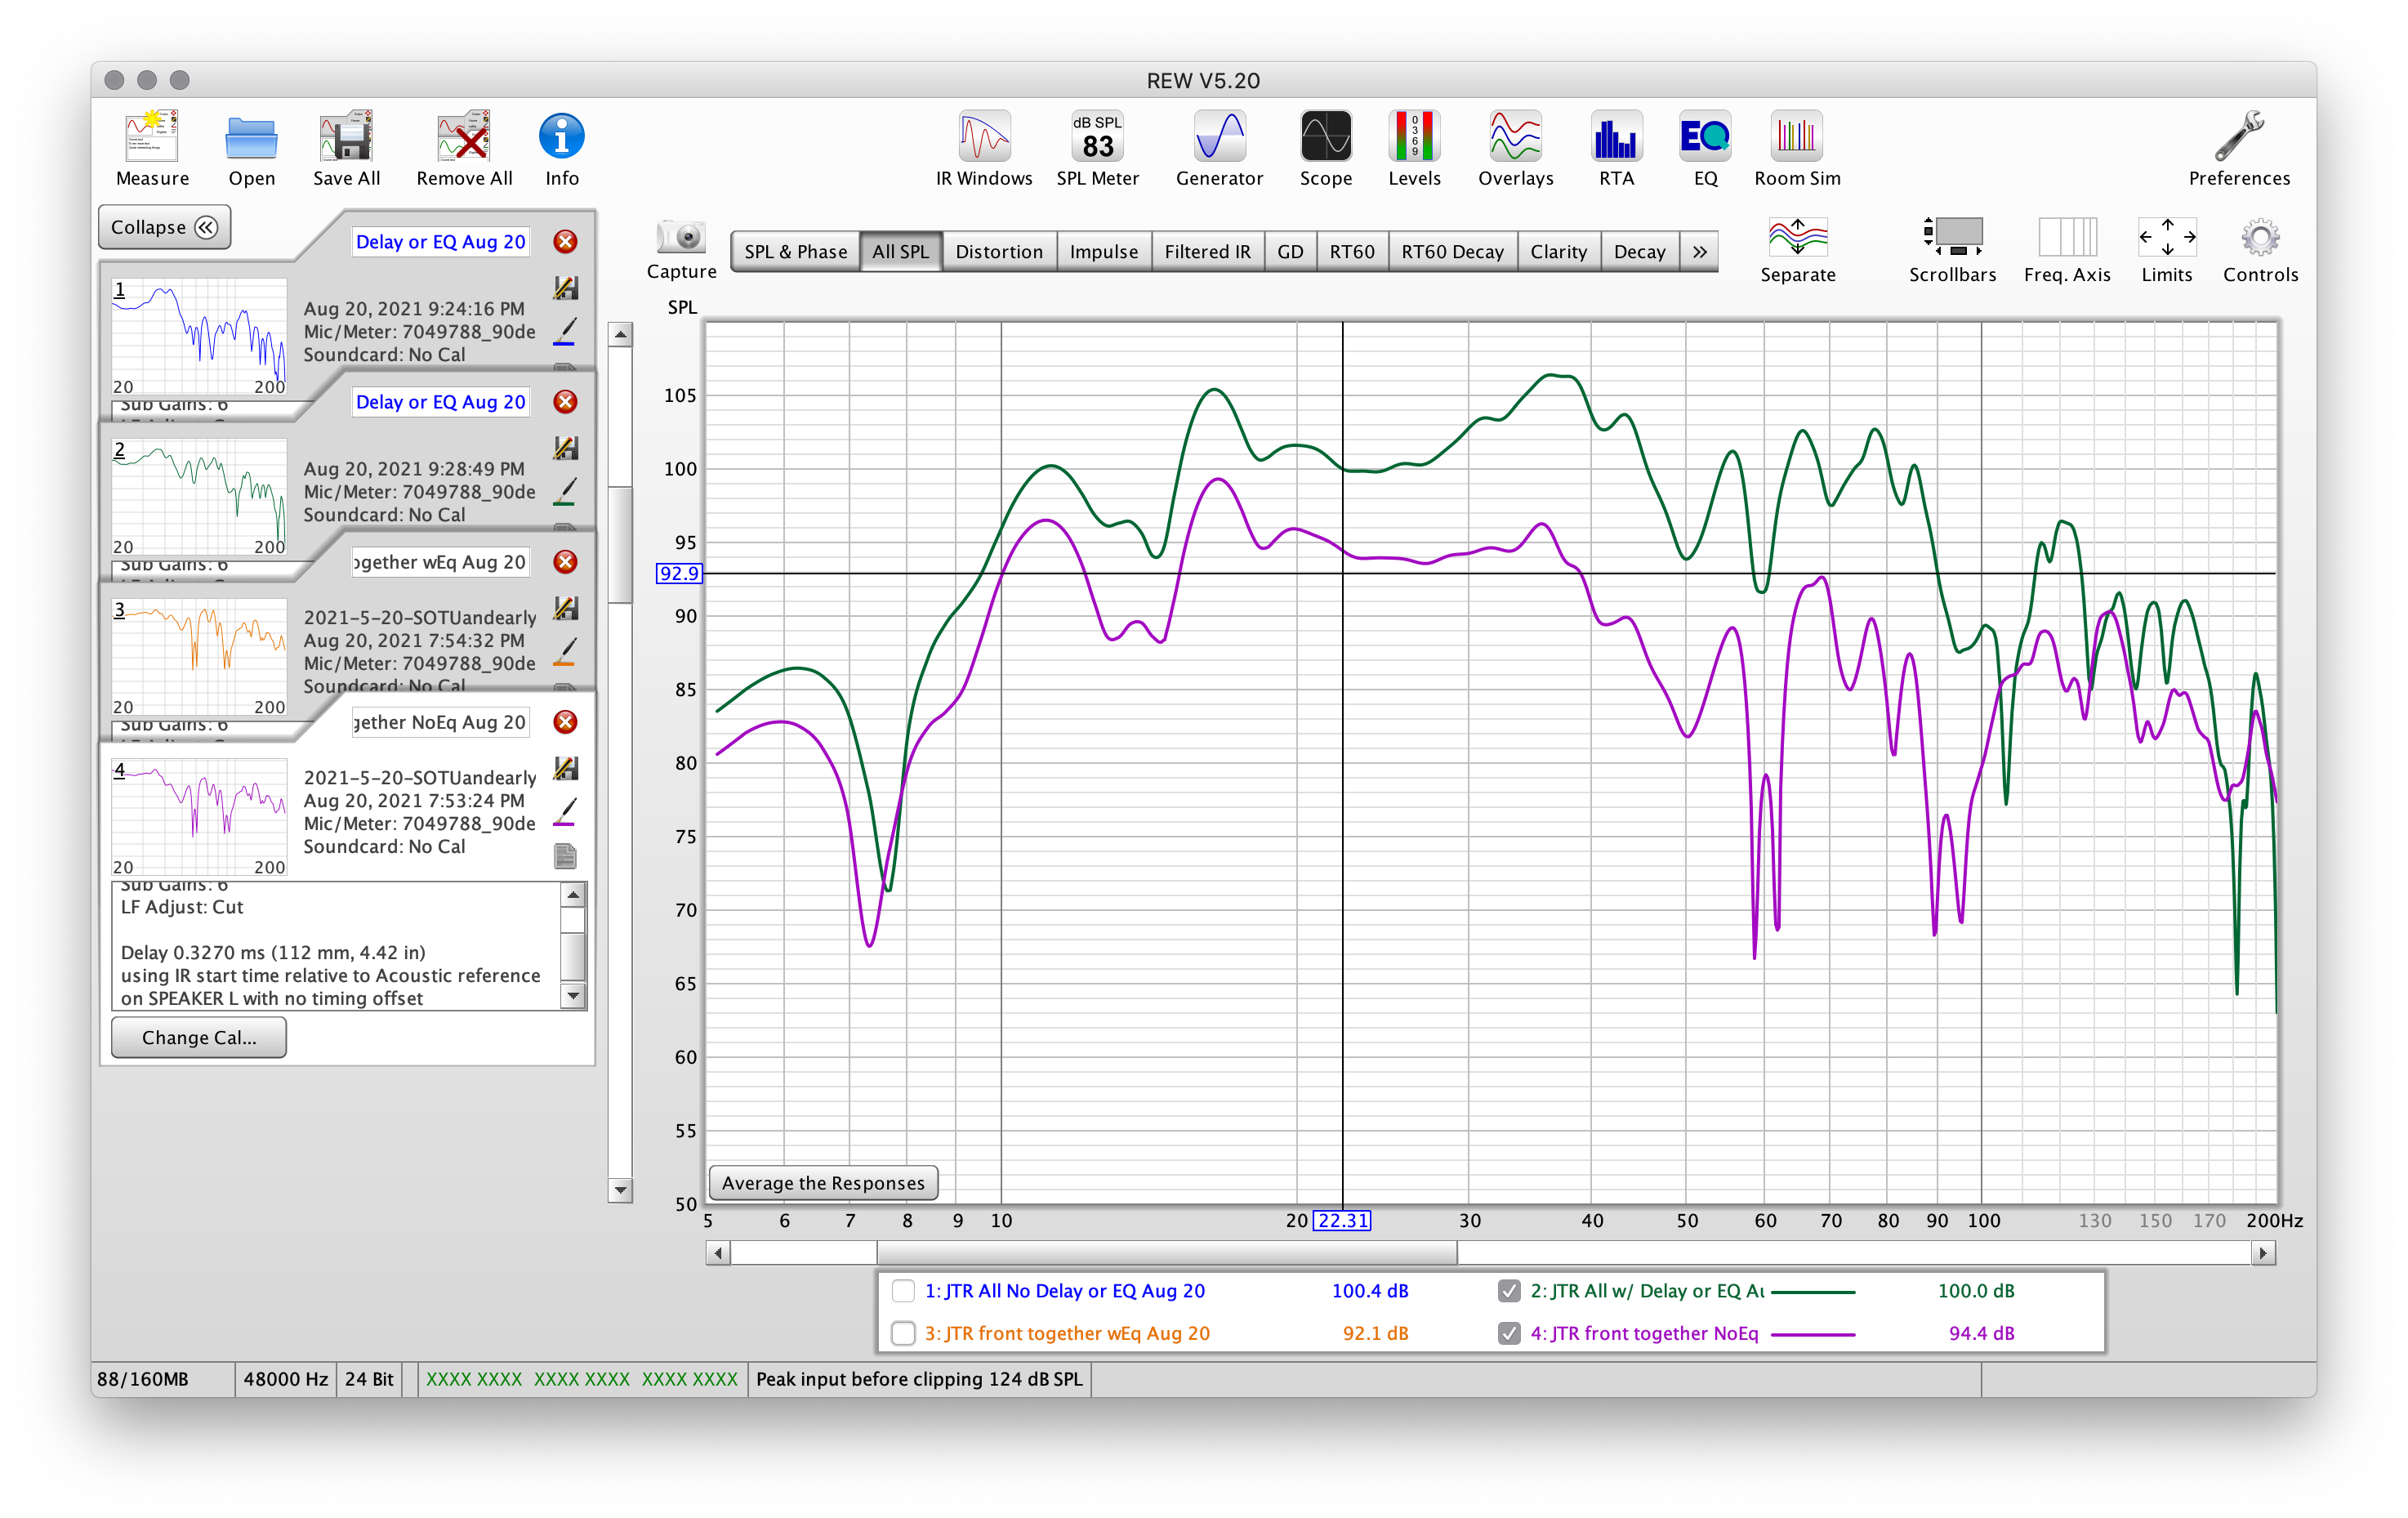
So, we'll need to add delay in the MiniDSP:
After adding in the correct delay, we'll take an actual measurement. Below is the comparison of with delay, with delay, and the expected frequency response based on REWs calculations/estimations.
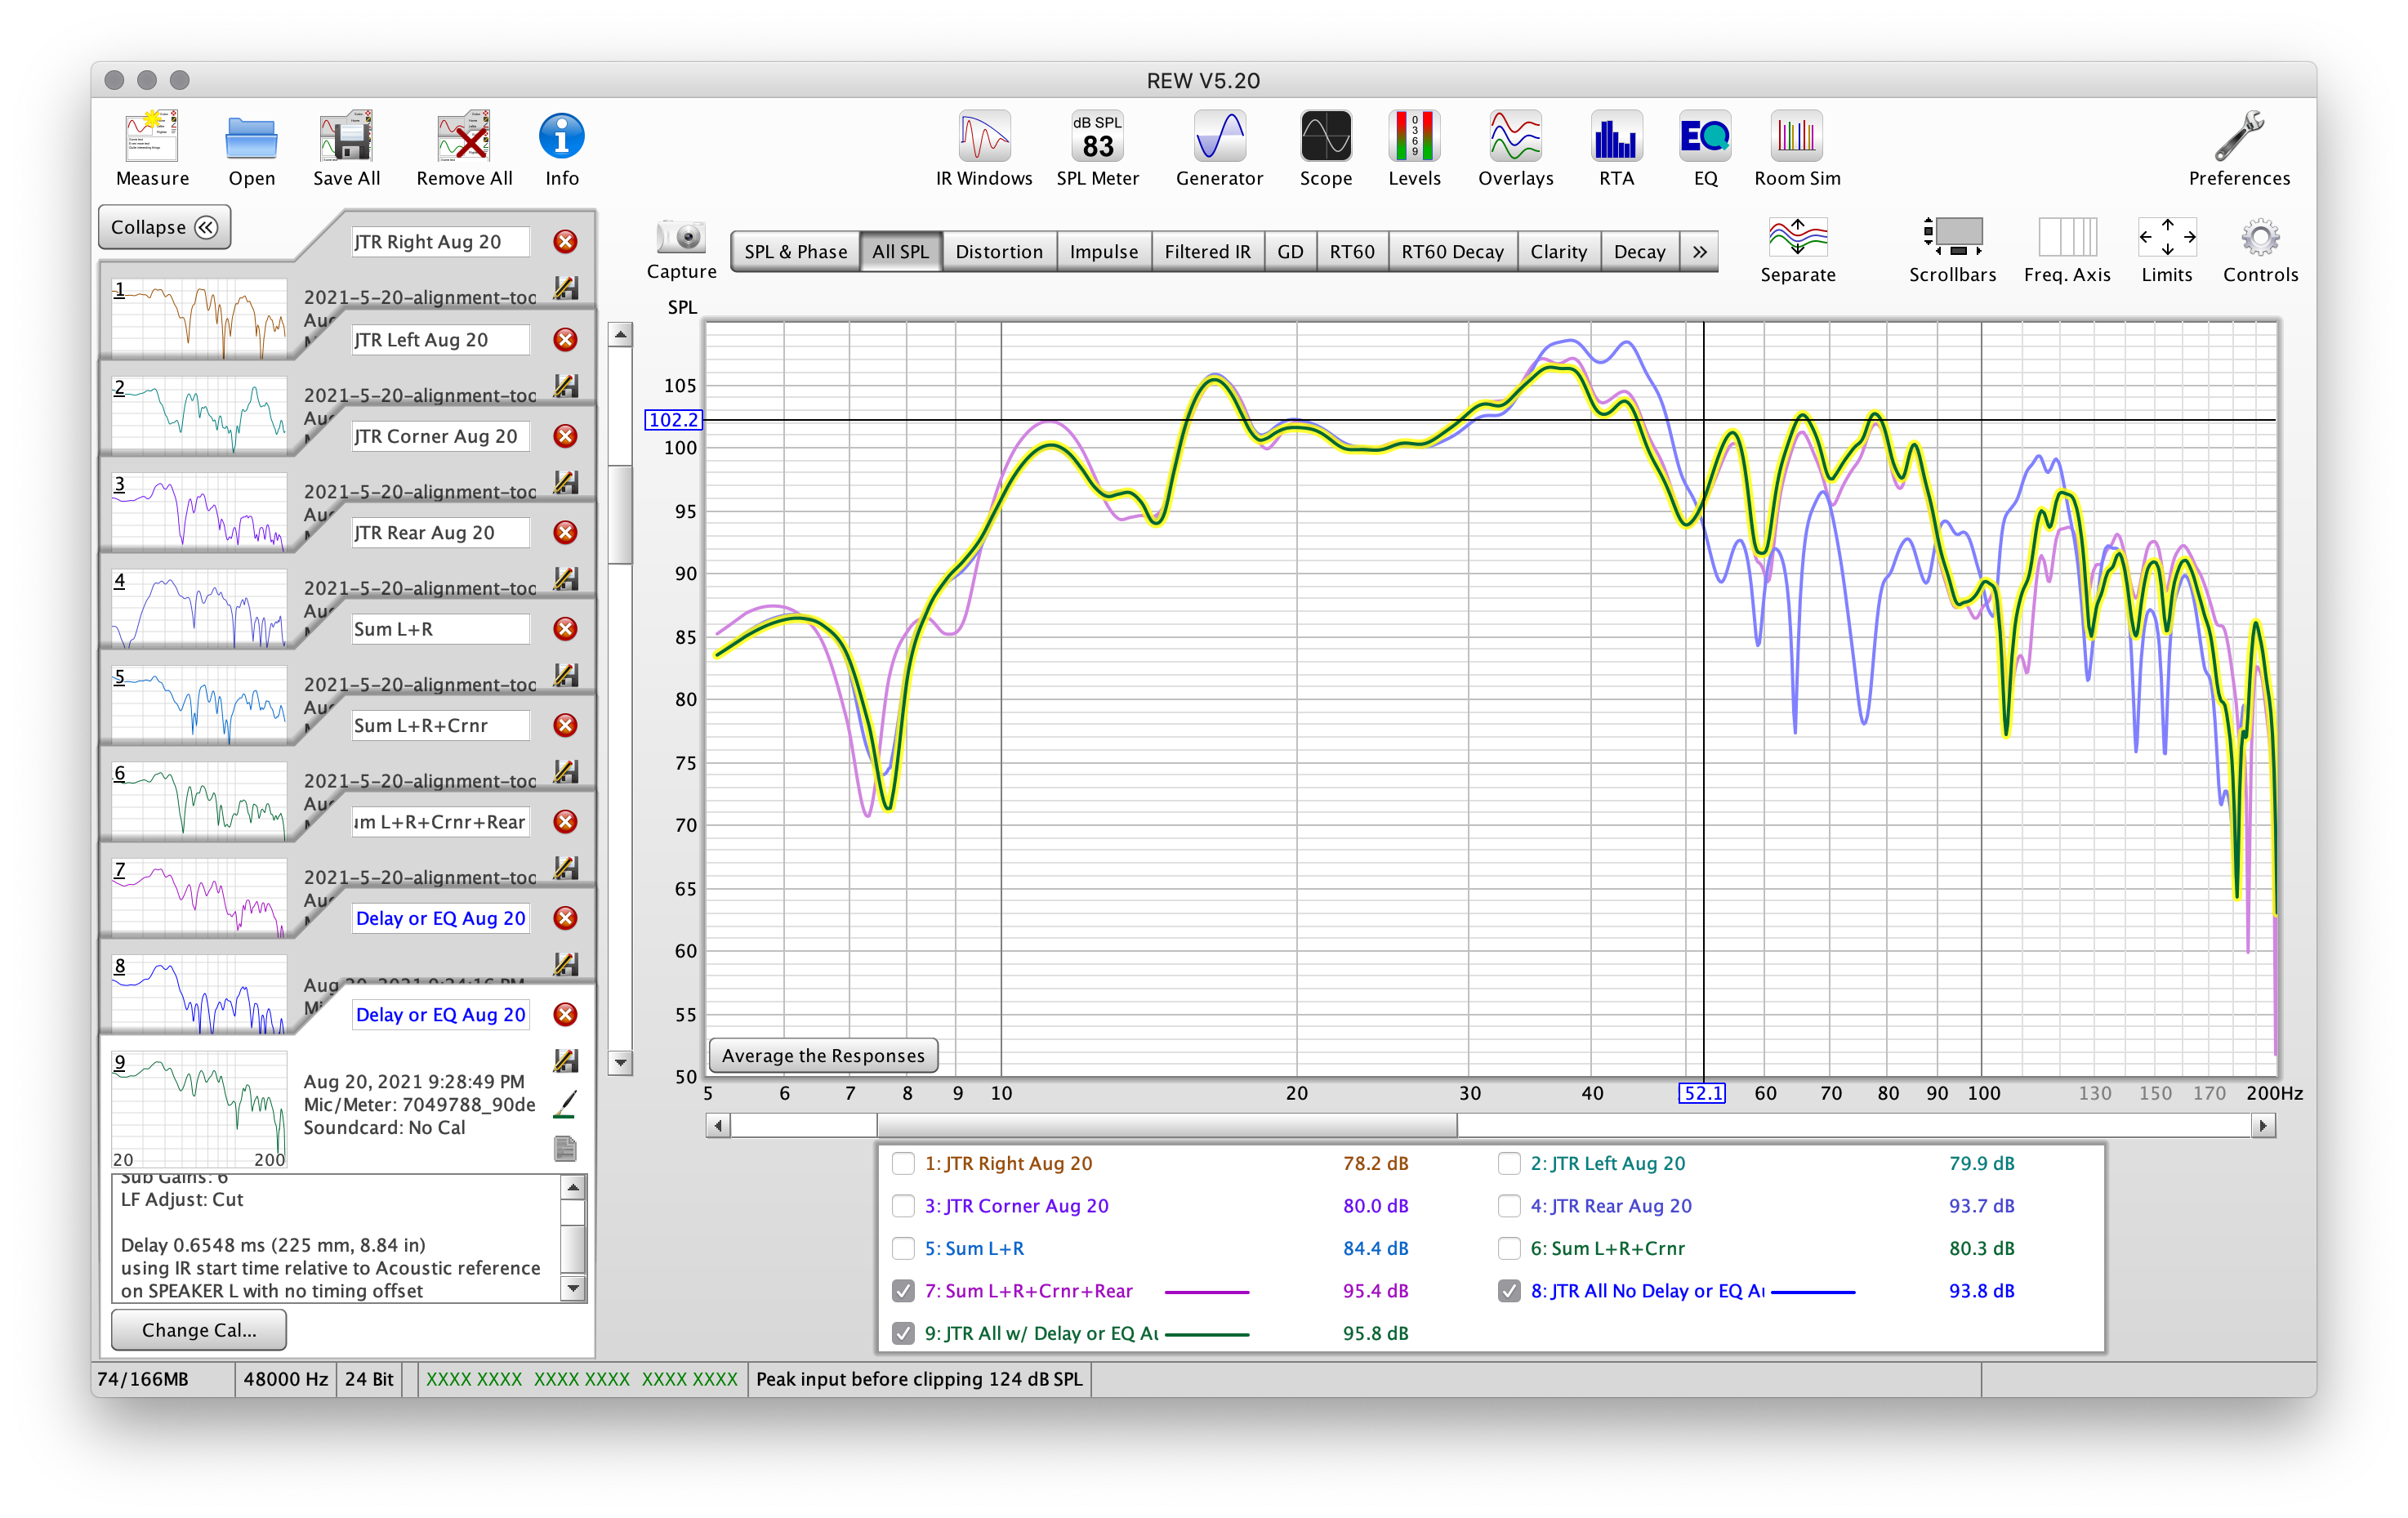
You can see that the actual and estimated sums are extremely close. This is the reason why this tool is so powerful.
We can also make some quick comparisons, like 2 versus 4 subwoofers:
Now it's time to EQ!
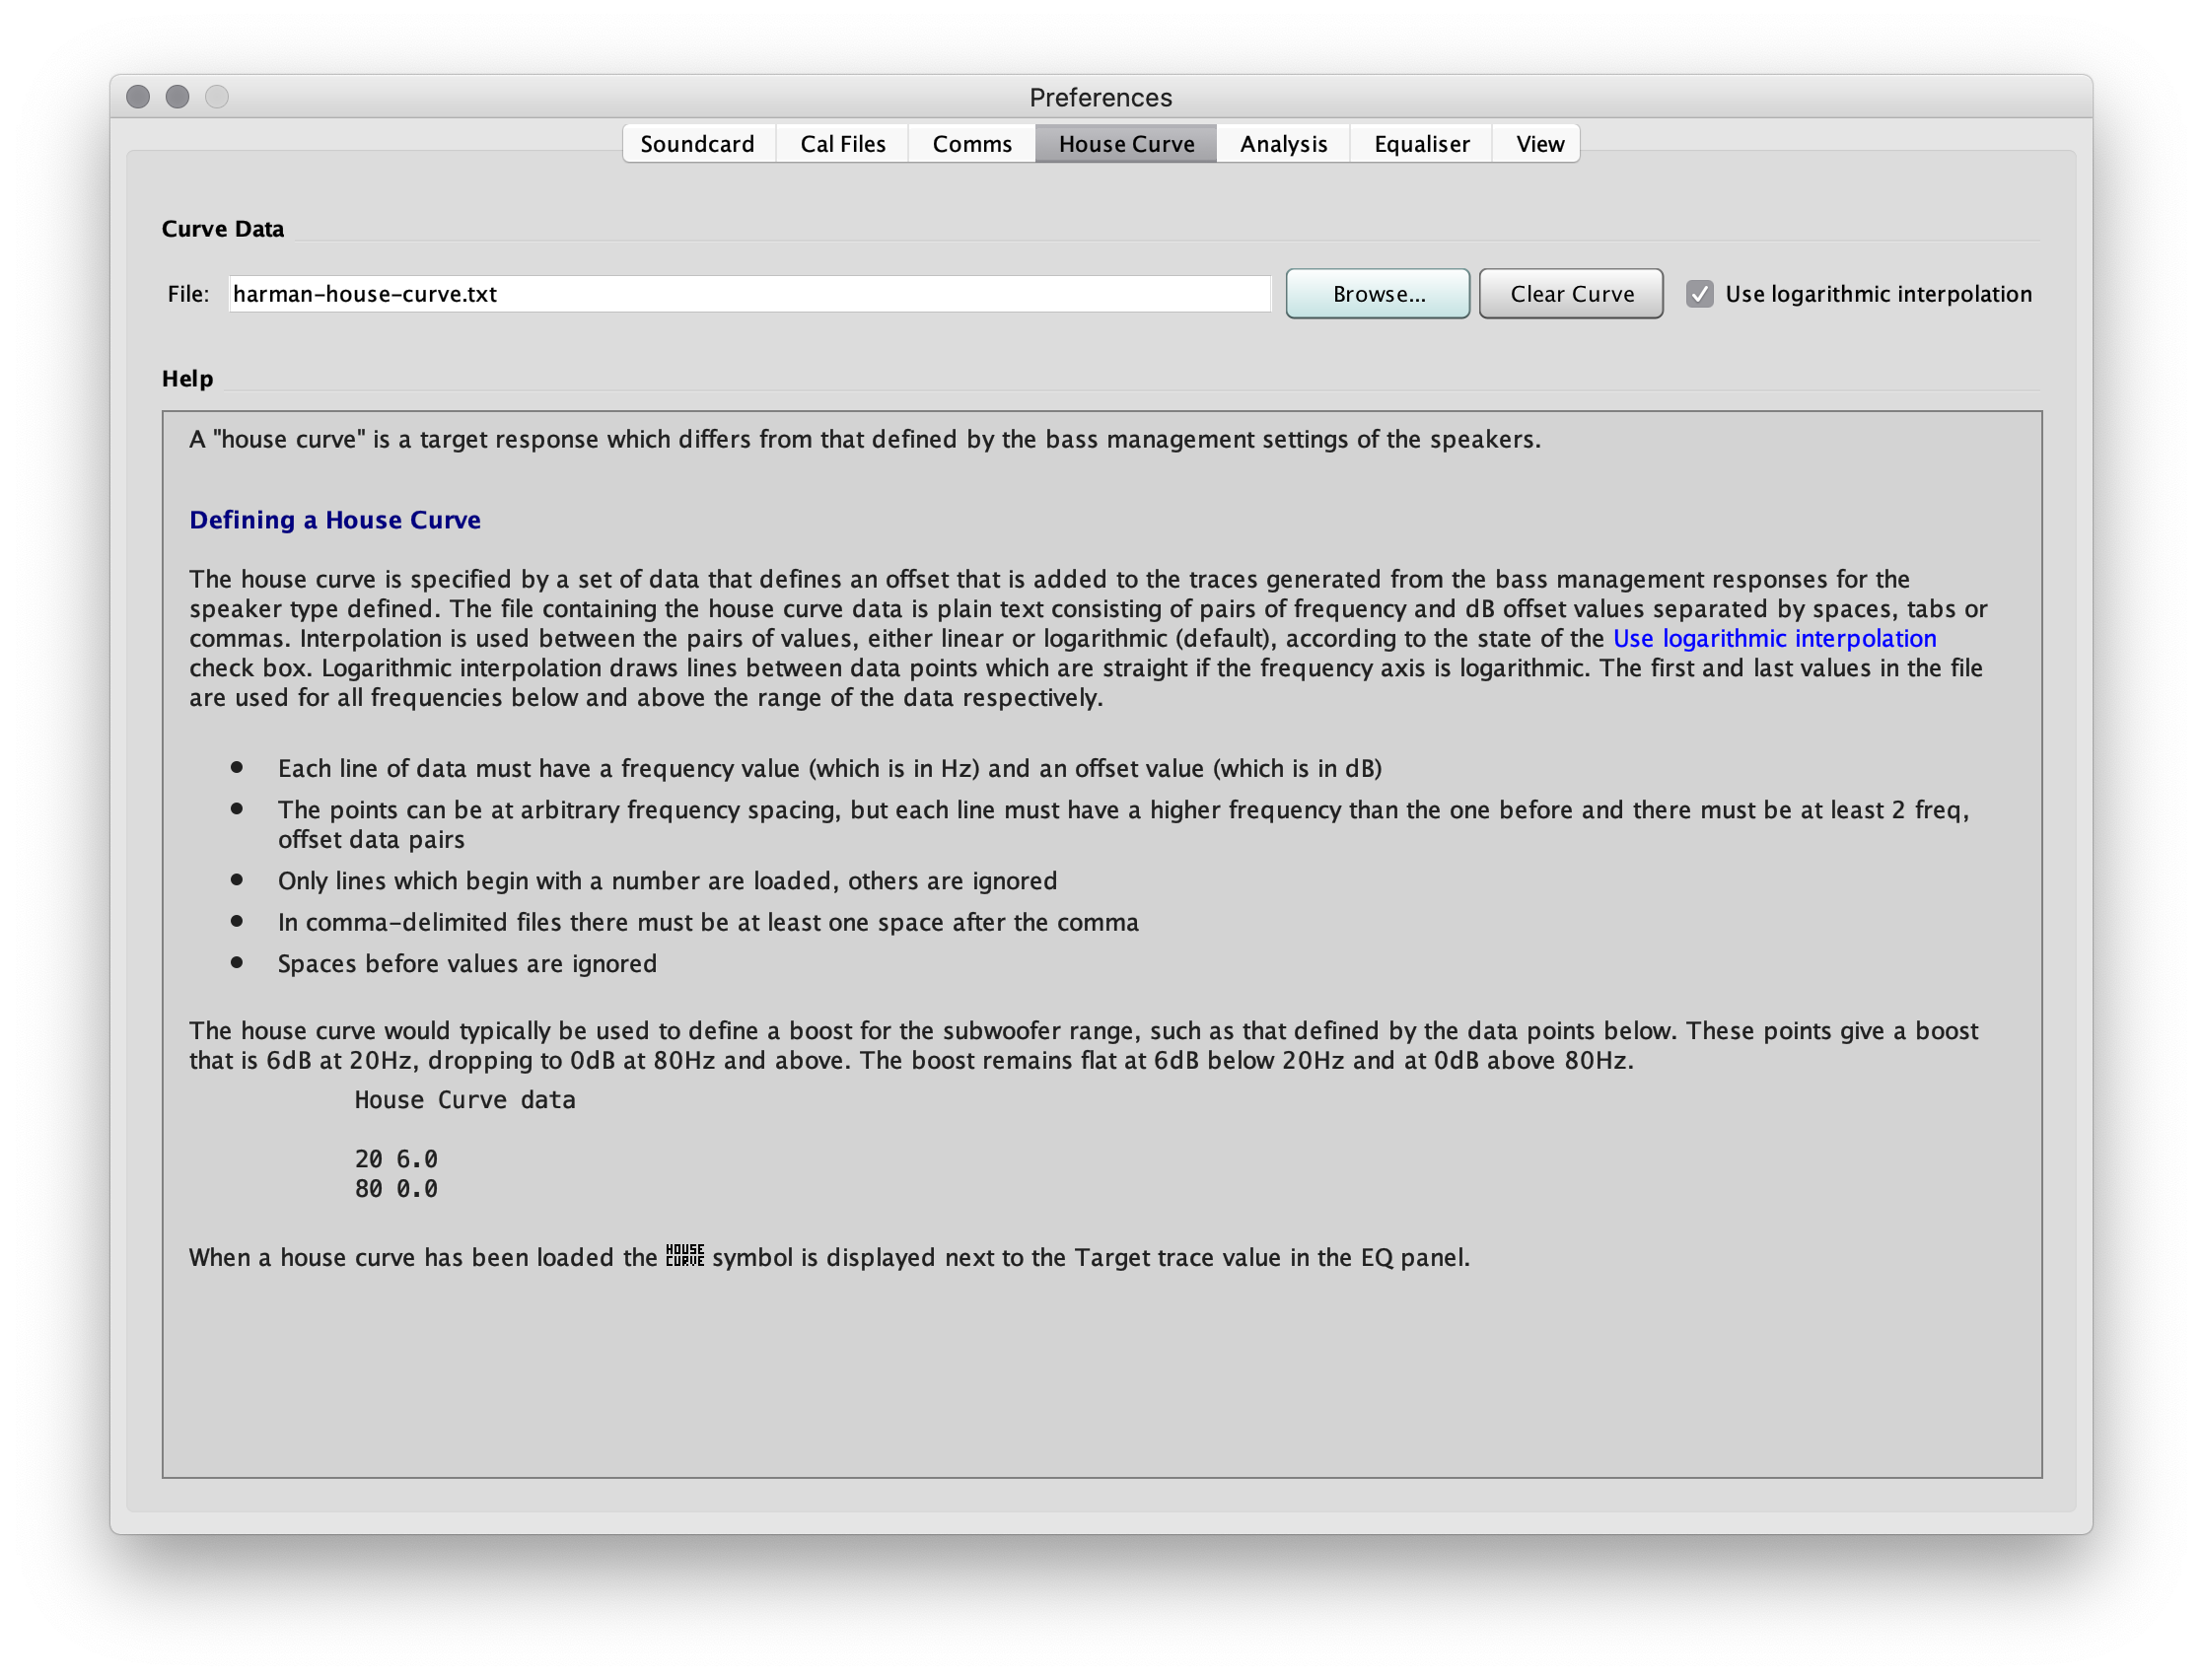
First, I prefer to run a house curve. This can be added in the preferences dialog box under "House Curve."
Next lets load the EQ tool.
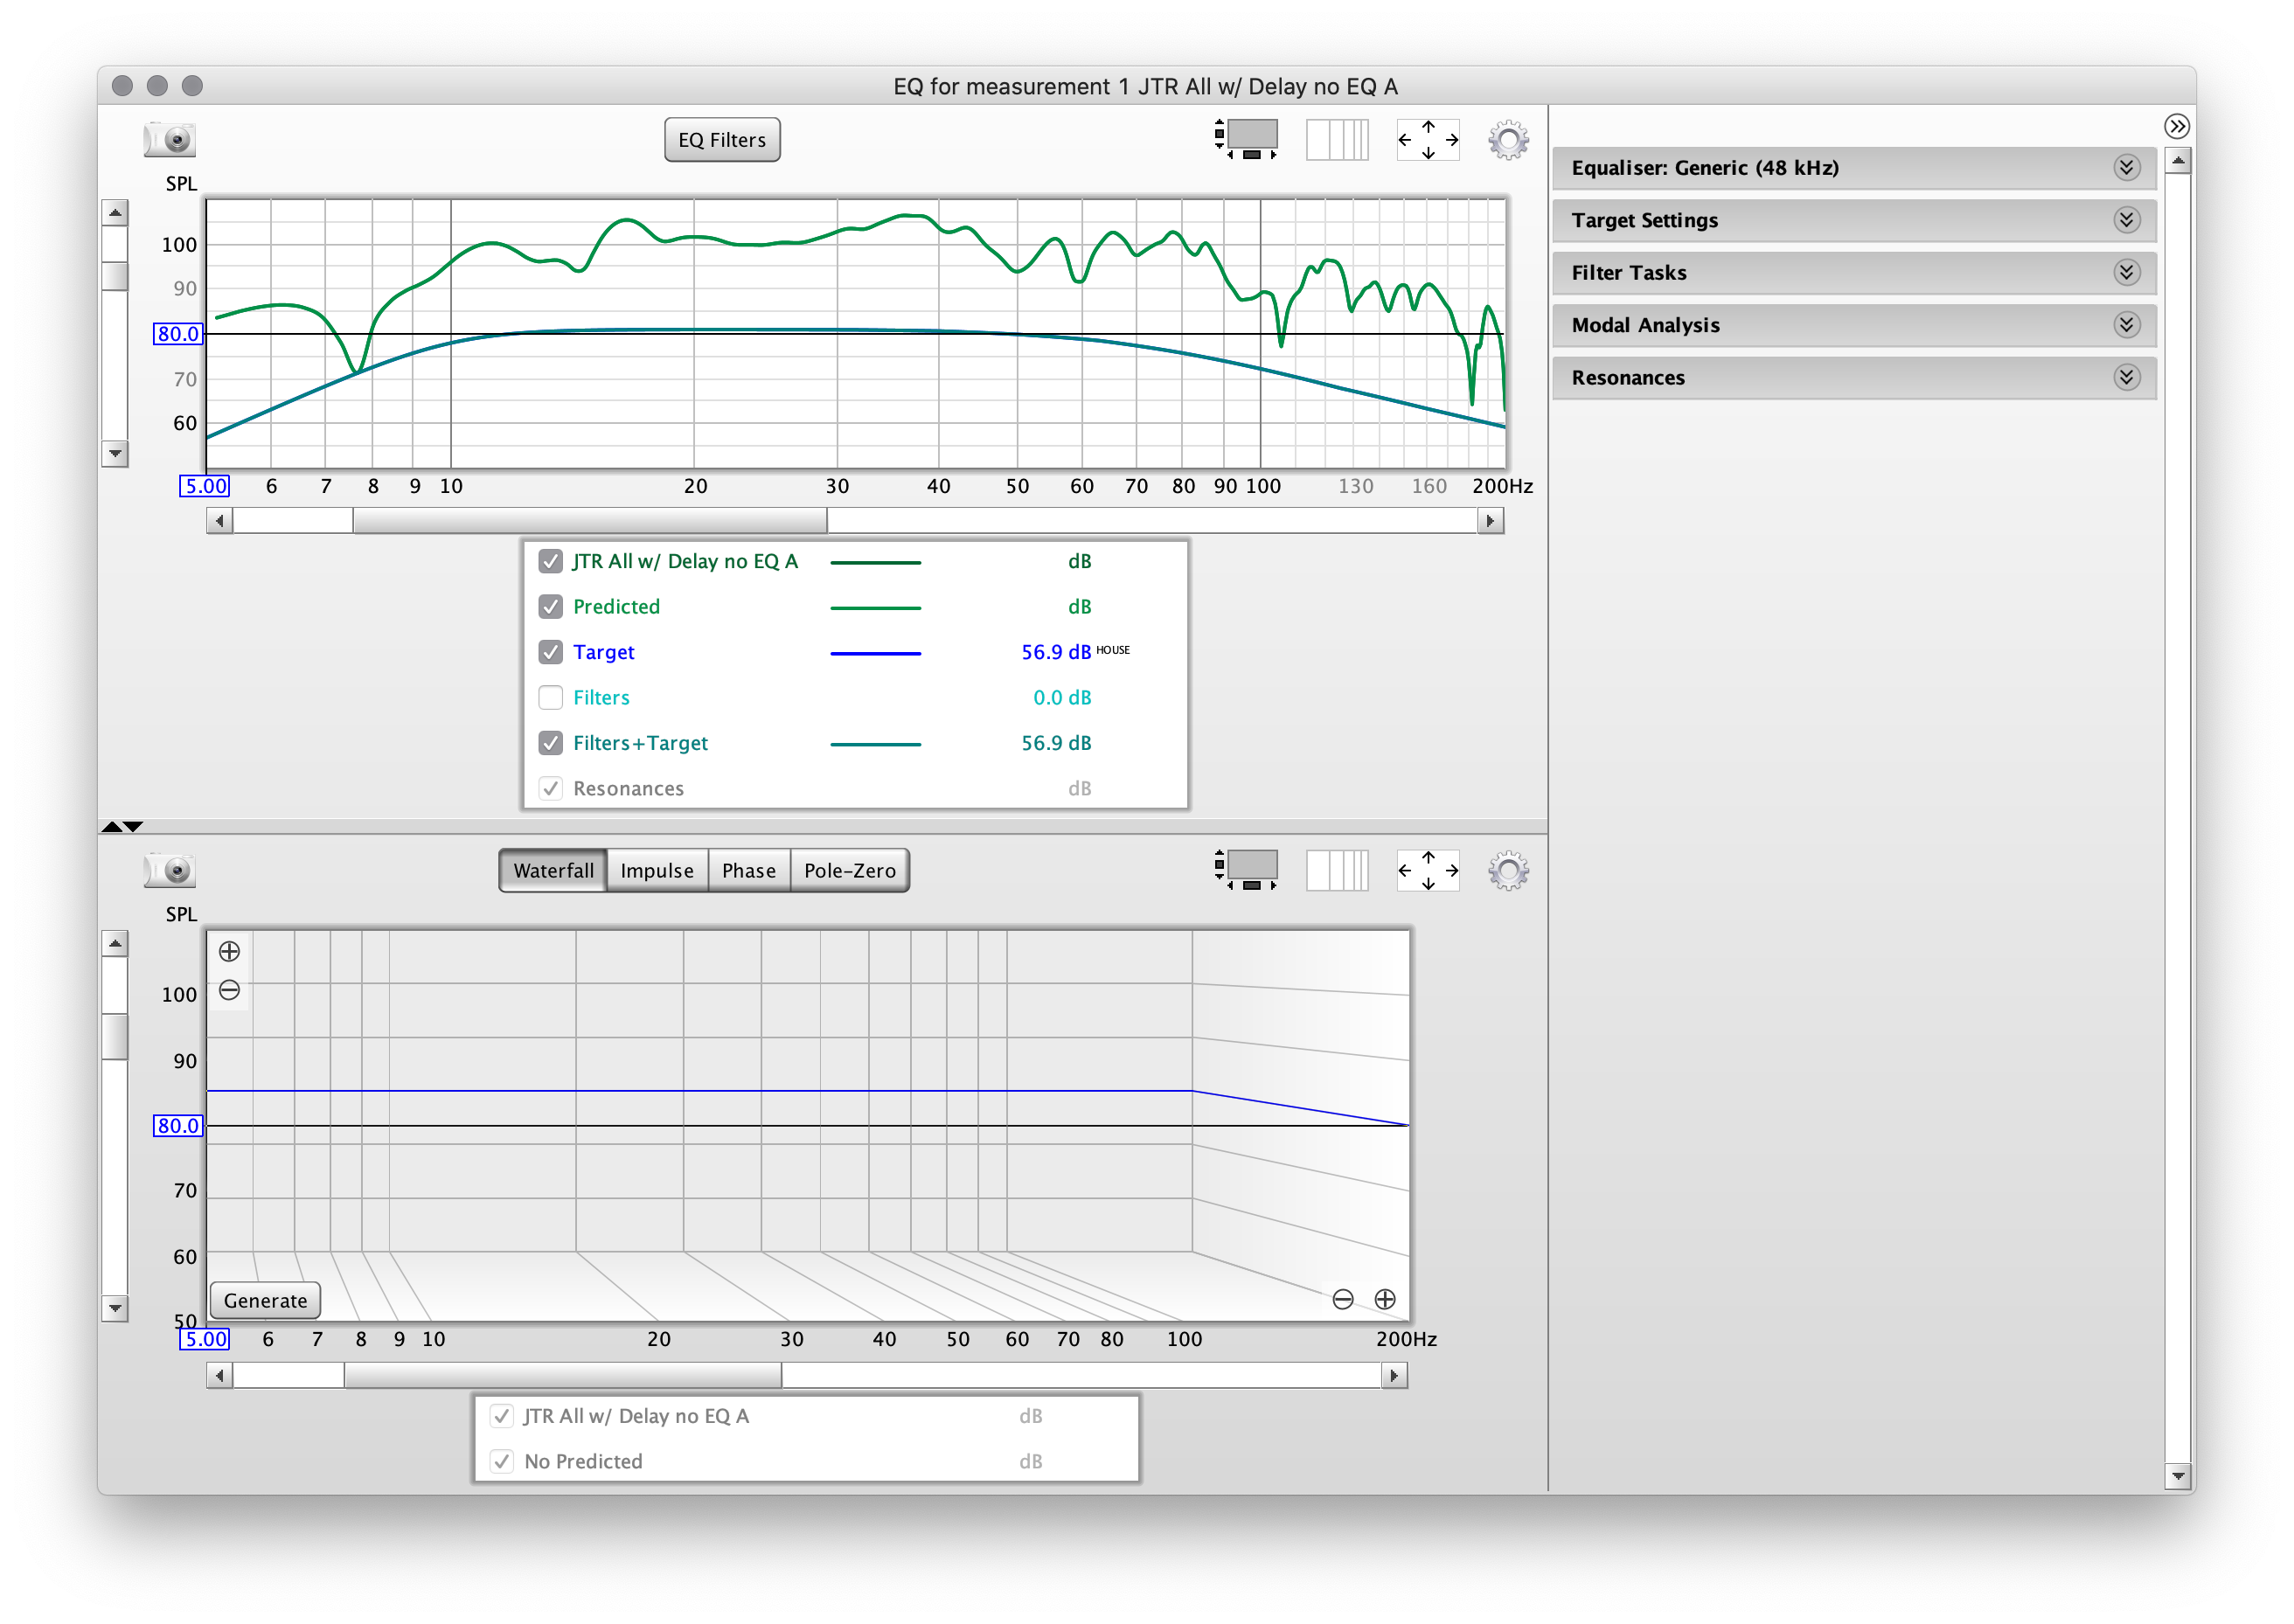
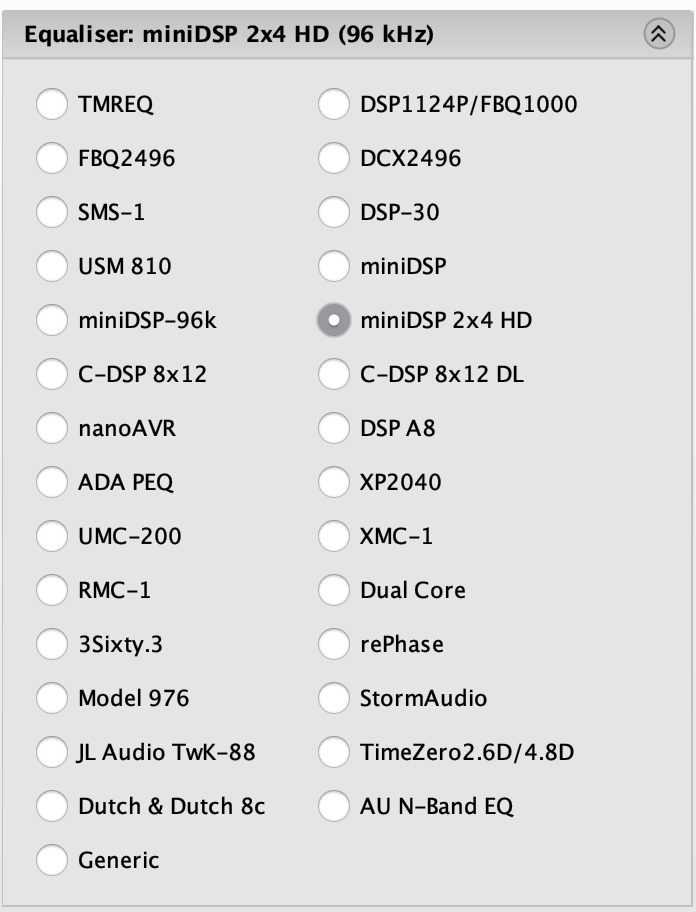
Click the first drop-down on the right to enter the Equalizer selector. In my case, I'm using a MiniDSP 2x4HD, so I'll select that.
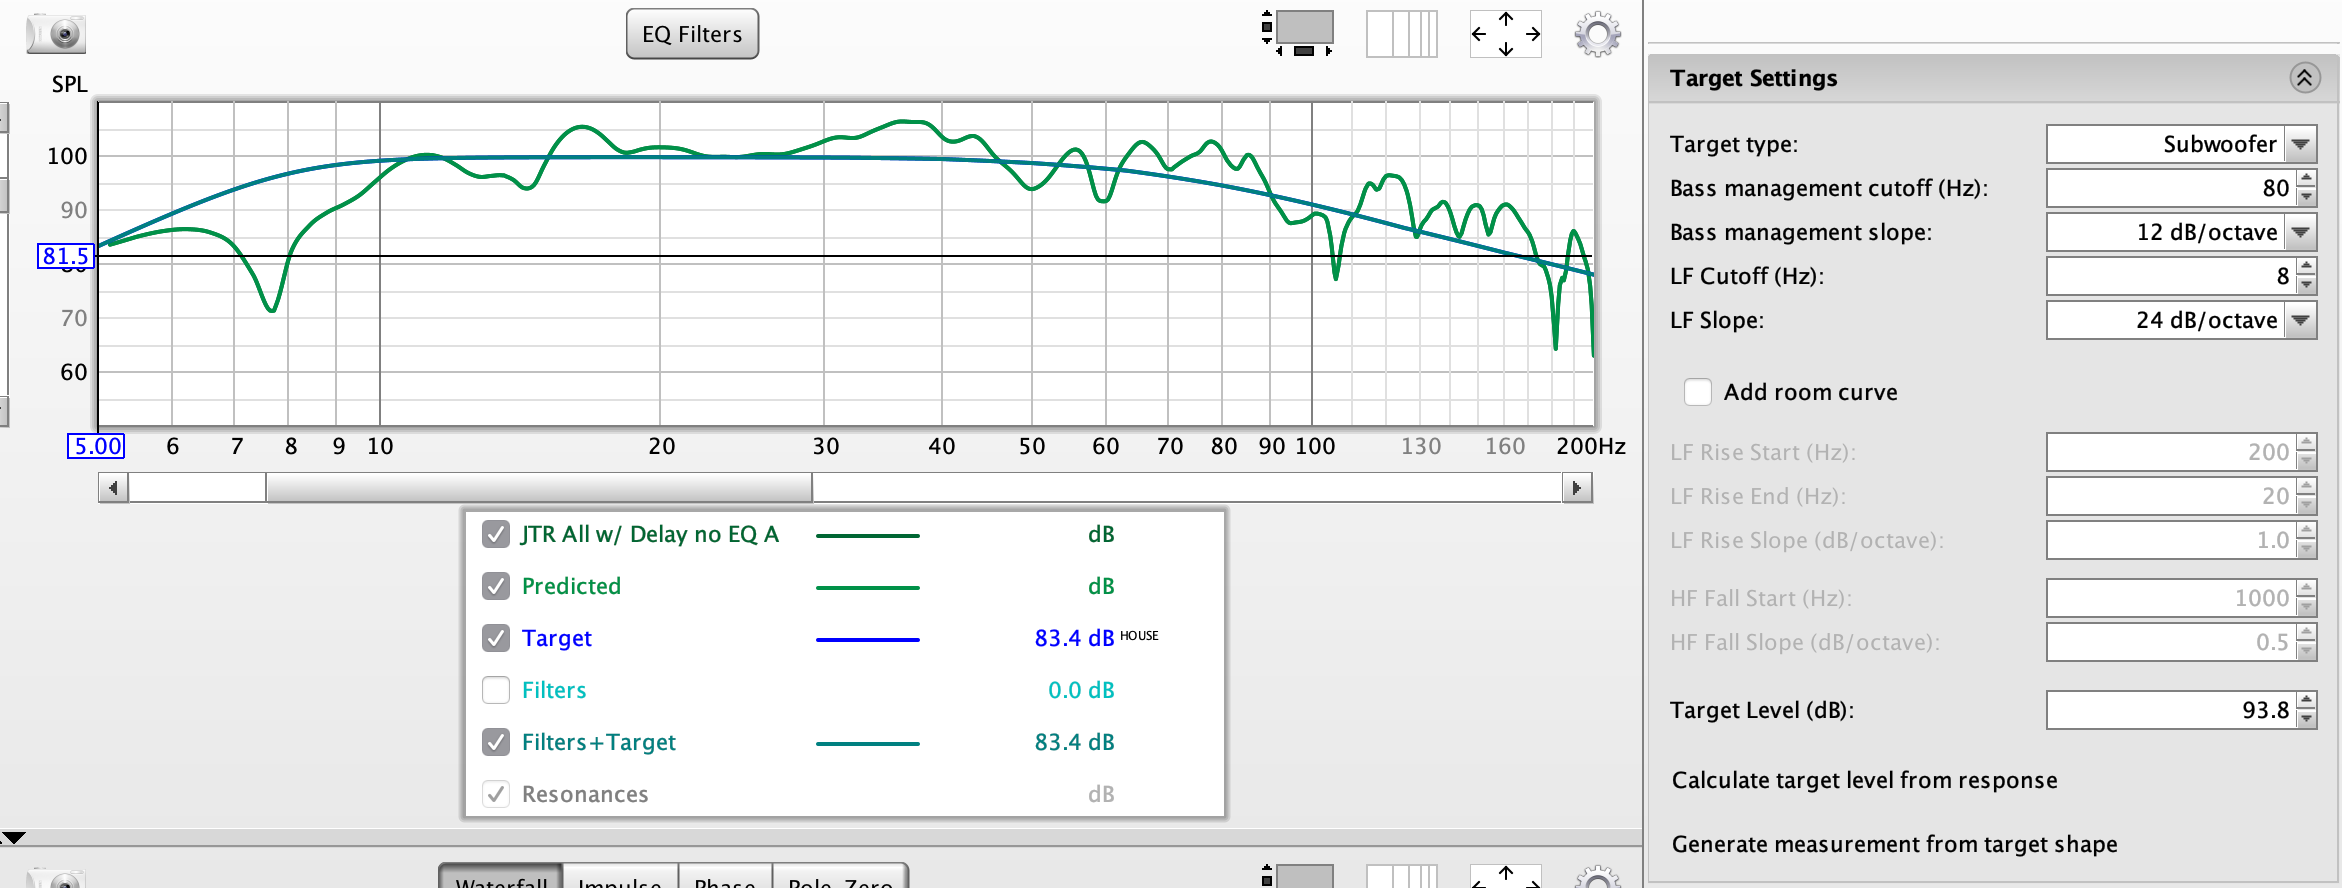
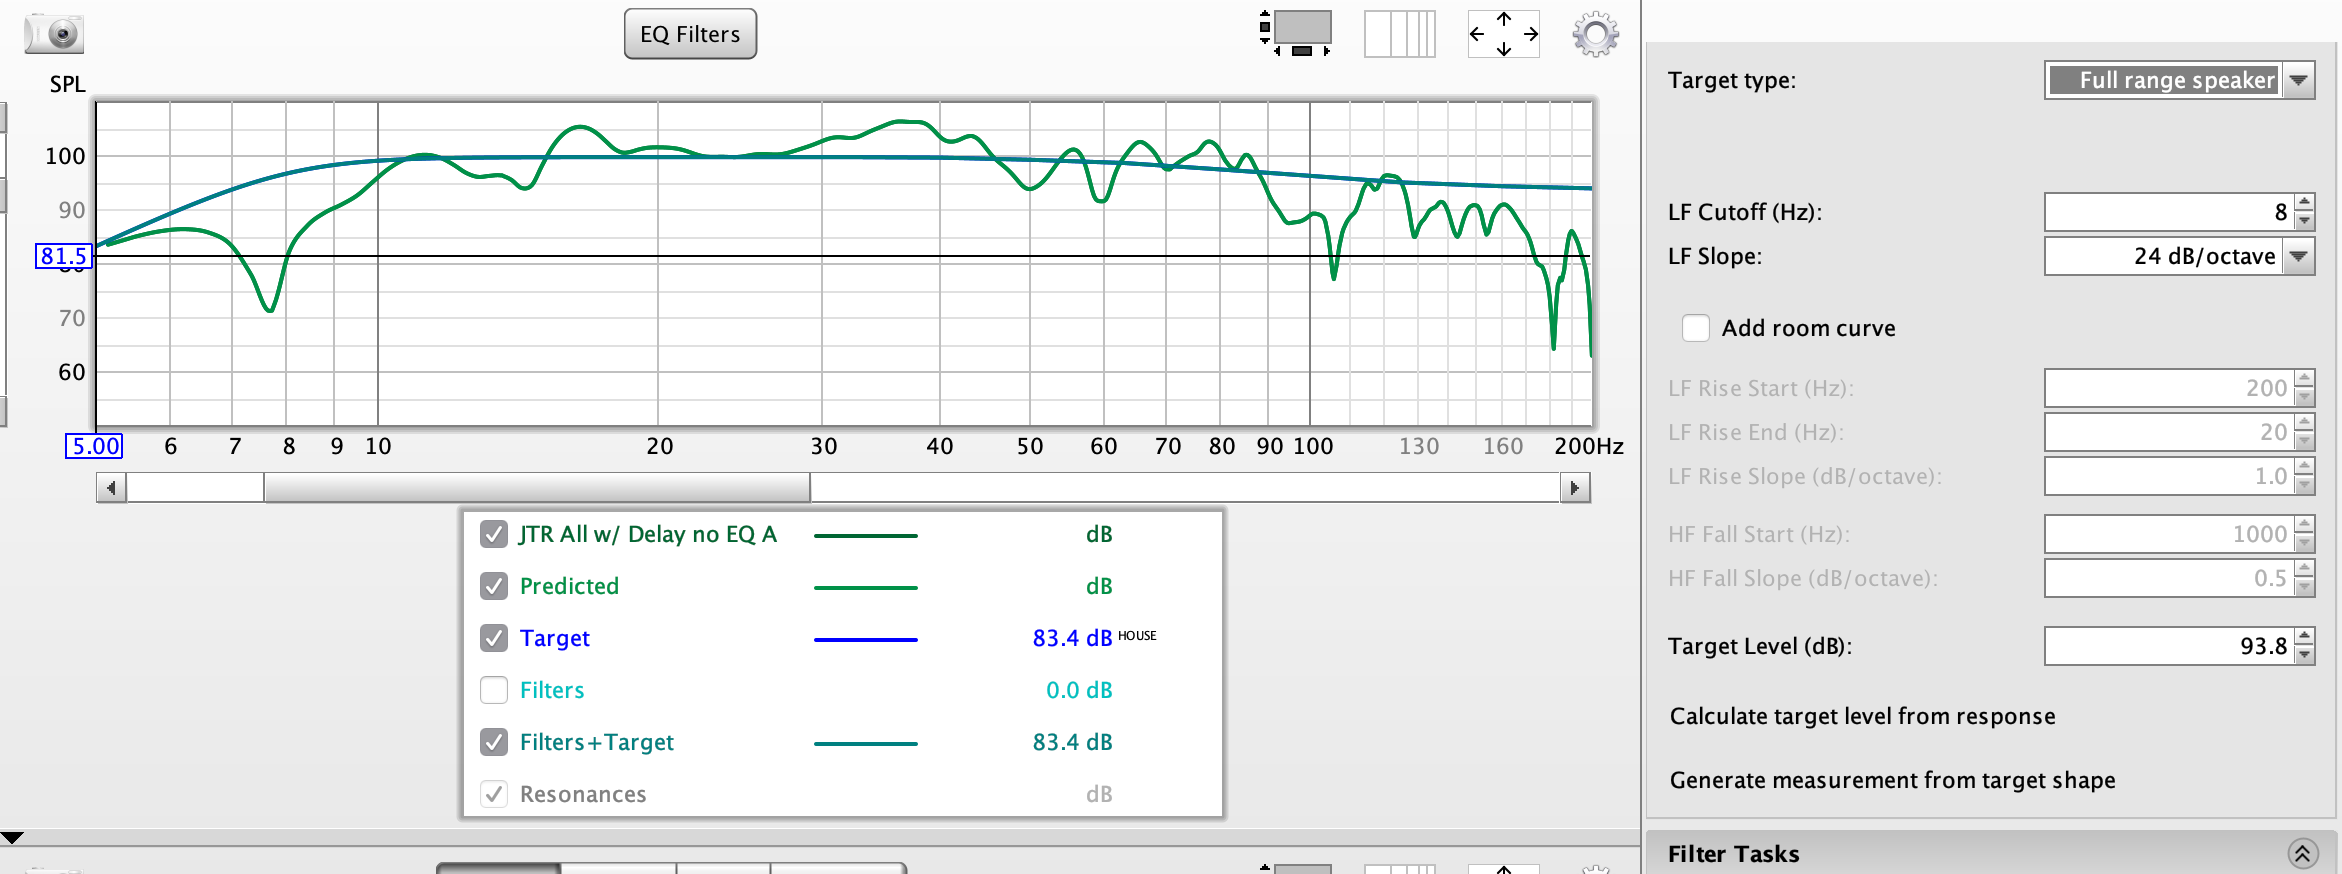
For EQ target, I'll either use Full Range or Subwoofer - depending on the application and goals.

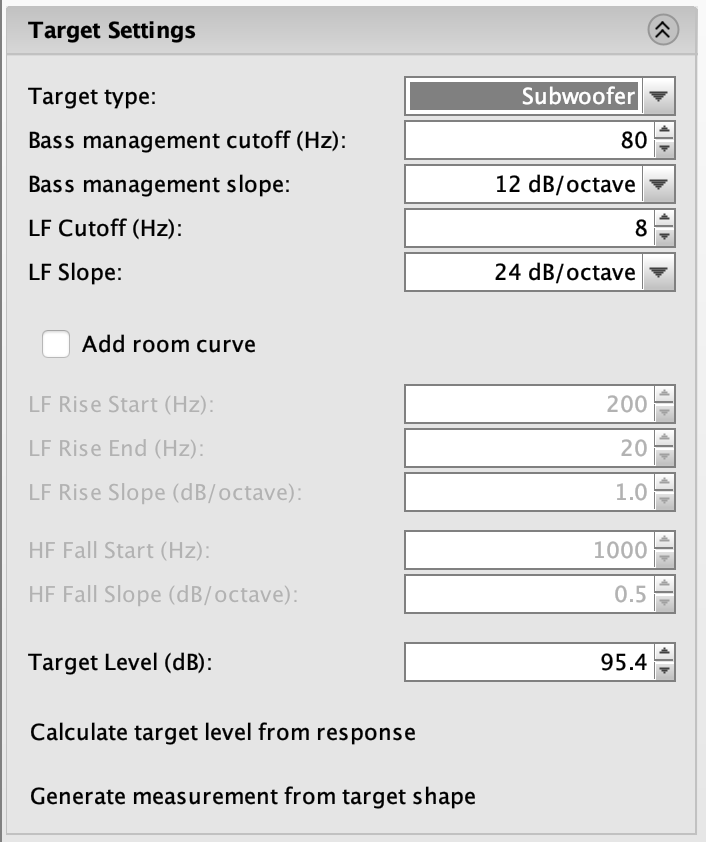
You'll see as you select different Target Types, the target is superimposed on the frequency response graph.
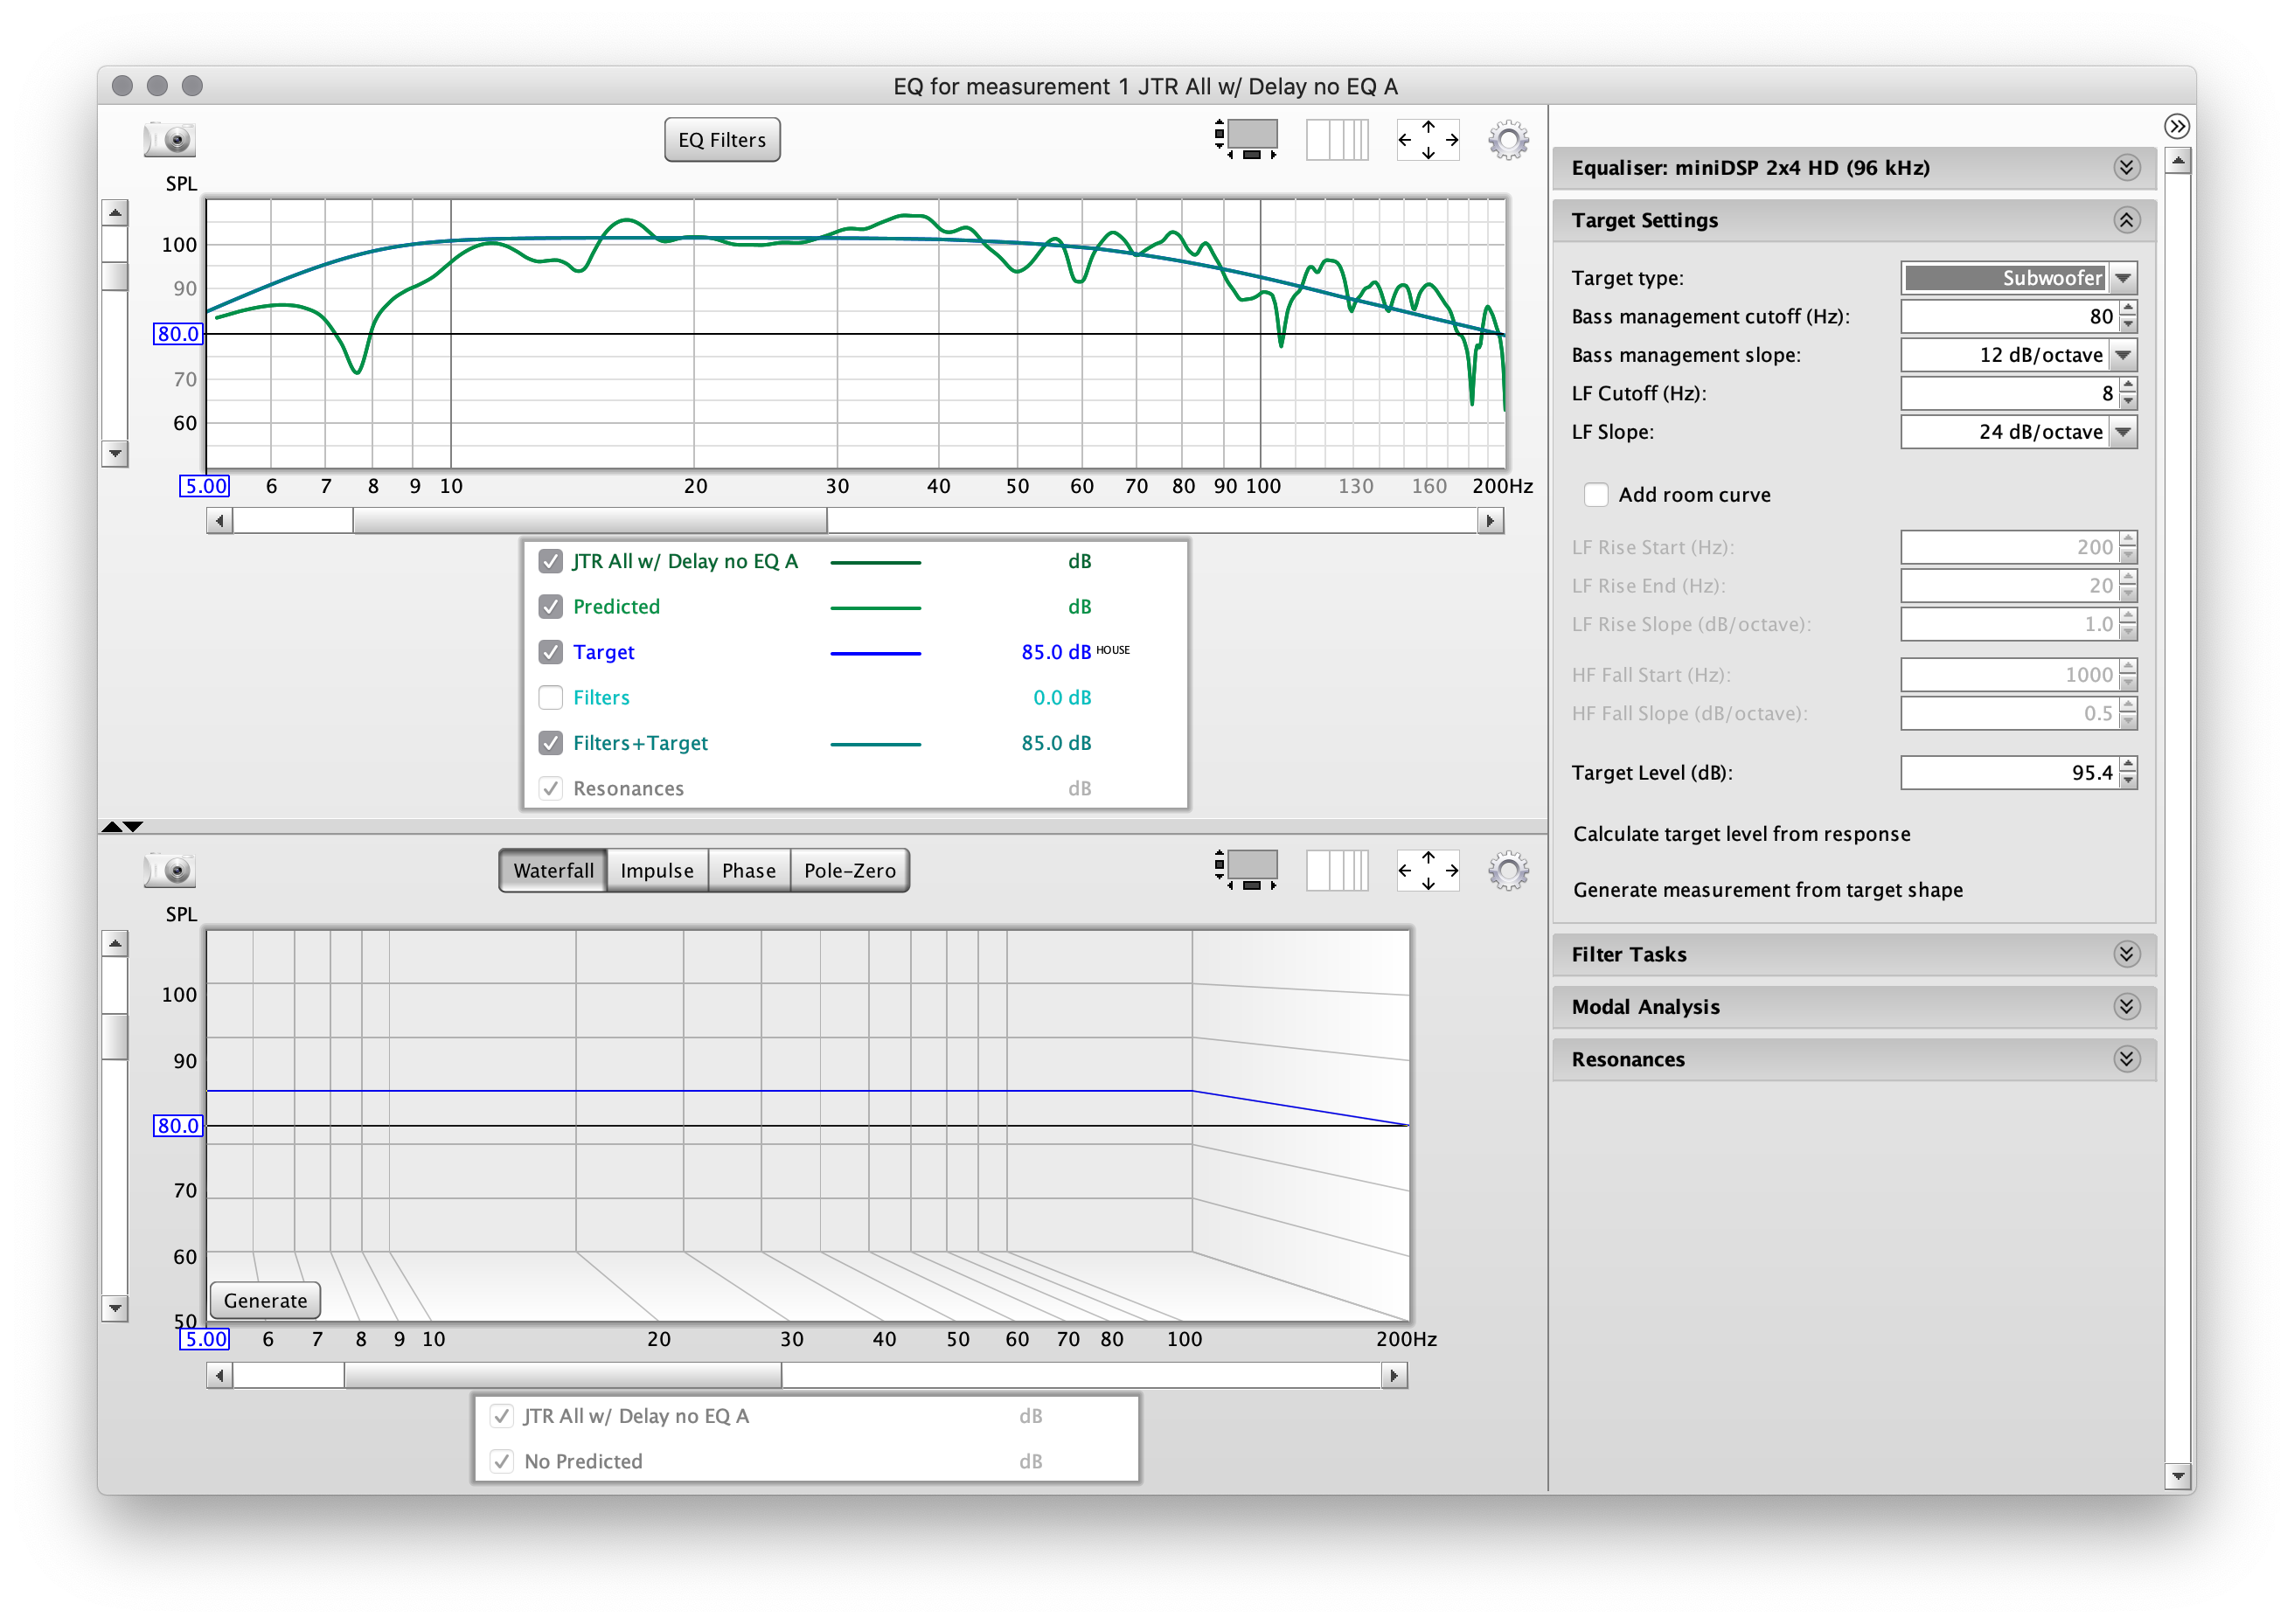
We'll then want to adjust the "Target Level" to find nice middle of the current measured response:
And now the full range version:
[SCREENSHOTS OF FILTER RESPONSE ARE MISSING]
REW recommended EQ is as follows:
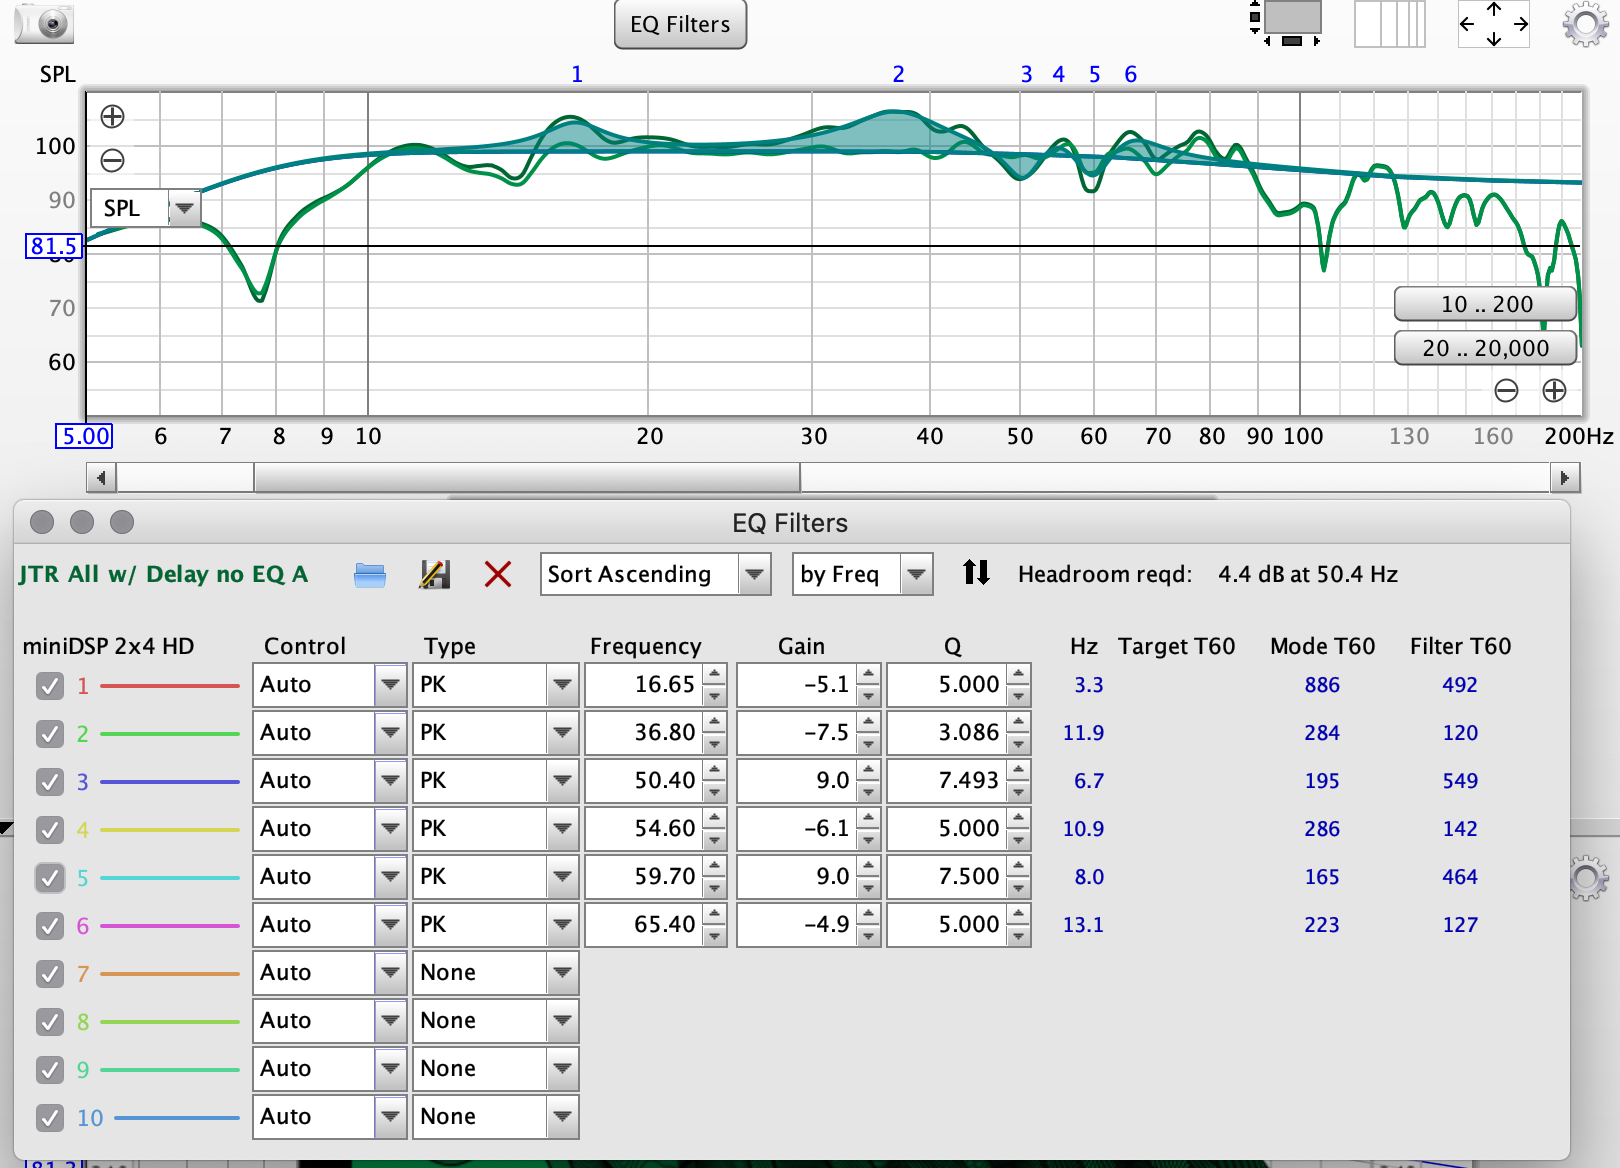
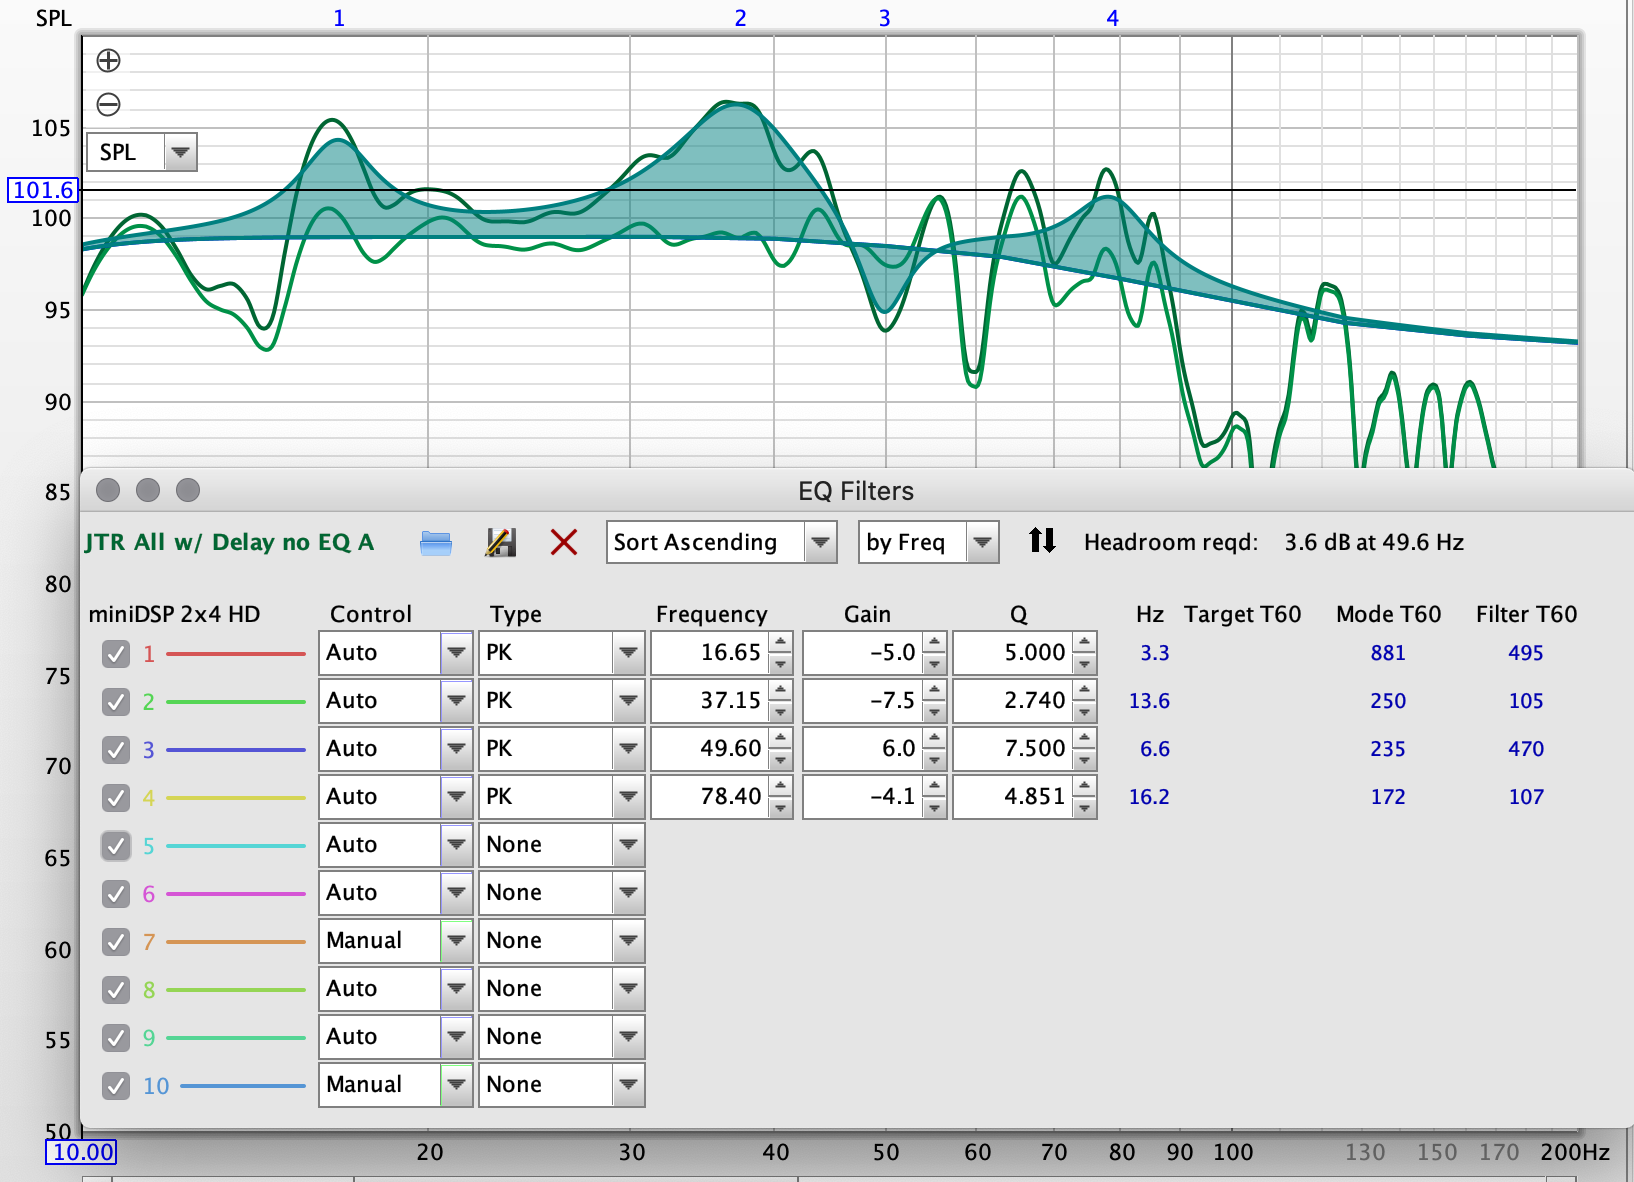
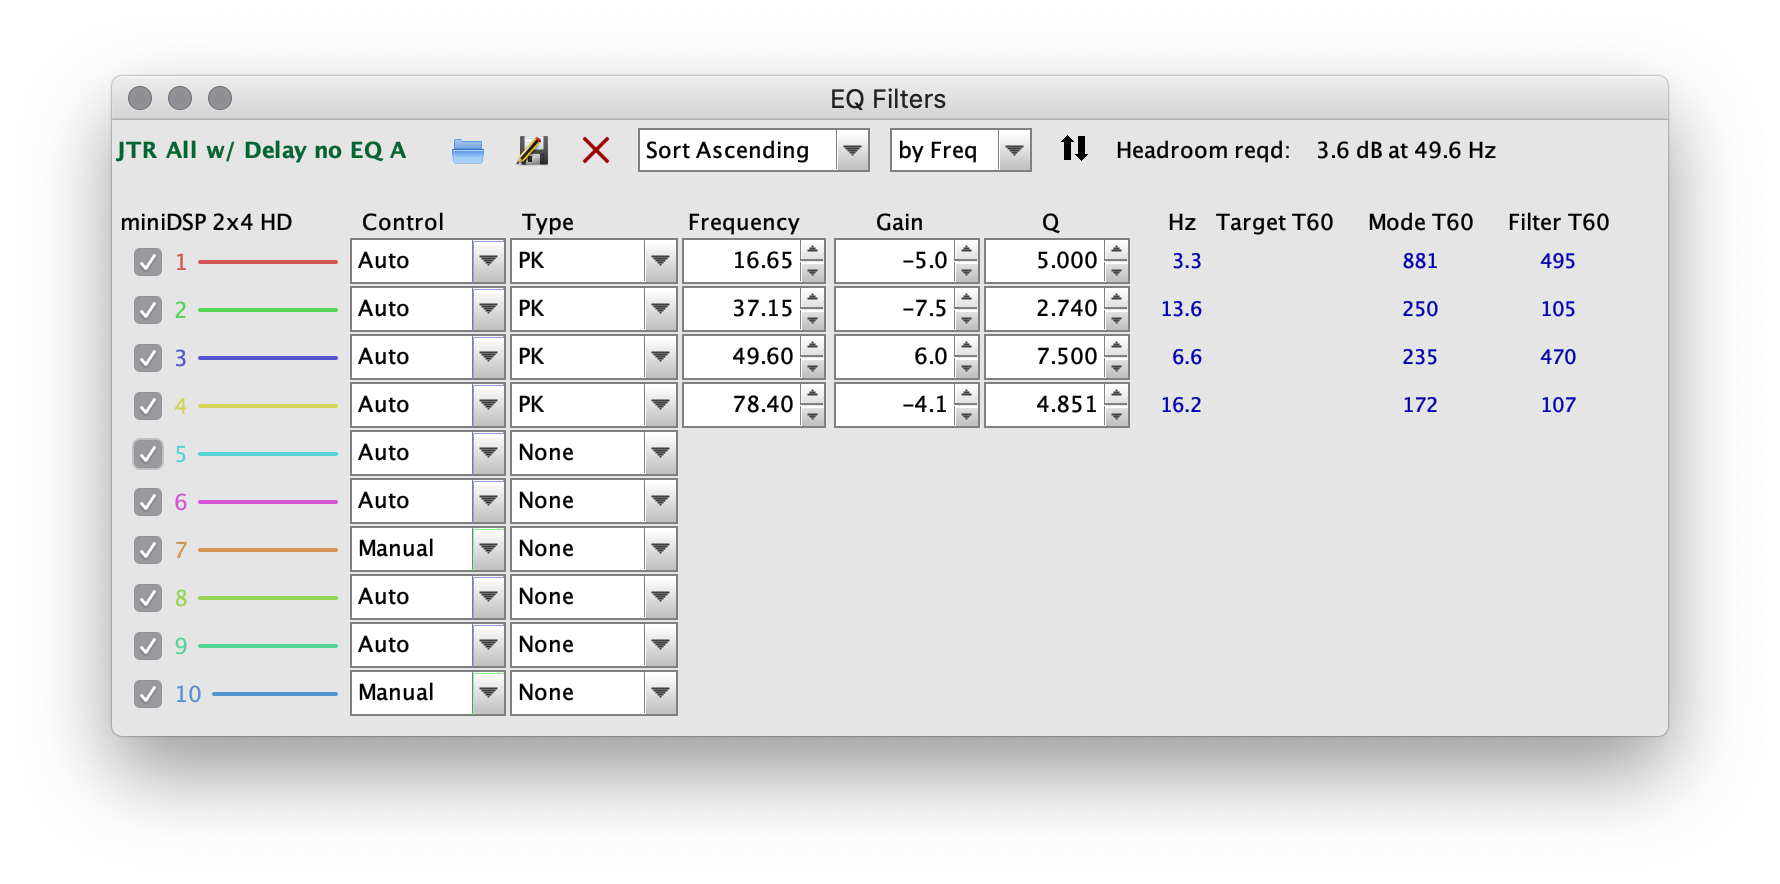
We can adjust these based on available headroom and desired response:
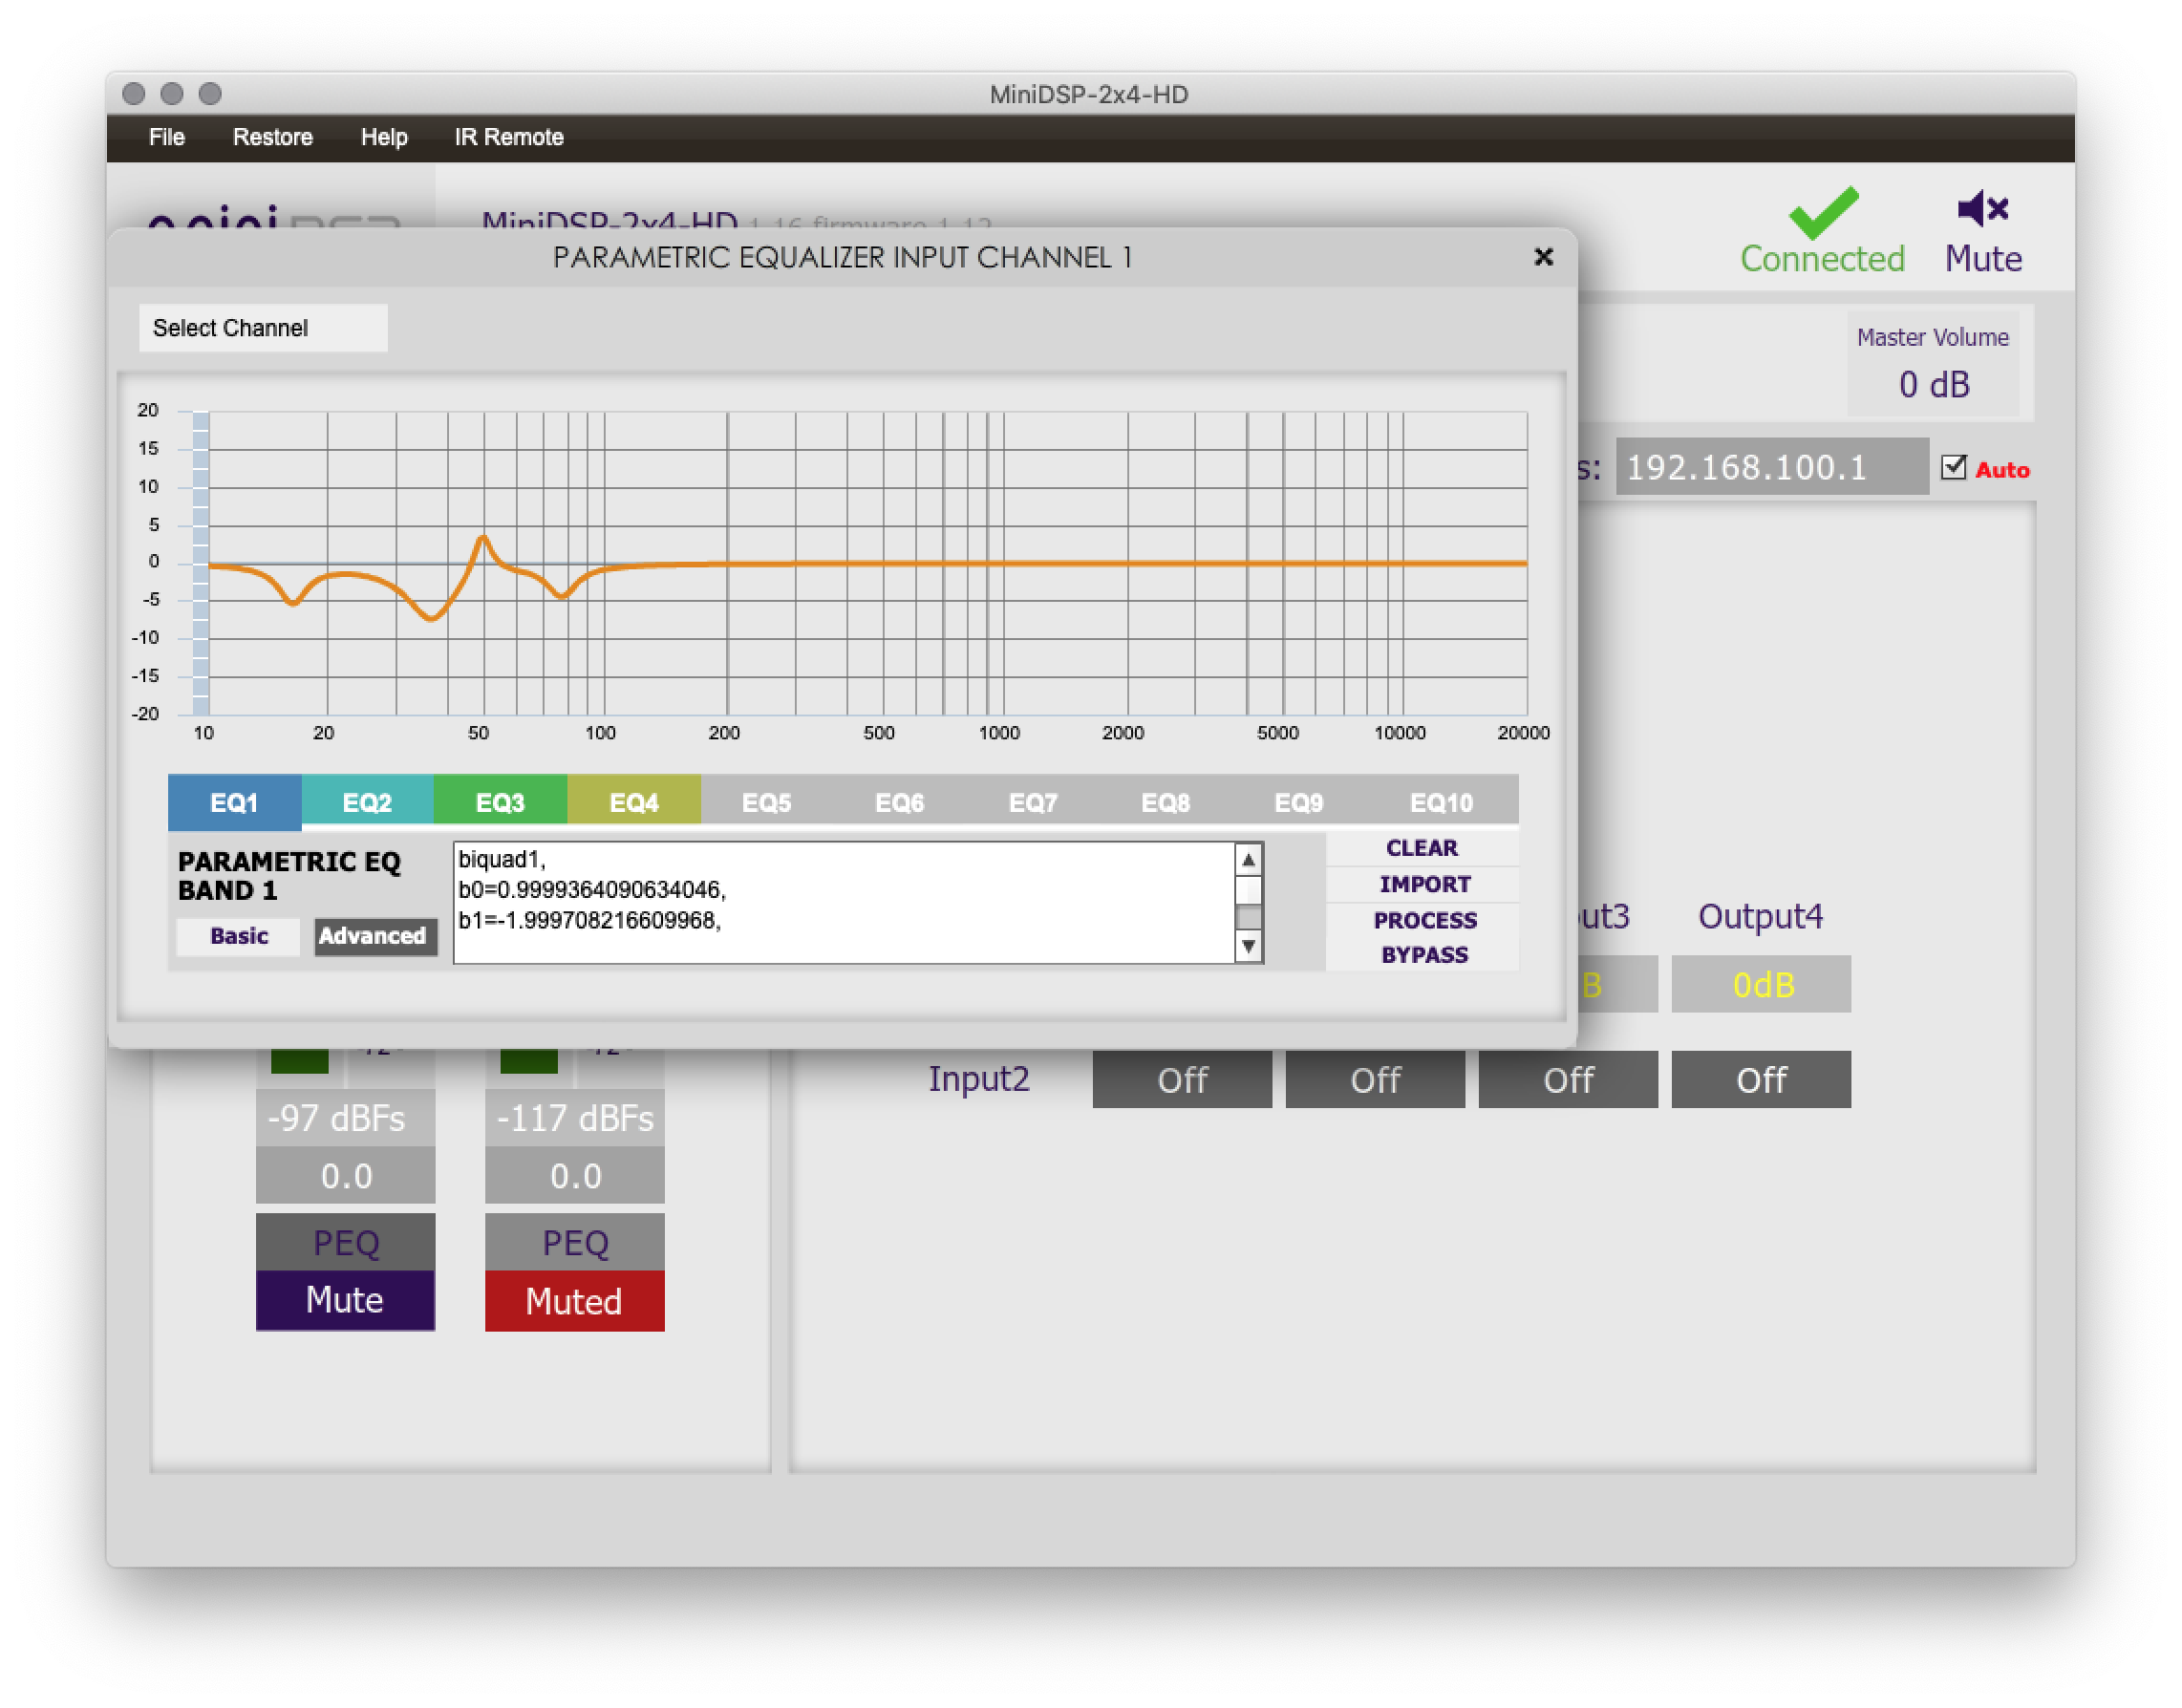
When satisfied, we'll want to save our EQ filters and import them into the miniDSP.
Within the miniDSP software, select PEQ for the input(s) your subwoofers are using. Generally I just use one subwoofer output from my processor to connect to the miniDSP, since subwoofers operate completely in the modal region and are generally (if everything is setup correctly) omnidirectional.
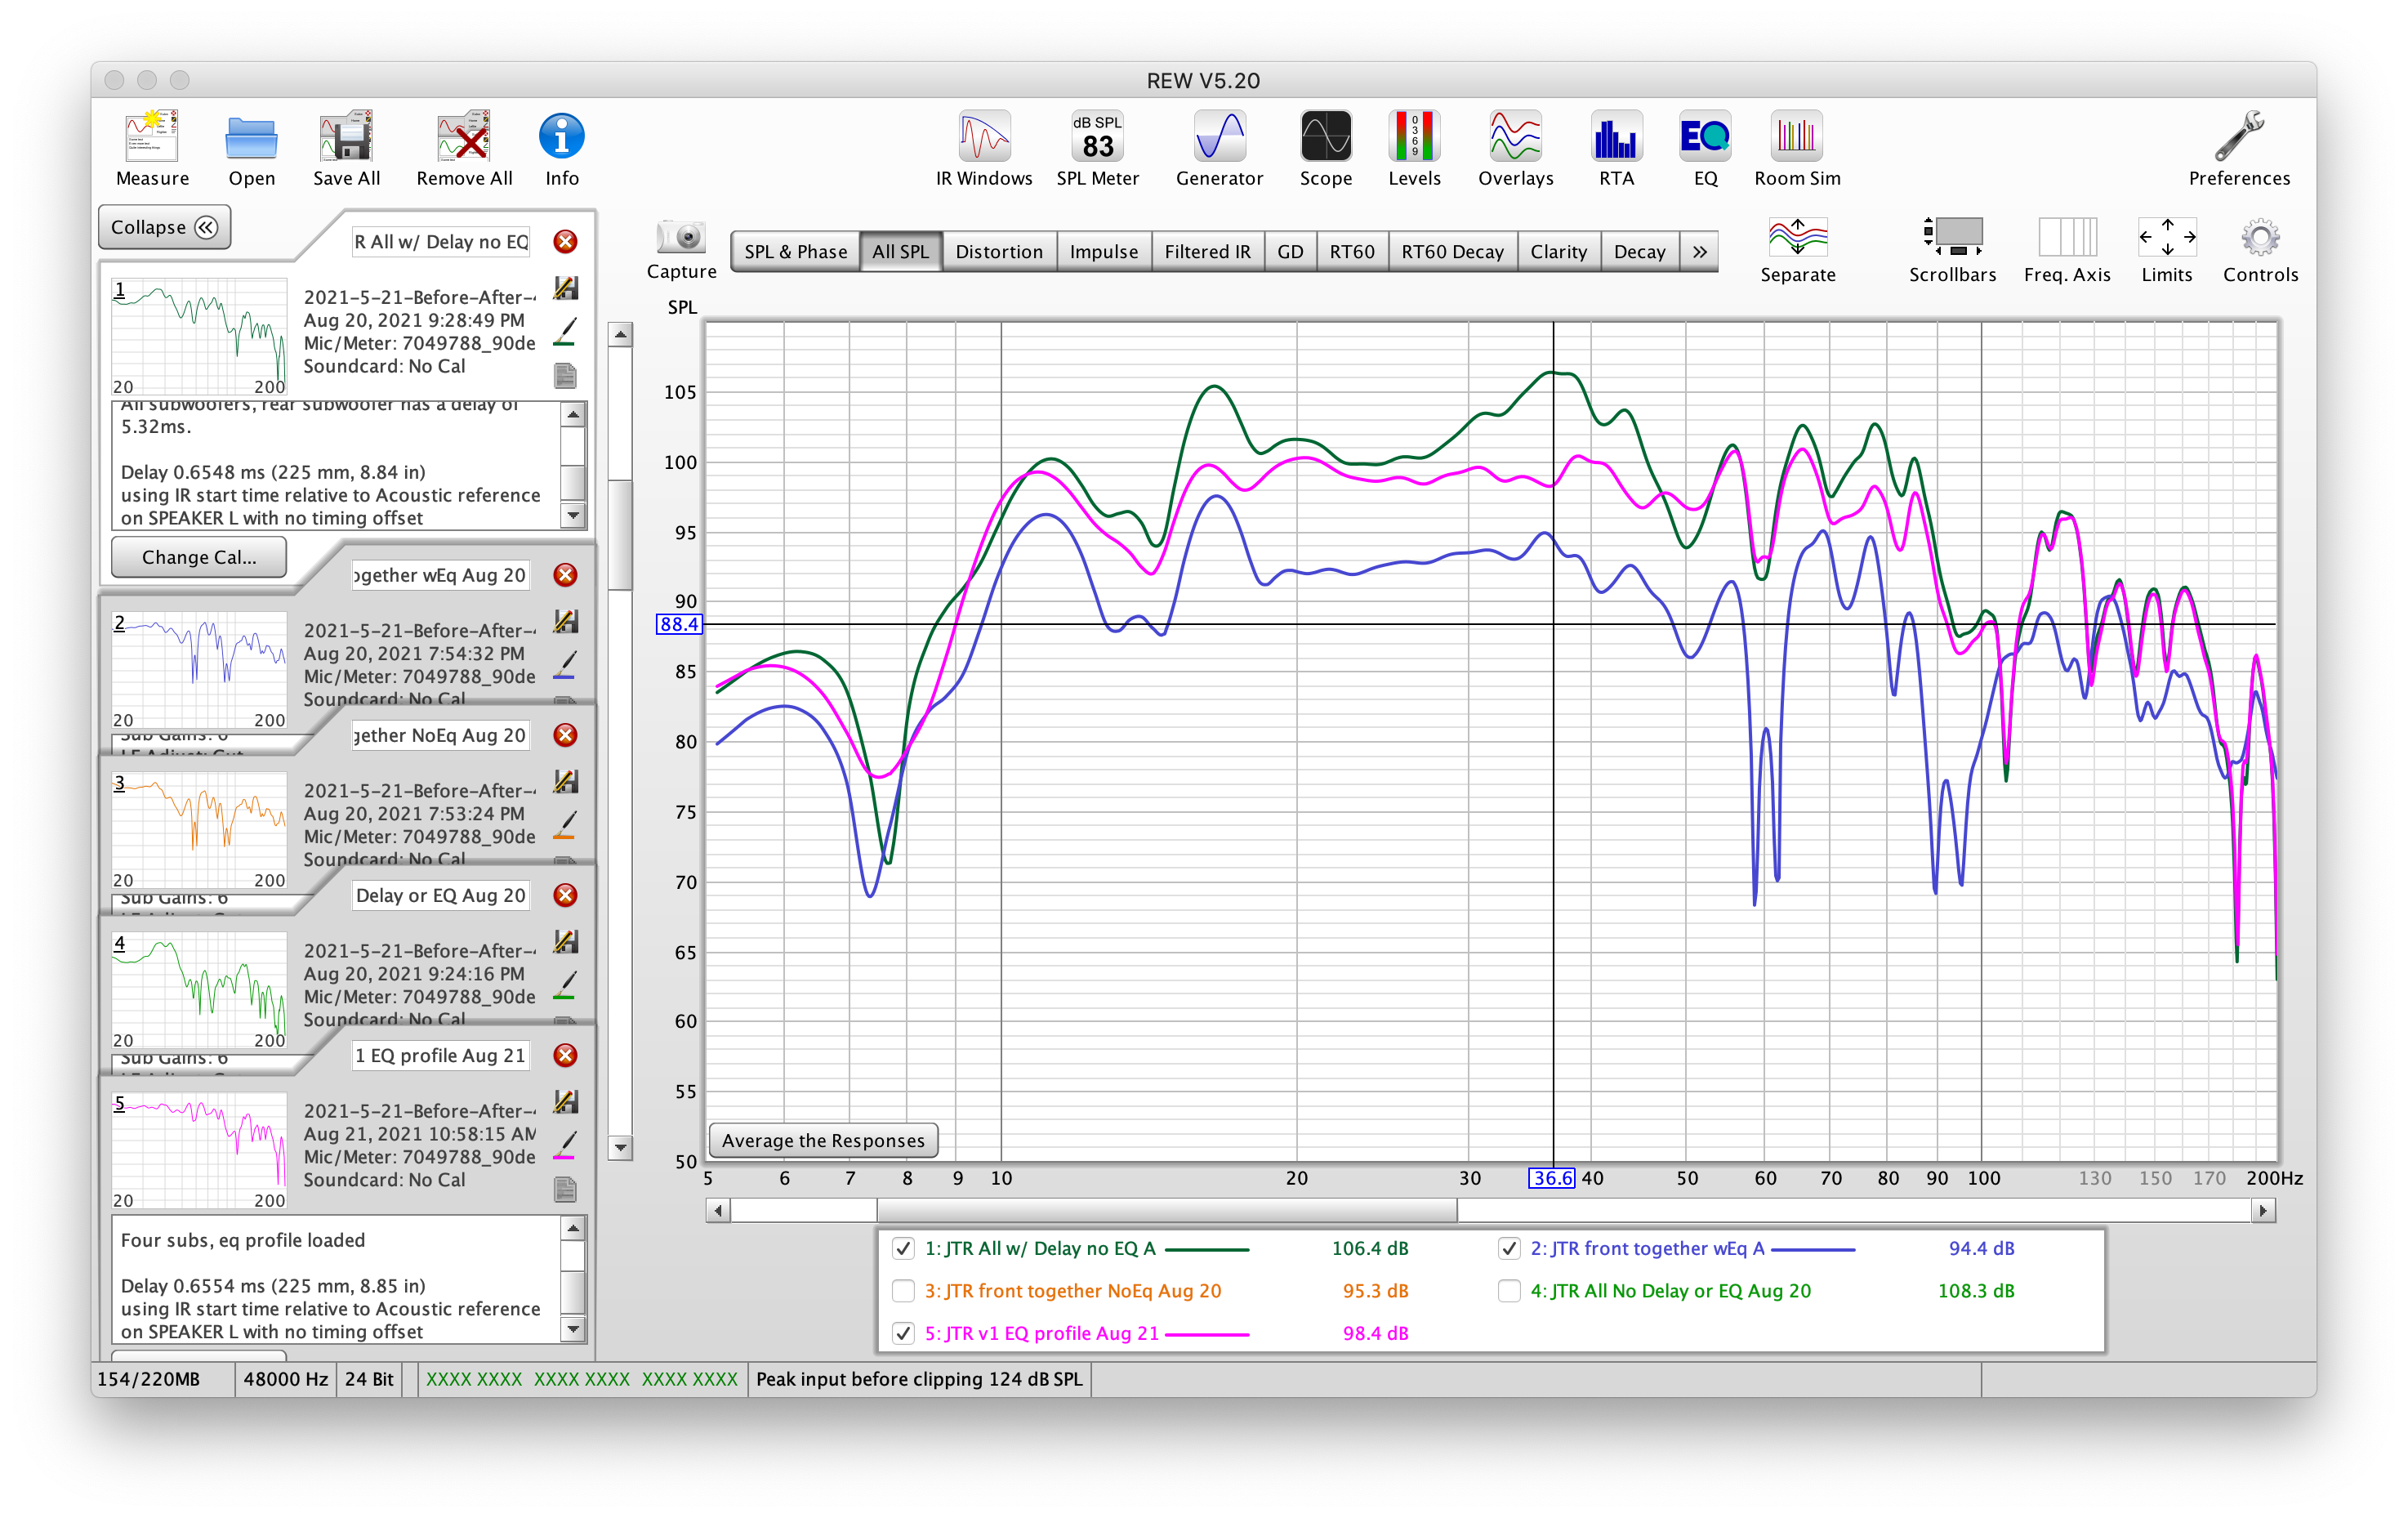
After we apply the EQ profile and take a measurement we get a rather nice looking result considering the rooms limitations.
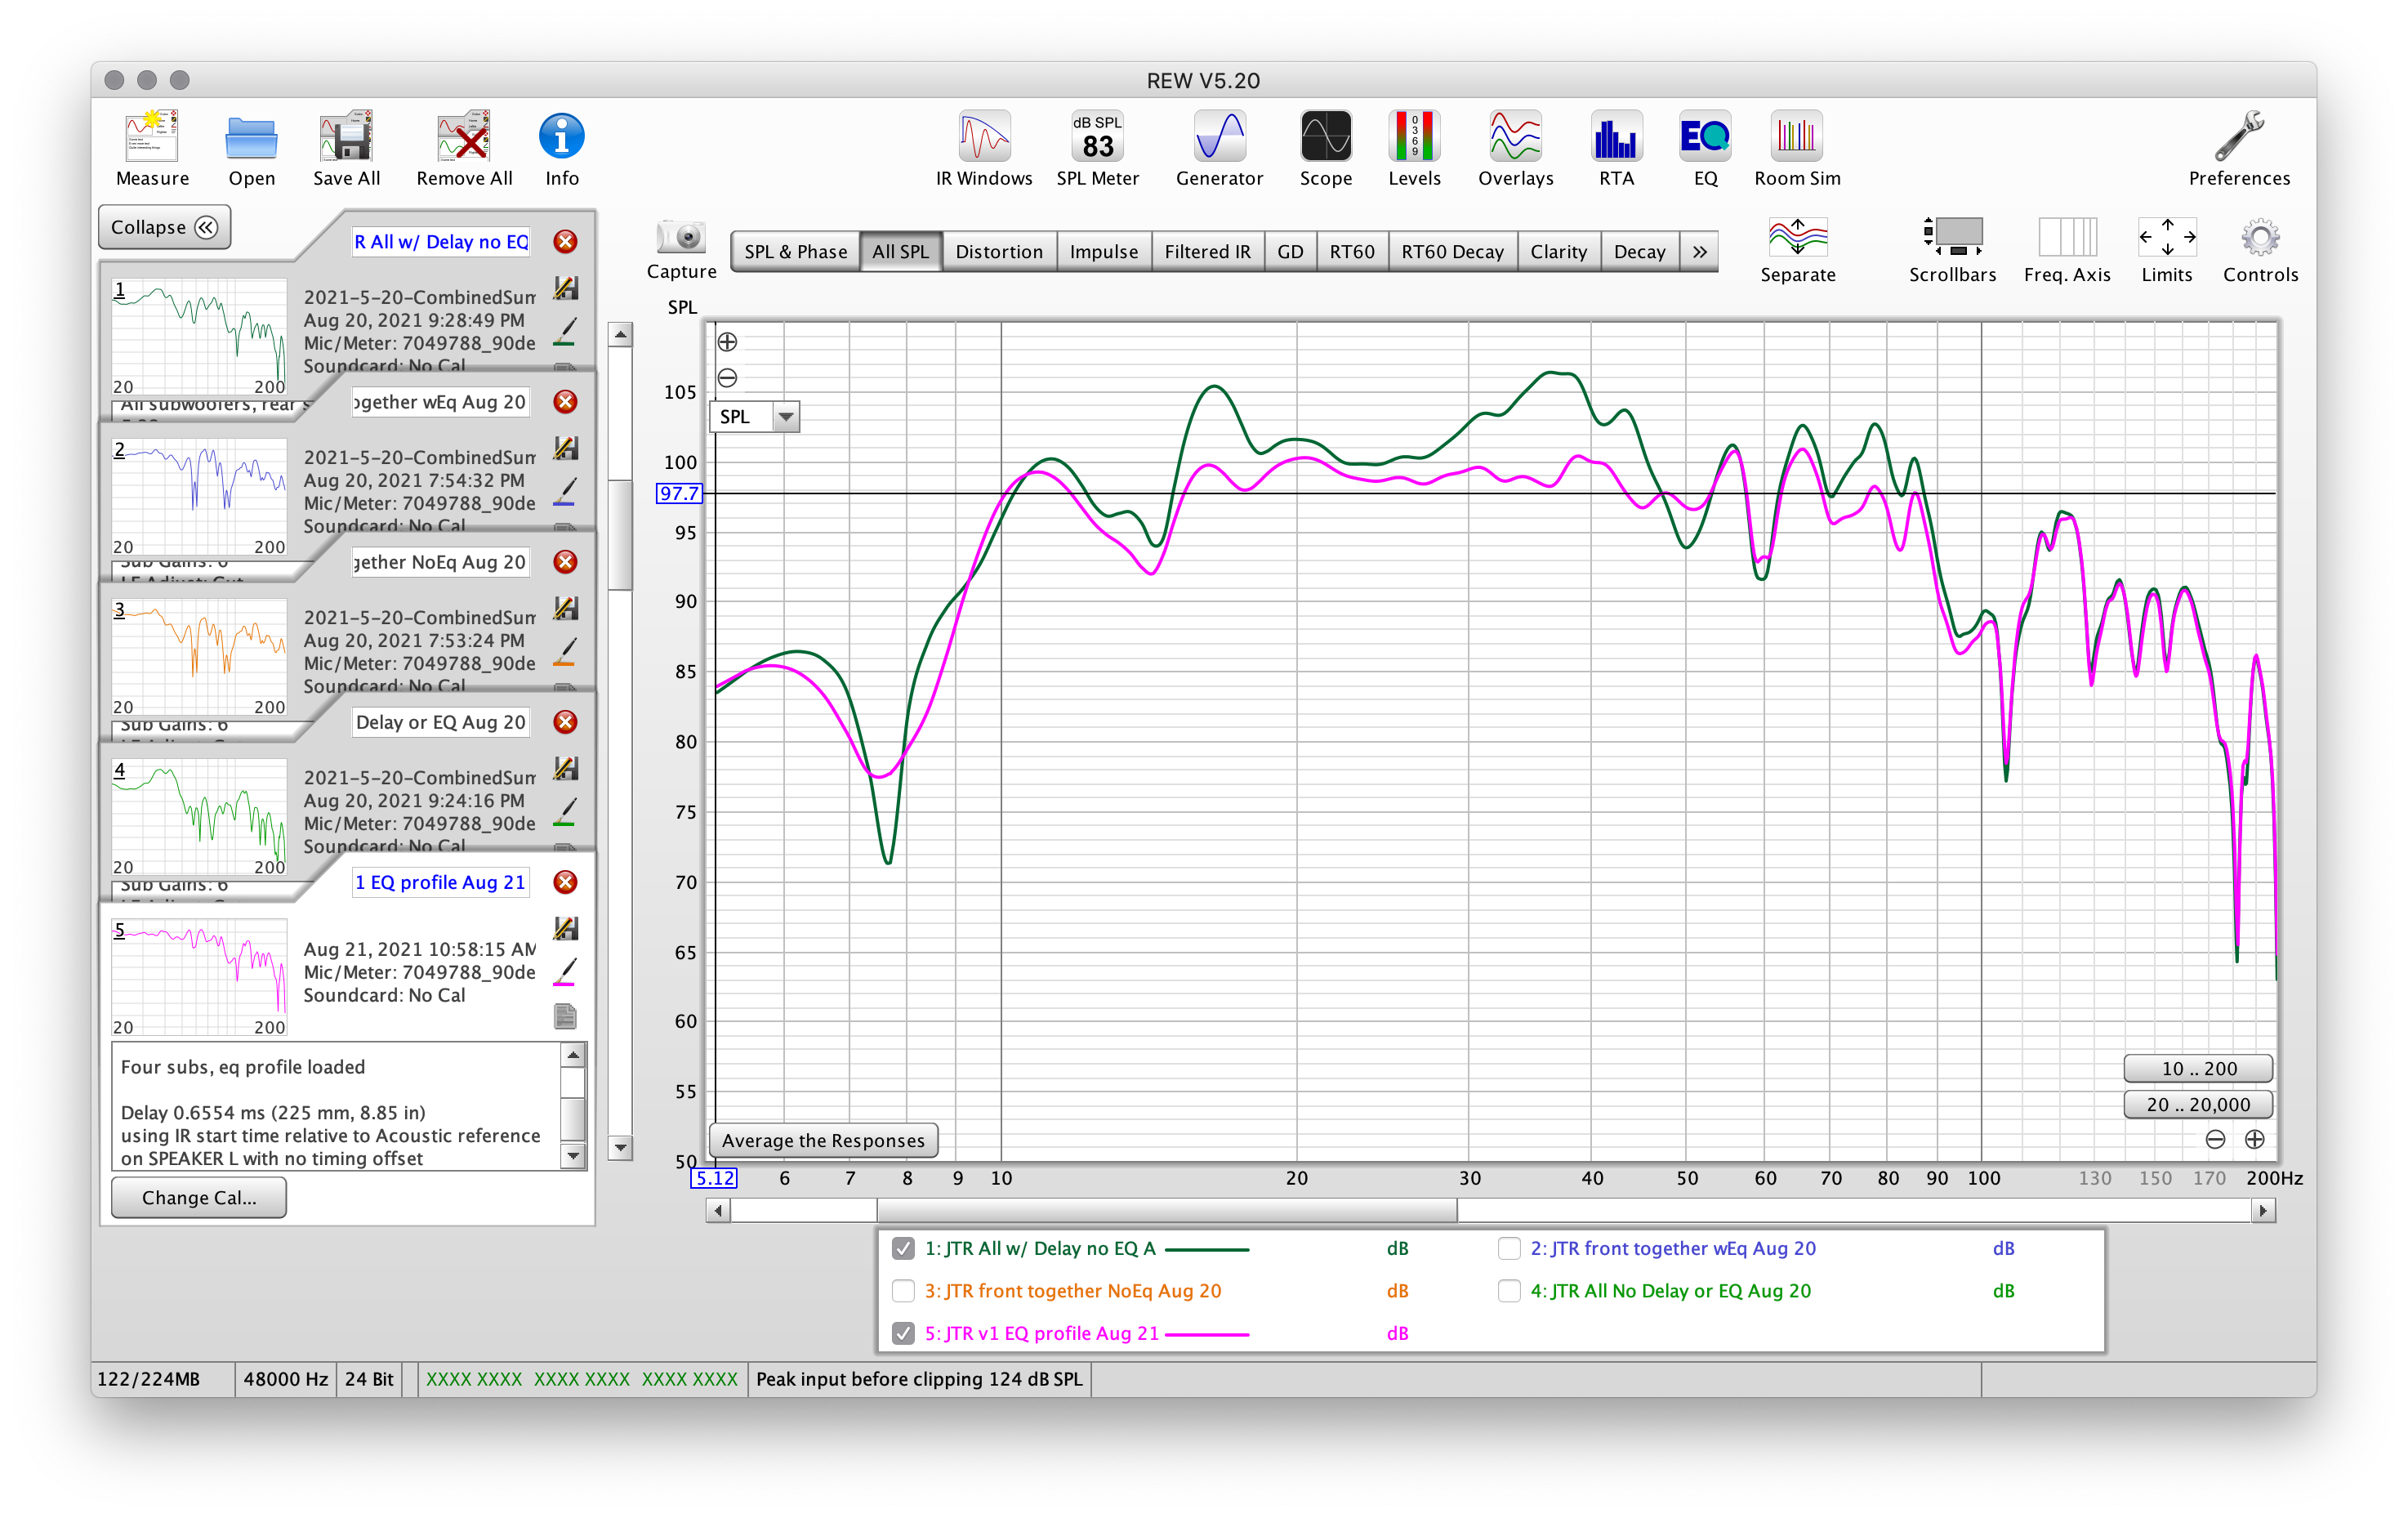
We can now compare the four subwoofers where we started (purple), to correcting the delays (green), to EQing (pink).